Showing posts with label French desserts. Show all posts

Saturday, September 19, 2026

French Deep-Dish Custard Tart

It's not "too hard" to make a French custard tart like this in your kitchen. If you enjoy baking, you can make it. The pastry is easily achieved using a simple biscuit crumb base. The vanilla custard is creamy and dreamy, and is a cream enriched version of the custard, crème pâtissière, used in many French Pâtisserie tarts, but even more cream-enriched. Thanks  to Nagi Maehashi for this recipe from her recipe book "Recipe Tin Eats Tonight" that I based mine on.

Wednesday, August 13, 2025

Peach and Sour Cream Cake

This really is the perfect afternoon tea cake to eat with Chantilly Cream, and is also suitable as a luscious dessert served with Crème Diplomat. You could say I'm feeling peachy that I persevered and that after two baking sessions I baked this cake to my complete satisfaction. The cooking notes below will give you some explanation of what happened with the first attempt, but I was over the moon that this cake was absolutely delicious after I made a couple of changes to the original recipe. 

Monday, February 12, 2024

Crème Brûlée


This classic Crème Brûlée is a very chic dessert to have in your entertaining food repertoire. Donna Hay's recipe was the one I used, but I added a couple of modifications to it which worked beautifully. A silky and rich custard has a topping of thin caramelised crunchy toffee. It's an absolute delight to crack through the toffee layer with a spoon to discover the rich vanilla infused custard waiting below. 

Tuesday, February 6, 2024

In My Kitchen February 2024

January has flown by, and now I am mentally collecting inspiration for cooking events for February. We are still experiencing the peak of the tropical heat of Summer here, and this determines a lot of what I am preparing and cooking. However, let's start on a sweet note and there a few recipes in this post that I haven't yet shared with you. 

Friday, February 24, 2023

Pears Baked as in Savoy or French Savoie


This is a stunning fruit dessert, inspired by the Savoy region in France. It consists of the simplest ingredients and is delicious despite containing no wine, but it will pair beautifully with your best bottle of dessert wine or sticky. It really is an exercise in simplicity, with pears, butter, cream, sugar, a vanilla bean, and that's all. The pears cook to perfection, surrounded by the most delicious sauce. This is a French recipe so there's no shortage of beautiful butter. Thanks Stephanie Alexander for the inspiration to take the humble pear to the next level for dessert. It's interesting that Stephanie in her acclaimed cookbook, "Cook's Companion" doesn't provide any illustrations for most of her recipes but she doesn't need to, her reputation speaks for itself. There are photos on her website though.

Friday, October 21, 2022

Cherry Clafoutis

Cherry and stone fruit season is just around the corner for us here in Australia, so not to be deterred due to a lack of fresh cherries, I have chosen to make this delicious dessert using pitted Morello Cherries. They work beautifully in this French flan which is also a kind of baked custard. Baking this Cherry Clafoutis is the beginning of my plan to start cooking easy dishes with a French theme, as I am travelling to France next year in Spring to visit M & M and our three grandchildren, who are currently living in Montpellier. I finalised all of the air fares this morning, so it seems real now. I am so excited but also a little nervous as I am travelling on my own. Mr. HRK has decided not to go as it is a heck of a long way on a plane from Australia and last time we flew to the Falkland Islands and South America he experienced a lot of pain with his sinuses. His back doesn't cope well with all that sitting either so I'm being very brave and hoping that my smattering of French, the Aussie accent and a smile, will encourage people to help me navigate Charles de Gaulle Airport if needed. I've flown into there before, but it's been a long time. I just can't wait to see my grandchildren again.

A Clafoutis is a French dessert likened to a French flan, and with interesting rural origins. It is most commonly thought to have originated in the countryside around Limousin, which is slap bang in the middle of France mostly atop the Massif Central, and sometimes referred to as France's rural heartland. This is an area I would love to visit.  Did you know the name of the Limousine vehicle is thought to have originated from Limousin, because of the resemblance between the covered portion of the vehicle and a popular style of black cloak worn in Limousin for warmth? Makes sense eh?

I take travel seriously these days, so I'm attempting to improve my schoolgirl French, read some of the French cookbooks sitting on my bookshelf, watch some French cooking programs, and make some recipes like this one to whet my appetite for French food. That's the food and language boxes ticked.  I saw a Cherry Clafoutis made by a French chef on TV recently, however never having made a Clafoutis before I thought I would make a simpler version which I could easily replicate in my son's kitchen and which would be suitable to cook for my grandchildren. French desserts can be anything from elaborate and decadent to simple, rustic and delicious. I'm starting with the latter. This one is very low on sugar, and therefore suitable for serving to the whole family, and very quick and easy to make. A great place to start. It is also very versatile as lots of different fruits can be used, stone fruits such as apricots, peaches and plums are also perfect. I'm really looking forward to stone fruit season in a month or so. 

This is really a French baked custard, and can be your Summer go to dessert. It just might be ours. Almond flour can be substituted for plain flour to convert it to gluten free, however the eggs can't be replaced, they are the essential custard ingredient.

I adapted this recipe from one by Jamie Oliver.

Bon appetit. 

Straight out of the oven

Let's cook:

Serves 4-6

Cooks in 50 minutes plus resting

Ingredients:

300 g pitted Morello Cherries or use fresh, preferably stones removed, if you have them

1/2 tablespoon unsalted butter, at room temperature for greasing

1 tablespoon caster sugar 

icing sugar. for dusting

BATTER

60 g plain flour

1/2 teaspoon baking powder

3 large free-range eggs

60 g sugar

METHOD:

Preheat the oven to 180 deg. C./gas 4.

Grease a 25 cm round ovenproof baking dish with the butter. Sprinkle the sugar over the base.

Add all the batter ingredients with a pinch of sea salt to a food processor bowl and mix until there are no lumps and totally smooth.

Set aside the mixture in a largish jug for 20 to 30 minutes. I balanced my food processor jug over the bowl so that every last drop of batter drips into the bowl, or just use a spatula. It's much easier to pour the batter into the baking dish from a jug with a pouring lip than from my food processor bowl.

Dot the cherries around the base of the baking dish. If you are using fresh cherries, you can soften them up a bit by placing the dish in the oven for 5 minutes.

Remove the dish from the oven and carefully pour the batter over the top of the cherries, without moving the cherries, and the cherries are just covered.

Return the dish to the oven and bake for about 30 to 35 minutes, until it is beautifully golden and puffy. Like a souffle, the clafoutis will lose it's puffiness quickly however that doesn't really affect the taste or texture. Such a shame though isn't it? Allow the dessert to cool slightly to lukewarm.

When lukewarm, sprinkle the clafoutis with a dusting of icing sugar and serve with Vanilla Bean ice cream or whipped cream.

A few cook's notes: (I've learned a lot about making clafoutis)

  • Sprinkle with icing sugar when the clafoutis is lukewarm and ready to eat, not when it's hot straight out of the oven, or the icing sugar will just absorb into the cooked custard.
  • Clafoutis is also lovely served in individually buttered 12 cm diameter dishes. Ladle the batter over the cherries, filling to near the top of the dishes. Bake your dishes in the oven for 10 minutes or until the batter is no longer sticky when tested with a skewer or knife. 
  • If using individual dishes, it may also be easier for you to place the dishes in your oven with the oven shelf pulled out, and pour the batter into each individual dish, rather than trying to place the dishes in the oven without trying to spill any.
  • I've read that clafoutis is delicious served up for breakfast in France and on the following day, if that is what you like, however I wouldn't recommend serving it up for dessert again the following day. Served fresh out of the oven on the day of baking gives the best result.
  • Be warned, in my bottle of cherries, 8 cherries still had the pips in place.

Warm wishes and Bon appetit,

Pauline


Thursday, July 14, 2022

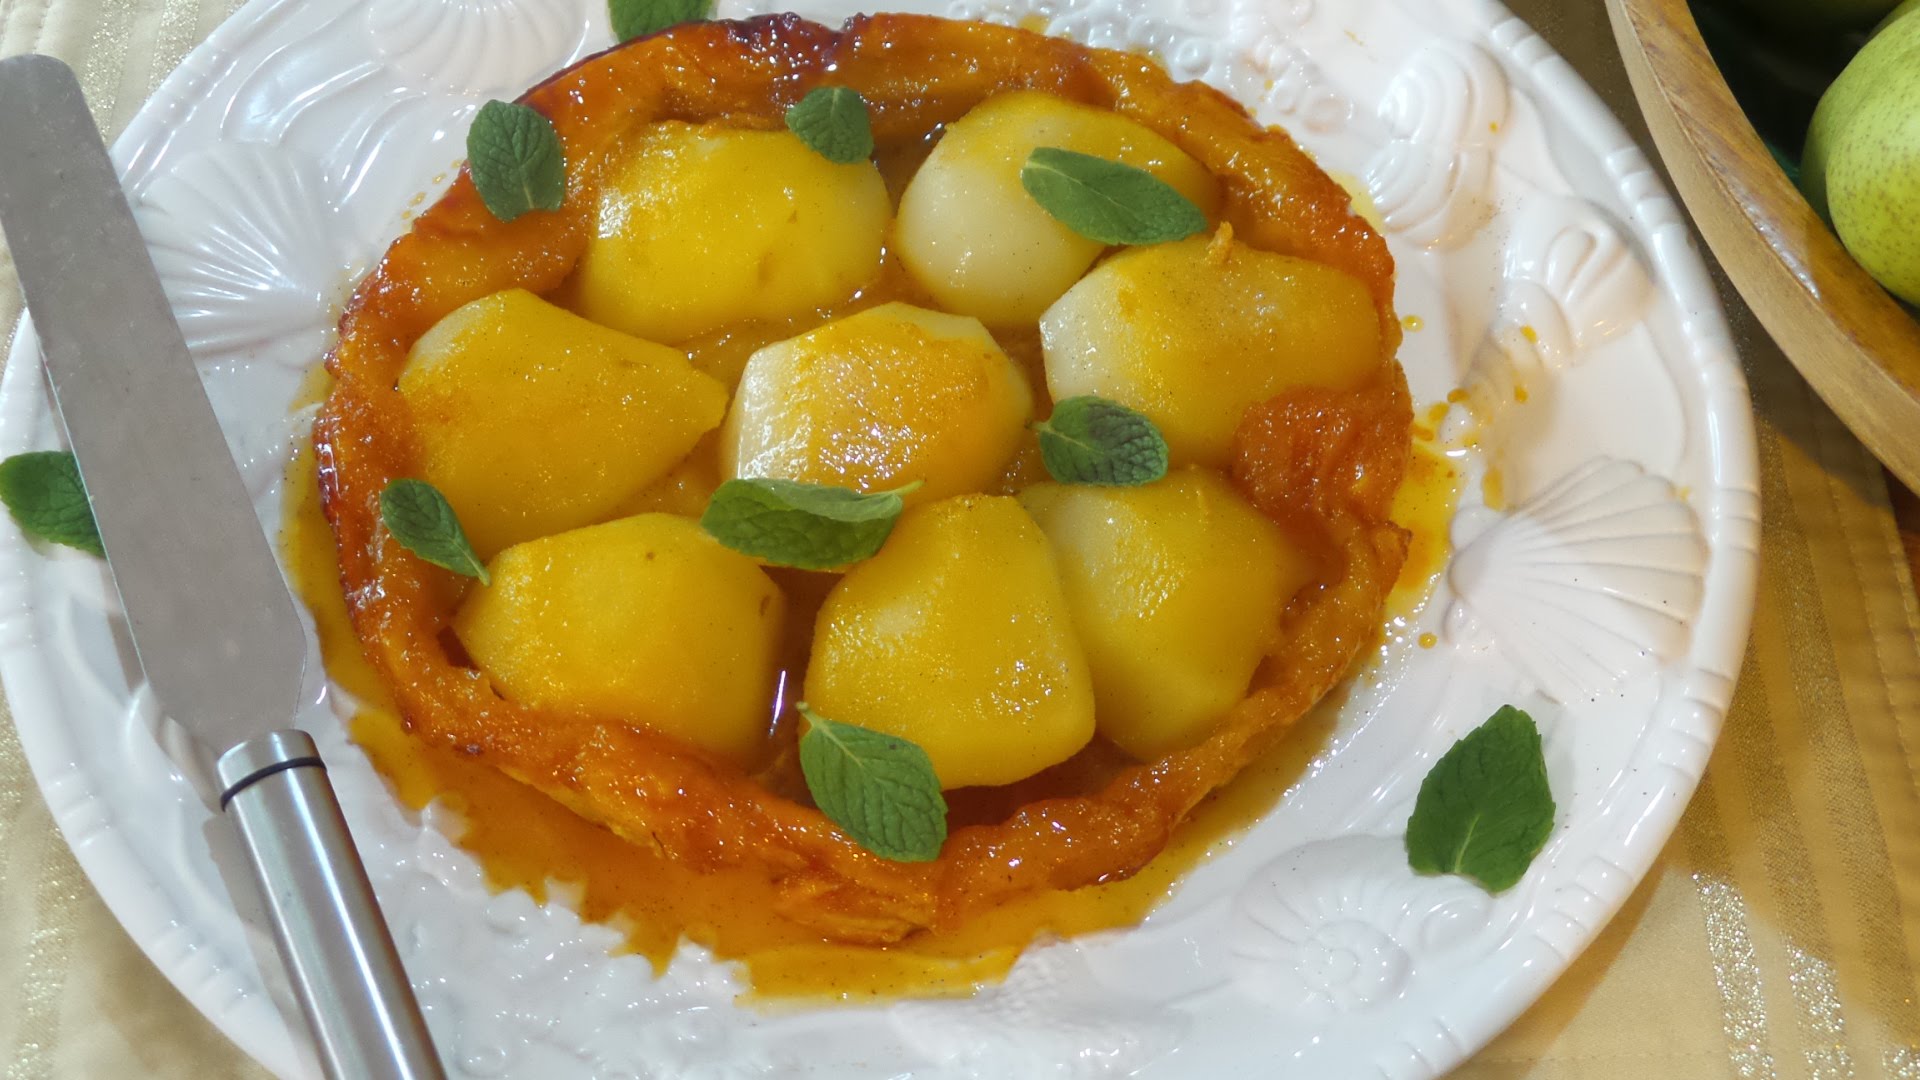
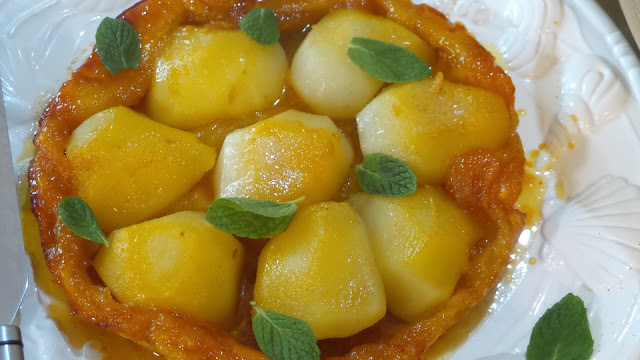
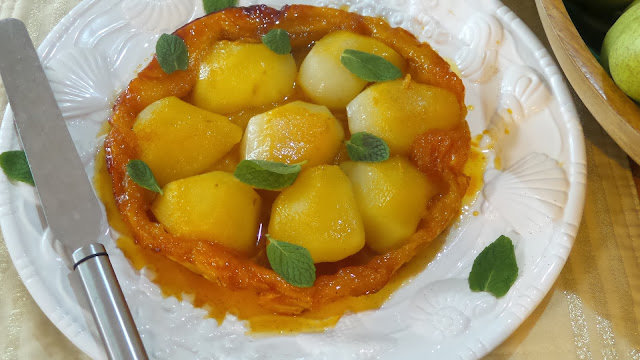
Pear and Ginger Tarte Tatin to celebrate French Bastille Day


It's French Bastille Day, and how better to celebrate than with a delicious and very simple to make Pear Tarte Tatin. Apparently the French don't say "Happy Bastille Day" they say Happy National Holiday, "Joyeux quatorze juillet!"The holiday marks the anniversary of the fall of the Bastille on July 14, 1789,  in Paris. The Bastille was originally built as a medieval fortress but then became a state prison. Our son and his family are living in Provence for now, and are travelling around in their camper on holidays, so it will be interesting to talk to them about their experiences on their National Day. When I saw this Tarte Tartin recipe on the lovely Lorraine's blog, @Not Quite Nigella, I had to make it. In fact I made three of them when I was in Cairns, just to perfect it of course. Mr. HRK is quite the fan of a Tarte Tatin. Pears are so plentiful, so it is the perfect  economical dessert to cook right now.

Mr. HRK and I had just arrived  in Marseille in 2009, which seems so long ago, and were amazed on arrival that nothing, and I mean nothing, seemed to be open on a working day during the week. We then saw barricades being erected and police arriving, and we realised that there was going to be a street parade. We were really hungry, and the only place we could find open to dine in was a McDonalds. So unashamedly as tired tourists, we stumbled in there, and discovered with my limited French, that it was Bastille Day. However we were very disappointed that we hadn't found a charming little French cafe to dine in. That came the following day. We had been staying with a French family prior to travelling to Marseille, and they hadn't mentioned to us that it was Bastille Day on the 14th July, and what to expect. Oh well, it made us wonder how significant the National day actually is to the French people. I'm sure it is though.

Ginger and vanilla are flavours that marry with pears very well, although  just use vanilla if you wish in this recipe. Golden Syrup is the secret ingredient here, making this recipe very simple to make instead of needing to make a caramel. Lorraine suggests that you could also use rosemary, cinnamon, almonds, citrus and chocolate, for extra flavour enhancement, or a splash of your favourite liqueur, such as Grand Marnier, Kirsch, brandy or a dessert wine (yum). It is really a blank canvas to work with with so many options to choose from.
Let's Cook:

Ingredients:

Serves 6, make that 4 in our house

1/3 cup/100g/3.5 ozs golden syrup

2 thin slices fresh ginger, peeled and finely sliced into matchsticks, or small blobs of bottled ginger if you wish

1 vanilla bean, split in half (I used 1 teaspoon Vanilla bean paste)

550 g/1.2 lbs Pears, or enough to fit the base of your springform tin

2 tablespoons butter, cold and cubed

1 1/4 sheets butter puff pastry, thawed in the frig (essential to use butter puff pastry)

Method:

Spray the base and sides of a 23cm/8 inch springform pan with oil spray and line the base with baking paper. A 20 cm pan will be fine as well. 

Just in case, place your springform pan in another tray with a lip on it to catch any drips. This shouldn't happen with a newish pan.

Preheat your oven to 200C/400F/Gas 6.5.

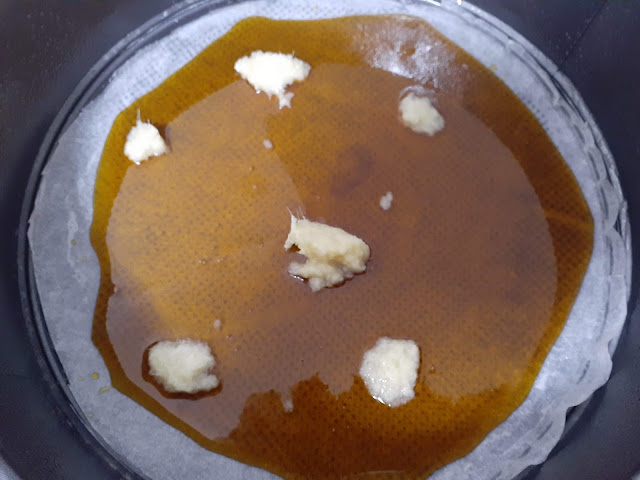
Gently warm your golden syrup (about 10 seconds in the microwave) and pour onto the lined base of your tin and spread to the edges with a pastry brush. Then sprinkle the ginger around the base and add the seeds from the vanilla bean halves on top. I just spread small blobs of the vanilla bean paste over the ginger. 

In this photo below, I had used bottled ginger because I was in a hurry, and just placed small spoonsful of it over the golden syrup, and it still tasted delicious. Sometimes we just need to improvise with what we've got on hand and what is available.
Preparing the pears:

The pears need to be peeled, sliced in half from top to bottom, and the cores removed. I found this really simple to do with a teaspoon or with the knife I peeled them with. 
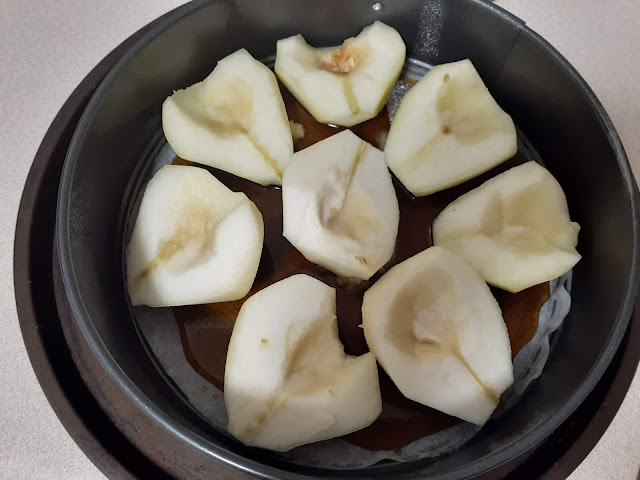
Place the pears in the tin, domed side down. Scatter the cubed butter over the top.

Place the whole sheet of puff pastry over the pears, and tuck in the sides, creating a nice raised ridge. Oops, the large sheet should have gone in first. I corrected this and placed the whole sheet in and then the 1/4 sheet on the top. I wonder if it would really have made that much difference to the result.
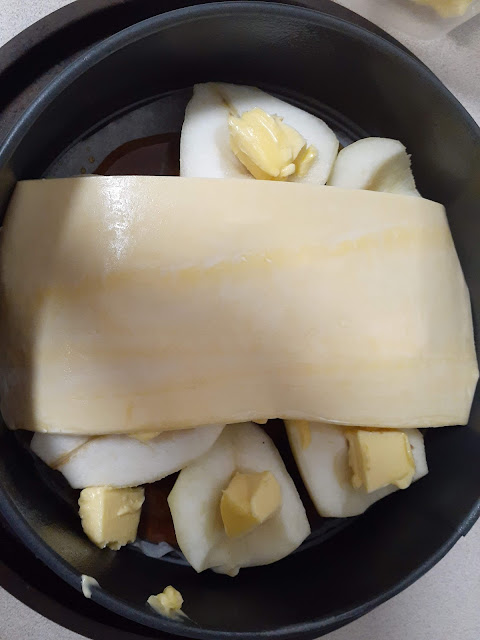
 Then place the 1/4 sheet in the centre so that there is some more puff pastry when the tart is cooked, that's always good, don't you think, the more puff the better? Just add more pastry if you think it is needed. It won't be noticeable when the tart is turned out later.
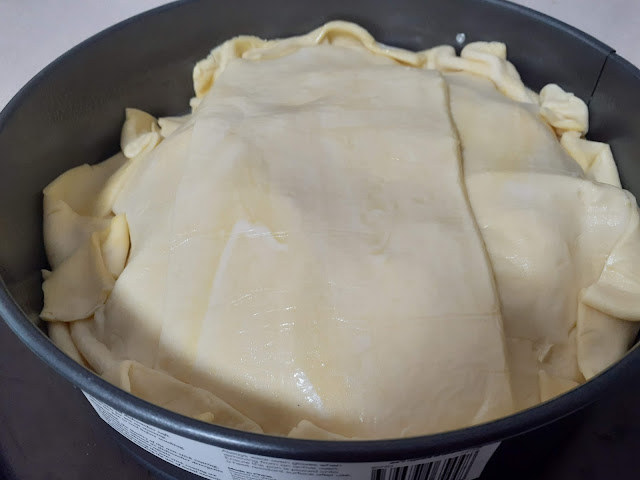
If the pastry is still cold, your tart can be cooked straight away. Otherwise, pop it back into the frig to chill for 20 minutes. The pastry will cook so much better and puff up beautifully.

Bake for 35 minutes, or until the pastry is golden and puffed. Take it out of the oven, give a little cheer, and leave it to cool for 3-4 minutes.
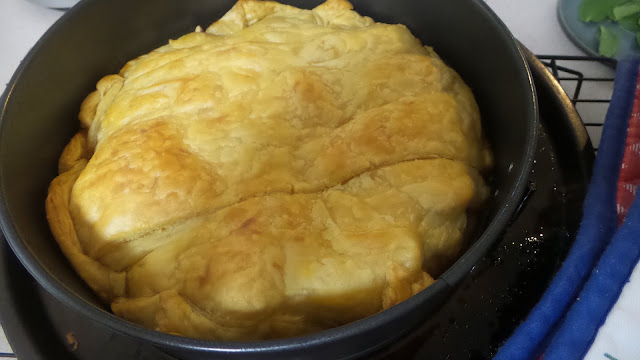
Now for the slightly tricky part.

Place a serving tray over the top of the springform tin, and I suggest a light serving tray,  and quickly turn upside down, scraping onto the tray any caramel sauce that is left in the tin.

Remove the tin and decorate as you wish. I used mint leaves as I had them and I liked the colour contrast and the freshness and the slightly minty flavour they brought to the dish, however if you use the scraped vanilla beans, they look fantastic, laid over the top of the pie.

Serve with ice cream, preferably ginger or vanilla.


I've also made an Apple Tarte Tatin and a Plum Tarte Tatin over the years. Always delicious.

Bon appetit,

Pauline


Saturday, September 19, 2020

Tarte aux Fraises (Classic French Strawberry tart)


Spring is here, and the good news is that the strawberries are still sweet, unless you buy them from the supermarket. This traditional French dessert combines a buttery almond pastry crust, with juicy ripe strawberries and a parade of other seasonal fruits. Traditionally this tart is decorated just with strawberries, but with the bounty of other fresh fruits on hand at the moment, I decided to combine them with blueberries, mandarin segments, and kiwi fruit.

This is a no fuss tart that I have brushed with an apricot jam glaze on all of the fruits. Apricot jam is commonly used to glaze fruit tarts in France,  and this is what I used, as after baking my Apricot Almond Cake for Fathers' Day, I still have a lot of Apricot Jam left over. However other fruit based jams work just as well for glazing, such as peach jam, strawberry jam etc. I've also included a more traditional glaze recipe using potato flour and redcurrant jelly if you would like to try that. However they are not items that I keep on hand so I didn't try that glaze.

 I fondly remember when we were in France, every boulangerie (bakery) had display cabinets full of enticing and colourful fruit tarts. Well we can't travel there now unfortunately, but we can eat their famous tarts. Instead of using the traditional "creme patissiere" in my Tarte, I have used a French Chantilly style whipped cream, with swirls of homemade lemon curd laced through it. However the lemon curd is optional, and the tart will still taste great without it.  I think lemon curd could be the secret ingredient though. The beauty of this confection is that you can prepare it a couple of hours ahead of serving, it will stay in tact for a few hours in the refrigerator,  yes I tested this out, or wait to assemble it at the last moment. My friends I'd suggest the former as honestly who wants to be assembling a tart like this while your family or guests are waiting for dessert, not the French or moi that's for sure. 

This tart serves 10 generously so there can be plenty of leftovers if you are making this for fewer people. It tastes great the next day as well. It might look complicated to make this dessert, and to be honest I felt a bit challenged by it, but it turned out to be much simpler than I thought. At the back of my mind I was thinking of contingencies for a dessert replacement in case it didn't work out. Thankfully it came together beautifully so no contingency plan needed. 

Anyway let's cook.

Equipment:

Use a flat Willow pizza tray, 28 cm across for these ingredients. Or for a 23cm tray use 1/3 less ingredients. Line with Glad Bake. The only round pizza trays that I own now have holes in the base so I lined the tray first with alfoil and then covered the alfoil with baking parchment. It worked well. I then very carefully transferred the cooked and chilled pastry base to a serving plate for decorating.

Pastry Ingredients:

1 cup plain flour
120 g softened butter
2 tablespoons icing sugar
60 g slivered almonds

Method:

Mix butter and icing sugar together. Add the flour.

Mix into a paste.


Refrigerate the dough overnight. Allow the dough to soften the next day (you should be able to push your thumb through the mixture.) Or you could make the pastry and chill it for 30 minutes before using.

Press into the tray lined with Glad Bake, and flatten to the edges.
Press the slivered almonds into the surface of the dough,

Place into a medium oven, 180 deg. F for 10-15 minutes until cooked.

Allow to cool on the bench until ready to use or refrigerate for 1/2 hour.


Chantilly Cream Topping with Lemon Curd:

Mix together  3/4 cup whipped cream, including 2 tablespoon caster sugar or less, and a few drops of vanilla essence. Mix 3 tablespoons of homemade lemon curd through the whipped cream.

Spread onto tart base.


Decorate the cream with a combination or fresh seasonal fruits, such as Strawberries, mandarin,  blueberries, or kiwi fruit, or just strawberries.

Apricot Jam Glaze for fruits

2 tablespoons apricot jam

Method:

Warm up apricot jam in the microwave for 15 seconds and pass through a fine mesh strainer to discard any fruit chunks. 

Gently brush jam over the strawberries and other fruits.

Chill tart on your serving plate for up to 3 hours before serving.

Optional Fruit Glaze instead of Apricot Jam:

1 teaspoon potato flour,
3 teaspoons water
1 teaspoon redcurrant jelly

Method:

Bring to the boil until slightly thickened. Cool before spreading over the fruit

We are buying strawberries every weekend now from our local farmer's truck at Fresh As Sweet As, enjoying their juicy sweetness while we can. These strawberries actually taste like strawberries and now that they are getting smaller as the end of the season is imminent there are more to a punnet. They were a good size for this tart.

Thanks for dropping by and I hope your are finding time to relax this weekend.

Warm wishes

Pauline


Monday, May 4, 2020

Plum Tarte Tatin: happiness on a plate


Tarte Tatin is an elegant, impressive, and very French special occasion dish. It is somewhat of a French culinary masterpiece, something to aspire to, and only the best butter puff pastry can be used. Having only ever made an Apple Tarte Tatin the traditional way, I wasn't going to contemplate baking another one without plenty of time up my sleeve. This Plum Tarte Tatin is every bit as delicious as any I have tasted. The recipe is easy, and unconventional, and is a cinch to make.

Sunday, March 12, 2017

C ' EST BON Restaurant Francais, Cairns

Last week we drove to Cairns in Far North Queensland for a special birthday celebration with our wonderful daughter, and where better to celebrate than at C'est Bon. 

Tuesday, March 4, 2014

Classic Crêpes


Classic French crepes on Shrove Tuesday, I am sure that is appropriate. This recipe
 is dedicated to Myrtille, my son Matthew's beautiful French partner, who has entertained
 and delighted us many times with her French crepes using this recipe.

She has been forced to graciously accommodate some Australian variations to the 
original recipe by the males in our family who insist there must also be a place for
 vegemite somewhere, when eating crepes, particularly on Australia Day. 

The following is Myrtille's authentic and never fail French crepe recipe with
variations, written by her.


Classic Crêpes

               350 g flour (plain, white)
               90 g butter
               75 g sugar
               5-6 eggs
               milk
Notes:
- This recipe is only lightly sweet, and thus accommodates all kinds of toppings,
savoury included. - For more rustic-tasting and healthy crêpes, replace a third of
 the flour with buckwheat flour - for Britany crêpes, replace part or all of the milk
 with beer!

Secret procedure for a lump-free mixture without the need of a sieve…
1. Place butter in a large bowl, microwave briefly until liquid hot but not boiling
 (set aside a bit if necessary).
2. Mix in eggs and a bit of milk, then sugar.
3. Add all the flour, mix the thick mixture well. If too solid, add a touch of milk.
4. Once all the flour is well incorporated with no lump in sight, add a bit of milk,
 mix, and repeat until the mix becomes a fluid (but not too much liquid,
 otherwise it will not cook well).
5. Pour a scoop in flat pan (previously lightly oiled for the first crêpe, usually not
necessary for the following ones).
6. Once the first side detaches itself easily, make the crêpes do some acrobatics
 in the air, and voilà!

Examples of classic great toppings (most are best directly placed on the crêpe
in the pan while the second side is still cooking):

Savoury:

- “Cheese & herbs”: cheddar, Italian herbs, fresh basil


- “Double decker/the Lot”: eggs (+S&P) on folded crêpe (made first, slightly cut
egg white for firmer quicker),  on top of ham + mushrooms + capsicum + fresh spinach 
+ cheese on a second crêpe


Mixes:
- “Honeyed goat”: Goat cheese (the firm type) + honey
- “French-English Wars”: Ham + Jam 
- “Die-hard Aussie”: Butter + Vegemite

Sweet:
- “Suzette”: sugar + a touch of Cointreau or Grand Marnier, or simply squeezed
   lemon juice
- “Chocolate-almond”: shaved almonds + cooking dark chocolate
- “Chocolate-banana”: sliced banana + cooking dark or white chocolate
- “Plombières”: ice cream (kirsch flavoured, otherwise vanilla/cherry) + candied/glacé
   fruits and just by themselves:
-  Nutella, (real) maple syrup, fruits, etc…


Bon appetit!
This article and photos are Copyright (c) 2014 by Hope Pauline McNee, All rights Reserved.

Wednesday, January 15, 2014

Clara's Apple Tarte Tatin


Apple Tarte Tatin, is a special French dessert which when cooked well, remains a fond memory after it is eaten. This beautifully golden, caramelised tart is best served warm if possible, but not too hot, so that the flavours can really develop.

Clara, a delightful young French woman, is cooking Tarte Tatin and invites me to help and learn her secrets to cooking this family recipe. It is I suspect  her signature dish. As we commence preparation I realise that there is no actual recipe and she cooks  by instinct and feel. This is my best attempt to recreate the recipe. It tasted delicious.

Ingredients:

15 red apples (the cheapest available)
120g butter
100g white sugar
2 sheets puff pastry
1 teaspoon canelle (canelle=cinnamon)


Method:

Chop butter into pieces and add to a deep stove top pan with white sugar and cinnamon. Melt these ingredients together and cook together to caramelise.

To make caramel, keep stirring and cooking butter, sugar and cinnamon until starting to brown.


Add cored and chopped apples to pan, cover with caramel and simmer apples until soft. This might take a while on a low heat. Allow caramelised apple mixture to cool.

Place apple mixture into a lightly greased spring form cake tin. Place 2 sheets Puff Pastry along top of apples, tucking in any excess around the apples.. Place holes in top of pastry and cook in a moderate oven at 180 deg. until browned.

Remove from the oven and gently ease a knife all the way around the edge of the tart. Carefully place a large heatproof dinner or serving  plate over pastry and quickly turn over the cake tin releasing the tart on to the plate so that pastry sits on the plate and the golden brown apples and a syrupy sauce are at the top.

The dessert can be refrigerated  until eaten if not eaten warm.

Dear Reader, have you had a memorable Tarte Tatin experience anywhere? If you have cooked it yourself, do you prefer using red apple varieties available in Australia, or the Granny Smith apple for a more tart flavour? In Europe, there is access to beautiful home grown apple varieties for cooking,  which we don't really have here.

Best wishes

Pauline