Wednesday, December 14, 2022

Italian Chicken and Sausage Tray Bake


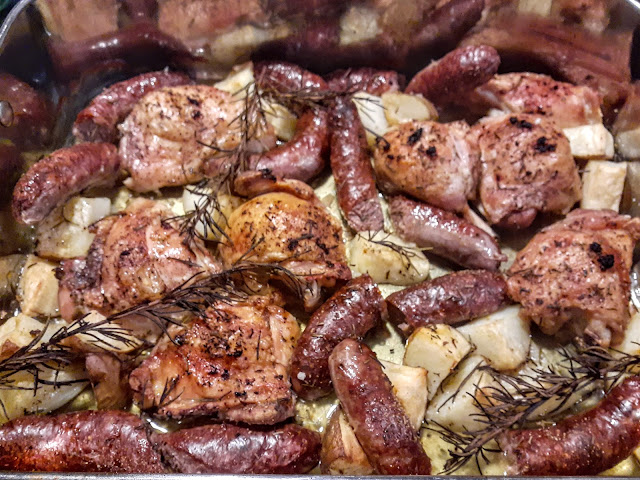
Chicken and sausage Italian Tray bake, one tray cooking, originates from the Italian Tuscan Hills with enormous Mediterranean flavours. This is an adaptation of Nigella Lawson's Italian Traybake recipe from her Nigellissima cookbook, published in 2012. This cookbook still stands proudly on my bookshelf. I can't remember how many times I have baked this dish since I first bought this book shortly after it was published, and it has never failed me. In fact I am more of a fan than ever. 


This dish came to my rescue again one Friday night when as of lunchtime I thought that 16 people were coming to dinner. By 5 o'clock the numbers had decreased to 12, and as I had bought all the chicken and spuds to feed 16 there were plenty of leftovers for us the next day. I baked enough ingredients to feed 12 in two trays, and it turned out beautifully. This particular group of friends who are also tennis players, have been meeting for 30 years on Friday night for tennis at local tennis courts, then for dinner at each other's home, so we are all very flexible and enjoy good food, wine, and each other's company. Some of the originals have left town, and others have joined, so whether it's 8 or 16 for dinner, we try to approach the whole event fairly simply and have a great time.

The following day for our dinner I cooked up the remainder of the chicken pieces and potatoes with a few variations, by adding some small cherry tomatoes from our tomato bushes, a little bit of cauliflower, some capsicum, some black olives, and a couple of pieces of pumpkin, and lots of rosemary of course. I put the leftover cooked sausages in for about 10 minutes before the dish was ready to take out of the oven just to warm them up.

It was so delicious the second time round the following day, leftovers often are, and to be truthful, I enjoyed it more than on Friday night when I was responsible for pulling the whole meal together.

Delicious, and straight out of the oven, smelling so aromatic and with a little more colour

I think to be honest the success of this particular tray bake rests with the tasty Italian sausages, good quality chicken, the very fresh aromatic rosemary, and of course the company around the table. However, I have made it again since and my rosemary, though perhaps a bit woodier than the supermarket version is still a fantastic Italian herb to use.  I actually think, as Nigella also suggests, that any good tasty thick sausages would do. You can go for the milder sausages, or the sweeter or "chilli and fennel" sausage. See my notes below. It is all about the fusion of flavours during the cooking process. The potatoes soak up the meaty and lemony flavours and crisp up beautifully on the edges, and stay nice and firm but a little more softened than just purely roasted potatoes.

Nigella also suggests using a shallow baking tray. This is probably preferable, however I have used both shallow and deep, and there wasn't much difference in the result.

For the full Italian experience, serve with bread or lentils, pickled zucchini, and a couple of jars of flame-roasted peppers, drained and mixed with good olive oil, red wine vinegar, and parsley.

Buon appetito! and thanks Nigella Lawson. You saved the day, again.

Ingredients
Quantities feed 8, just add more for more people

3 BAKING POTATOES (APPROX. 750G TOTAL), UNPEELED AND CUT INTO 2CM CHUNKS
8 CHICKEN THIGHS, BONE IN AND SKIN ON 
8 ITALIAN SAUSAGES (APPROX. 750G IN TOTAL
SMALL BUNCH (6 OR 7 SPRIGS) OF FRESH ROSEMARY
ZEST OF 1 LEMON
GROUND PEPPER
4 x 15 TABLESPOONS OF GOOD QUALITY OLIVE OIL

Let's Cook:

Preheat the oven to 220deg C/Gas mark 7.
Put the potatoes into a large, shallow baking tray and add the chicken thighs and sausages throughout the potato pieces. If using 2 trays, divide everything between them (and also swap the trays over and turn them round halfway through the cooking time).

Arrange about 4 sprigs of the rosemary among the chicken and sausages, then finely chop the needles of another 2 sprigs, to give you about 2 teaspoons of finely chopped needles per tray, and sprinkle these onto the chicken pieces. Believe me, this isn't too much rosemary.

Zest the lemon over everything, and season with the salt and a good grinding of pepper. Drizzle with the oil and bake for 50-60 minutes, or until the chicken skin and sausages are golden and the potato pieces are cooked through. It's fine to let all of this stand for up to 30 minutes once cooked, prior to serving.


Cook's Notes:
  • It really helps if you have fresh rosemary growing, however a large punnet from the supermarket should have enough in it for this recipe. This isn't too much rosemary.
  • It's not the end of the world if you can't find Italian sausages, and I know they are expensive these days. You can go for milder sausages, or even fennel sausages with a hint of chilli, whatever you like really. The flavours will still be enormous.
This traybake could be very handy in the leadup to Christmas for an easy dinner in between festivities.

I wrote this up a while ago, and pleased to have it all prepared as I am feeling off colour and flattened by Covid 19 this week. It's been a long five days for both of us with Covid, of not feeling that great, and incredibly tired.  However this is Day 5 so hopefully we will start to feel a lot better from now on. I'm sure though we would have felt a lot worse if we hadn't' been fully vaccinated. The airconditioning is on, so it is very pleasant inside our home away from the Summer heat and humidity outside.

On the positive side, we don't need to worry about catching Covid over Christmas and New Year.

Wishing all of you a happy Christmas and festive season with family, loved ones, and friends, and I have really enjoyed hearing from all of you, and appreciate that you have taken the time to comment on my posts. I've enjoyed the cooking comaraderie from fellow bloggers and your recipes as well.  Happy and Healthy New Year for 2023.

Best wishes

Pauline

xx


Saturday, December 10, 2022

Rosemary Sourdough Focaccia Bread

It's the "Silly Season" when Focaccia bread is perfect to serve to friends with a Grazing Platter or a Charcuterie board and to take to a Christmas party. I've taken a long break from breadmaking for a number of reasons, and consequently I haven't been feeding my Sourdough "Mother" as often as I should. Trying not to eat too much bread which is impossible when I make my own, lack of time, lack of availability of the flour I like to use, travel, all of these things meant that I have sometimes fed my sourdough Mother sparingly just enough to keep her alive in the refrigerator. That sounds awful doesn't it? However, a few days ago I decided a good place to start with breadmaking again would be to make Focaccia. It's delicious and substitutes perfectly for crackers and biscuits. It makes a really nice change. We have an old and faithful rosemary bush growing in our front garden which keeps soldiering on and produces wonderful flavours in so many dishes, and particularly in this bread, and a batch of focaccia doesn't take as long to make as a sourdough loaf does. It's a perfect choice at this time of year.

I fed my sourdough Mother jars with plain flour and water, I have three Mothers now, as she has grown over the years. I placed two jars back in the refrigerator and left the other one out to ferment, and two days later she rewarded me by bubbling away happily. This is a refresh of a post I wrote a few years ago, and hopefully will inspire me and you too my friends to start baking some sourdough as a weekly tre in the New Year, to not only stretch the budget, but to also keep healthy as sourdough is great for the gut. 

I was recently told by a dietician friend, that sourdough bread is most nutritious if baked long and slow, like most foods, so that is one of my projects for 2023, to research the best way to bring the best sourdough qualities out in my bread. Even though the dough has a slow overnight rising process, apparently the bread needs to bake long and slow as well, for maximum health benefits. I'd love to hear from you if you already bake your sourdough loaves this way.

Let's Bake some Sourdough Focaccia Bread:

This is how I make my Sourdough Rosemary Focaccia Bread. There are also plenty of recipes around for how to make this with instant yeast if you don't have a sourdough starter which will still be delicious. To substitute instant powdered yeast for sourdough starter, replace 100 g of starter with 5-7 grams of instant powdered yeast, or 12-15 grams of fresh bakers yeast.

Timing:

Steeping the rosemary: 12 hours
Mixing and kneading: 15 minutes
First rising: 2 hours
Proofing: 1 hour 30 minutes
Baking: 15-20 minutes

Ingredients:

Makes 1 large focaccia, about 940 g., leftovers can be frozen. It reheats well.
  • 4 sprigs fresh rosemary
  • 30g (2 tablespoons) extra virgin olive oil, plus extra for drizzling
  • 500 g (4 cups) plain flour
  • 295 g (1 1/3 cup) lukewarm water 
  • 100 g (1/2 cup) liquid sourdough starter that is very active and bubbling, or substitute 5-7 grams of instant yeast
  • 1 1/4 teaspoons instant powdered yeast (which I used) or if you can get it, use 7 g (2 1/2 teaspoons) fresh bakers yeast, in addition to the sourdough starter
  • 10 g (2 teaspoons) salt
  • Sea salt flakes for sprinkling
The night before, remove the leaves from the fresh rosemary sprigs and mix them with the olive oil. Leave them to steep overnight at room temperature. If you forget to do this the night before, add the rosemary to the olive oil the next morning, and warm up the olive oil and rosemary together in your microwave. This will help to soften the rosemary.

I kneaded my dough by hand so I will give instructions for using a stand mixer and for doing it by hand.

KNEADING BY HAND

Put the flour in a large mixing bowl and make a large well in the centre. Pour in half the water, then add the sourdough starter, yeast, and salt. Mix well, then add the rest of the water and knead until all the flour has been incorporated. Add the rosemary and the steeping oil. Knead the dough until it becomes smooth and elastic. If you think the dough is a little dry, wait until you've added the oil and rosemary before adding more water.

I always knead my sourdough by hand, however there isn't really much kneading needed for this recipe. If you prefer to use the dough hook in your Stand Mixer, here is a method for that process. 

KNEADING IN A STAND MIXER

Put the flour, water, sourdough starter, yeast, and salt in the bowl. Knead with the dough hook for 5 minutes at low speed, then for 10 minutes at high speed. Add the rosemary and the steeping oil around 3 minutes before the end of the kneading time.


Shape the dough into a ball, cover with a damp cloth, and leave to rise for 2 hours in a warm spot. Midway through the rise, deflate the dough by folding it in half. By the end of the rising time it will have increased in volume.


Put the dough in a shallow baking pan lined with baking paper. 


Stretch the dough with your hands to make a flat piece that fills a 40 x 30 cm pan, or 16 x 12-inch pan. I used one of my old baking dishes. Cover with a damp cloth and leave to proof for 1 hour and 30 minutes. Ensure the pan is deep enough for rising.


Place a baking tray on the bottom shelf of your oven and preheat to 230 deg C. (or 450 deg. F.) Use the tips of your fingers to press small holes over the surface of the focaccia. Pour a little oil into the holes and sprinkle with salt flakes.


Just before you put the focaccia in the oven, pour 1/4 cup or 50 g of water into the baking dish in the bottom of your oven.

Bake for 15-20 minutes.

Remove from the oven when beautifully browned, turn out the focaccia , and leave to cool on a wire rack.


Slice into squares or tear apart. Mr. HRK loves the rustic approach by tearing a Focaccia loaf into pieces, no photo available unfortunately. Focaccia pieces are also delicious dunked in good quality olive oil, and then into Dukkah. This is a very simple way to eat it.

However one time he excelled himself and cut it into perfect shapes. 


Stay safe, healthy, and Covid free, it's on the rise again unfortunately.

Warm wishes,

Pauline

Thursday, December 8, 2022

In My Kitchen, December 2022


This is the Christmas Edition of In My Kitchen, and 'tis the season for baking. This also means my friends, that it's the season for Mangoes and Lychees here in tropical North Queensland. Bowen Mangoes which are the best to buy in our humble opinion, were costing $15.00 a bucket at our local market last Saturday. Just this morning we picked up a bucket for $12.00 from a roadside stall, and a bag of lychees. Bowen is just a couple of hours North from us. The lychees were a bit more expensive, the first of the season, but we couldn't resist them, they are a precious commodity, and for Christmas holidays only. We'll be freezing, dehydrating and eating mangoes for the next month, and then eating frozen mango with ice cream and yoghurt for the rest of the year. Dried mango is great for just snacking on. We'll also be looking out for the Common mangoes from backyard trees, strictly for making delicious Mango Chutney with, which we traditionally eat with our Christmas ham.

I started this post ages ago, however I have also been cooking lots of other dishes over the last month in between Christmas baking sessions, after all we still need to eat in between Christmas preparations. We've also been enjoying our garden. The weather has been cooler of late, so we've been gardening and enjoying just sitting out in our courtyard late in the afternoon with a cool drink and enjoying the birds and our garden. Our Gardenia bush has flowered the best it's flowered for years and is still flowering. I've just loved bringing these perfectly white and highly fragranced flowers into the kitchen. Their intoxicating perfume reminds me of exotic Eastern destinations. The blooms only last two days at the most so they are quite precious. Update, how quickly things change, we are now in the middle of a heatwave, crazy times.

I cooked Nigella Lawson's Italian Chicken traybake with loads of our home grown rosemary. When time is at a premium, this meal never fails and is so tasty. It's also a great dish to cook if you find yourself entertaining a lot of people all of a sudden. I'll post the recipe soon I hope.

Then with the traybake leftovers, because I make sure there are some, I threw in handfull of small tomatoes from our bushes, some peas, some olives and voila, the dish took on even more intense Mediterranean flavours. It was so delicious.

Beautiful organic and free range eggs gifted from a friend, poached and sunny side up for Sunday's breakfast.


This Mexican Chicken one pot dish or traybake was delicious. You can find the recipe at this link. The Chicken Lovely Legs were the perfect cut of chicken to use.

A kilo of very ripe tomatoes needing to be used up, transformed into a batch of delicious Spicy Tomato Relish. This is perfect eaten just with cheese and crackers or biscuits, or served with quiche, an omelette and a whole variety of dishes. We love it. I added a few of our small home grown tomatoes as well. You can find my recipe for tomato relish at this link. It's so handy to have in the pantry all year round.

Blanching the tomatoes and removing the skins. I don't like to have tomato skin in the relish.

I threw in a few small tomatoes from our bushes, so there might be a little bit of tomato skin in there this time.


A kilo of tomatoes and onions made about 6 bottles of relish.

This tasty and easy to make Sweet and Sour Chicken was just what we needed during a busy week. Always enjoyable and an old favourite of ours.


How wonderful is the variety of food we can create in our own kitchens, and it doesn't need to be expensive or too fancy to be absolutely delicious. Over the last month I have moved from Italian, to Mexican to Chinese and then a Middle Eastern Bulgur Wheat Risotto with Chicken, Capsicum and Artichokes, which is always a healthy, low calorie meal to eat before the weekend, know what I mean?


All of these recipes above and below are part of my collection of favourite meals and are very comforting as well.

Family Heirlooms in My Kitchen

Do you have many "family heirlooms" in your kitchen?  A blogging friend commented recently on my post about my Christmas Plum Pudding recipe, that he loved that I used twine to hold my old pudding steamer together as the clips have lost their grip, a little bit like me I thought at the time, and he called my steamer a family heirloom, which I suppose it is. I loved that thanks David from Spiced. It might not have any monetary value anymore, but every year I derive a lot of satisfaction and joy from using this old relic. And apparently they aren't very easy to find anymore. 


It also made me realise that I have quite a few "family heirlooms" in my kitchen that I treasure, and use regularly and always bring back lots of memories. It would take too long to mention them all now, perhaps that's a post for another day.

This beaded cloth was crocheted by my Great Aunt Eileen for my Mum, many years ago, and I have a few of them. They are just so useful for covering a jug of custard or a water jug. Speaking of custard, I made a jug of Vanilla custard recently which I hope to make to serve with our Christmas Plum Pudding this year. It's delicious. This was a rehearsal for Christmas and it worked out beautifully.


 Since then I have bought a new Custard jug, to replace my old one which broke, which was also a "family heirloom". There wasn't a lot to choose from, but I liked the rustic look of this one. I'll be on the lookout now though at charity shops for an older style one.


I've made my Christmas Plum Pudding, this is the smaller one. My recipe makes two, a large and a small. It's still surprising to me how many people who are great cooks have never made a plum pudding, and I think it's partly because the old method of making one involves a lot of time which scares people off. An initial four hours of simmering in a pudding steamer and then simmering it for another two hours of the day of eating it. Following a query by a reader about whether or not it could be cooked in a pressure cooker, I have added a p.s. to my post and given instructions on how to cook it in a Pressure Cooker, which is more suited now for busy people with little time.


I have a Phillips all in one pressure cooker. I've consulted with my very clever cooking friend Julie, who has the same pressure cooker as mine, and she is a lot more adventurous with it than I am, and after that chat, I am happy to say that yes absolutely, you can cook a steamed Christmas Plum Pudding in a Pressure Cooker. It will only take about 1 hour 15 minutes on manual pressure. Briefly, add two cups of water to the bowl, add a trivet so the steamer isn't sitting on the bottom of your stainless steel pressure cooker bowl, cover the batter with baking paper, then the lid of the steamer. Cook on manual pressure for about 1 hour 15 minutes, quick release, and your pudding is ready. However, it's important to check the instruction manual for your particular type of pressure cooker for exact times and settings.
I've been rather thrilled and overwhelmed by the response to this post, hopefully lots of people will be taking the plunge and making a homemade Plum Pudding this year.

I've made a batch of Scottish Shortbread, which was delicious, and a batch of Rum Balls, which are now in the freezer for Christmas festivities.


A Sourdough Rosemary Focaccia with a late afternoon drink was delicious after a long break from breadmaking.


Mr. HRK and I wish you and your families a safe and festive Christmas. I think a little bit of indulgence is allowed, and everyone really needs the Holidays this year.

This is my December submission to the #IMK series hosted by Sherry from Sherry's Pickings. Each month bloggers from around the world gather to share what is new in their kitchen.  I don't buy a lot of new stuff anymore for my Kitchen, but I love cooking and baking. I hope you enjoy some of my recipes and stories.

I'll be posting a couple of new recipes and stories between now and Christmas hopefully. 

Take care my friends,
Pauline x


Thursday, December 1, 2022

Vanilla Custard made from Scratch

There are so many beautiful things involved with cooking your own custard. The result is just delightful. Making your own, without a packet of Foster Clark's custard powder to be seen is a labour of love, but so well worth it. Allow an hour max to make it. On the day of THE big event such as Christmas lunch, if you making it to have with Plum Pudding or dessert or even for an evening dinner, I would suggest making it first thing in the morning, even before you open the presents, and then it's done. In my part of the world in North Queensland, that's how we beat the heat on Christmas Day. Your custard will keep in a covered jug, on your kitchen bench until you are ready to serve it. This recipe is Part 2 to my previous post on how to cook your own Christmas Plum Pudding. This is the perfect custard recipe to serve with your Plum Pudding, with Apple Crumble, or another type of fruit crumble.

Using a precious Vanilla Pod is very special and gourmet in cooking, and brings a unique flavour to the custard. However, Vanilla Custard was made from scratch many years ago before we had access to vanilla pods, so good quality vanilla extract or vanilla bean paste will still work beautifully. It is definitely acceptable to substitute vanilla extract for the vanilla pod. However, vanilla essence can be of poor quality, so it is preferable to use a teaspoon of vanilla extract, not essence, or a teaspoon of vanilla bean paste will still disperse those beautiful flavours of vanilla through your custard.

 Did you know you can make your own vanilla extract quite easily by steeping 3 vanilla beans in 1/2 a cup of cheap vodka for about 4 weeks. This is all that vanilla extract is. You can find out more about how to make your own vanilla extract in a previous post I have written, at this link.

Before I made this jug of custard I compared Jamie Oliver's recipe to my family recipe, the one that we always used at home, and the only real difference was the use of the vanilla bean. There are many fancier ways of making vanilla custard from scratch, and Jamie Oliver has a great video and recipe which uses cream and milk and serves more people, but I am happy to use this more cost effective one, using more full cream milk and without the bottled cream. On Christmas Day, a custard without even more calories suits me just fine. It still tastes delicious and with a beautiful consistency.

Ingredients:

Makes 500 ml, and serves 4-6 people. Allow an hour cooking time

600 ml full cream milk

4 large and very fresh free-range egg yolks

1 vanilla bean

2 tablespoons caster sugar

1 tablespoon cornflour

Method:

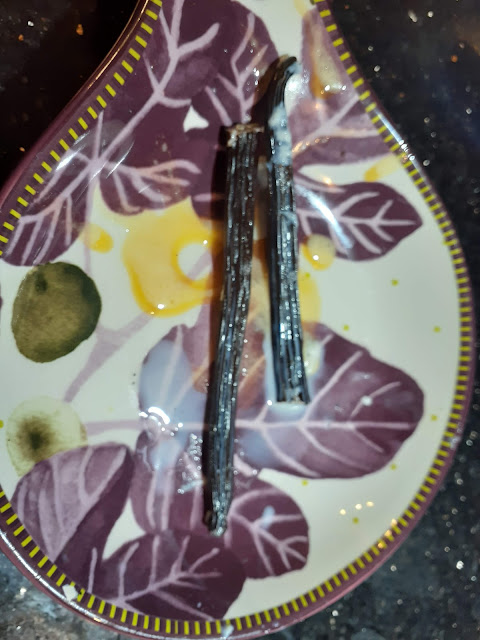
Halve the vanilla bean down the middle lengthways and scrape out the seeds with the tip of a knife.

Separate the egg yolks from the whites, and if you don't intend to use the whites in the short term, I suggest you store them in a covered container in the freezer for that pavlova you are making in the future.

 Add both the bean and the seeds to a saucepan on a medium-low heat, pour in the milk and bring the milk just to the boil. You will know this is starting to happen when light steam evaporates off the milk.

Take the saucepan off the stove, and leave to cool slightly, then remove the vanilla beans.

Meanwhile whisk the egg yolks with the sugar and cornflour until pale. (I started this before I heated up the milk.) My eggs never became really pale as I used large, organic, free range eggs from a local supplier. They were expensive, but I thought it was worth it.

Pour a ladle of milk into the bowl and whisk well.  

Then gradually add the warm milk, a ladle at a time, whisking well each time.

Pour the milk mixture back into the saucepan and cook gently on a low heat for about 20 minutes or until thickened, lightly whisking continuously in a figure of 8 motion. Please don't leave the stove or allow yourself to be interrupted during this process. It's only for 20 minutes at the most. Your reliable kitchen apprentice could help with this. 

To check if the custard is thickened, dip a wooden spoon into the custard, and run your finger along the back of the spoon. If this leaves a line through the custard it is thick enough.

This custard is delicious served with Christmas Plum Pudding, and any type of fruit crumble. You can find the link to my recipe for Christmas Plum Pudding here.


To quote Mr. HRK and our beautiful daughter, you can never have too much custard.

Warm wishes
Pauline