Saturday, February 27, 2021

Country Style Green Apple And Walnut Cake


I like to have fresh cake made for the weekend, such a treat don't you think to eat cake on Sunday with a nice coffee, and this one ticks all the boxes. No icing on this one though, just sifted icing sugar, but you could ice them if you really must. This recipe, was adapted from a school recipe book in Western Australia by Matthew Evans, of Gourmet Farmer fame. These aren't fancy cakes,  they are low cost country style apple cakes, moist and crumbly, and taste even better the day after they are made. Matthew Evans lives in Tasmania where apples are plentiful, and I always have apples in the fruit bowl and walnuts in my freezer staying fresh, so it is easy to make this cake. Apples and walnuts should always be together.

Granny Smith green apples are the best kind to use for this cake. Those of you of my generation might remember Roger Miller's famous song "little Green Apples, from his 1968 album "A Tender Look at Love", which he wrote for his wife. It has been covered many times by various artists and even though I have to say it wasn't an actual favourite of mine, the song bounced into my head as soon as I started thinking about green apples.

"God didn't make little green apples

And it don't rain in Indianapolis in the Summertime

And when myself is feelin' low

I think about her face aglow and ease my mind" 

And if that's not lovin' me, then all I've got to say, .........

Written by Roger Miller. 1968


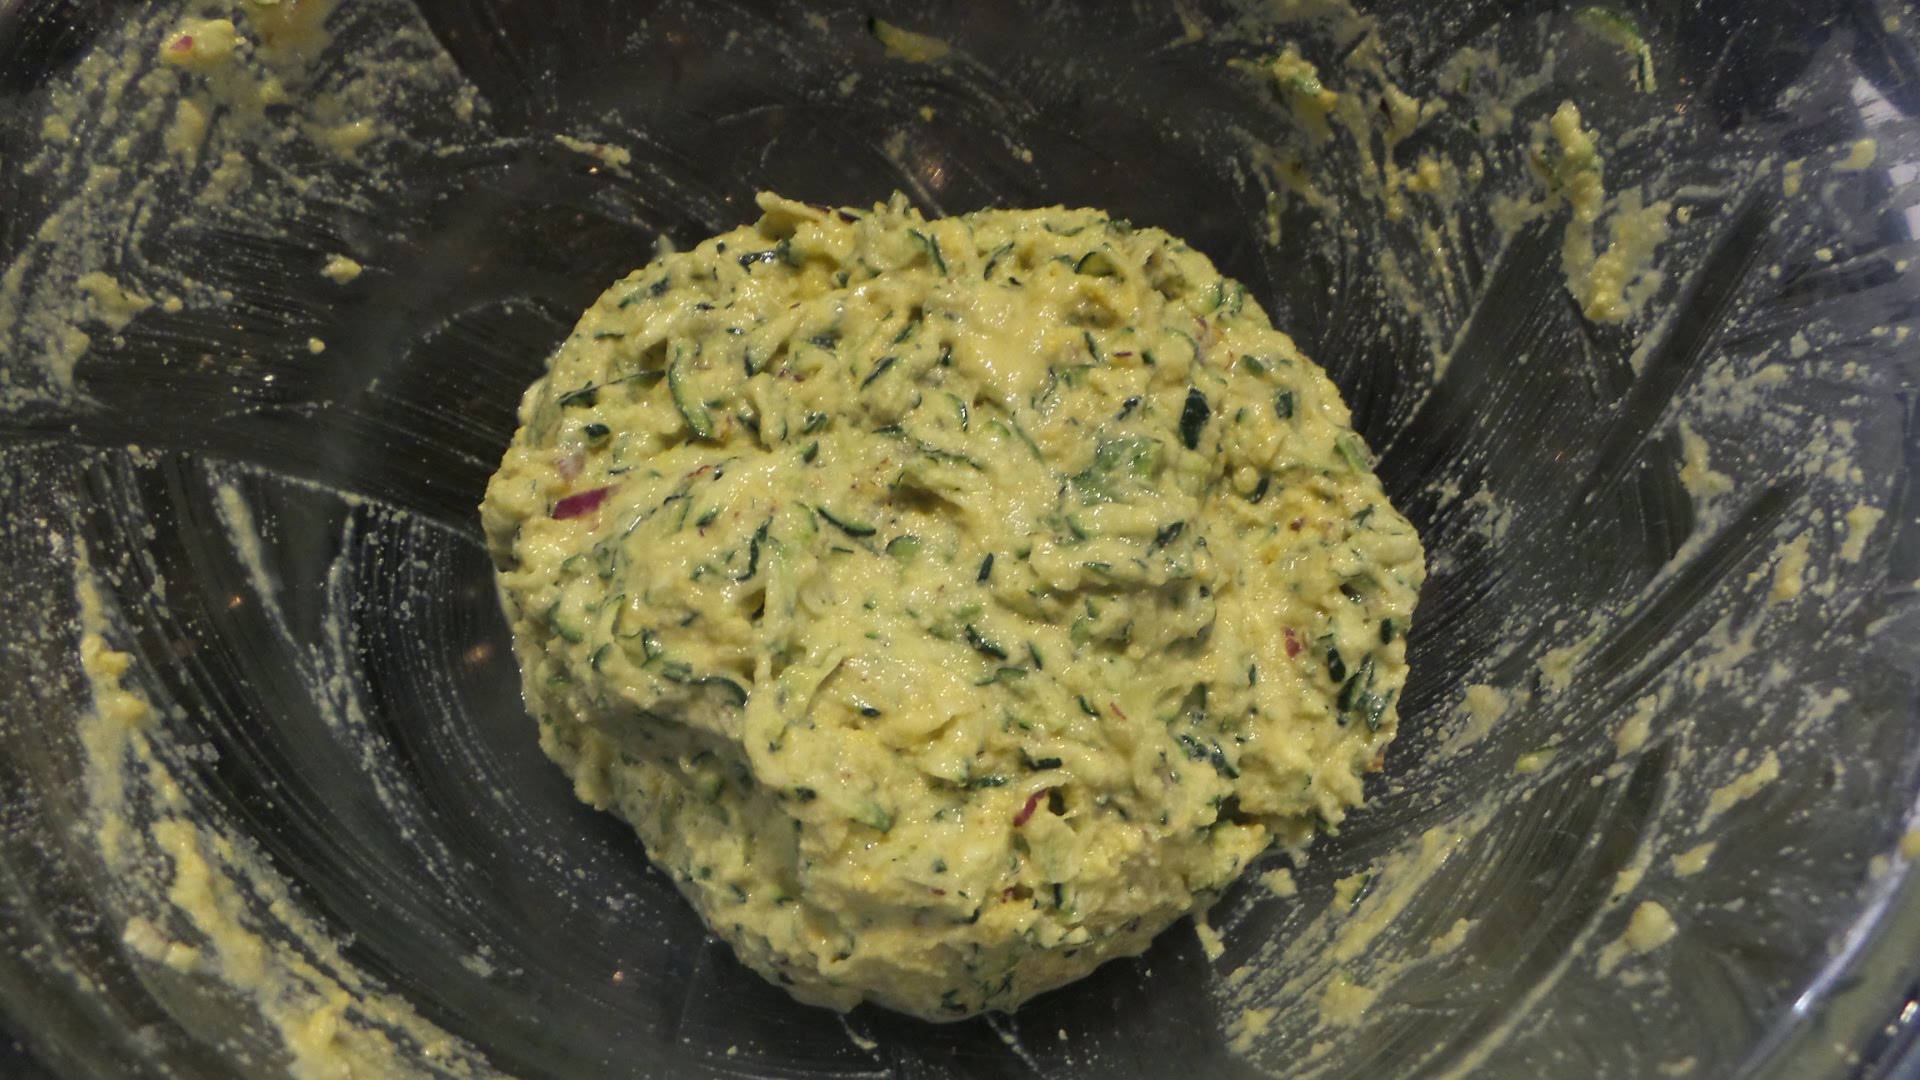
After that moment of self indulgence, back to the cake. The consistency of this cake mixture reminds me of a mixed fruit cake mixture, where there is a minimum of cake batter and maximun of fruit, and where the mixing spoon stands up by itself in the centre, a sure yardstick of a good fruit cake.  The first time I made these cakes, the mixture makes two 20 cm cakes,  one was eaten very quickly, and the other one sat in the refrigerator for over a week and still tasted perfect, like any fruit cake should. I was pretty thrilled with this recipe. The bonus with making two cakes, is that if you need one for an occasion, pop that one in the frig, leaving the other one to be eaten by the family. 

My 4 year old grandson living  in the Falkland Islands is invited to a lot of birthday parties, in fact in Stanley it seems that everyone in the class is invited to every birthday party always held at a large venue in the town with jumping castles etc, so that means a lot of parties and a lot of cake. Because the population there are basically British, and we know they have a sweet tooth and love cake, well they do in the Falkland Islands anyway, (hope I'm not generalising too much),  I am told there is always a predominance of cake over savouries and healthy food, at the children's parties. Some of the parents, including my son and his wife worry about the amount of cake the children are eating, and when I made this cake I thought this would be the perfect kind of cake for a children's party. Sweet enough, or the sugar can be halved, and there is plenty of fruit in the mixture. That's what I told myself anyway as I ate a second slice. It could be iced and decorated and still be much healthier than a bought one.

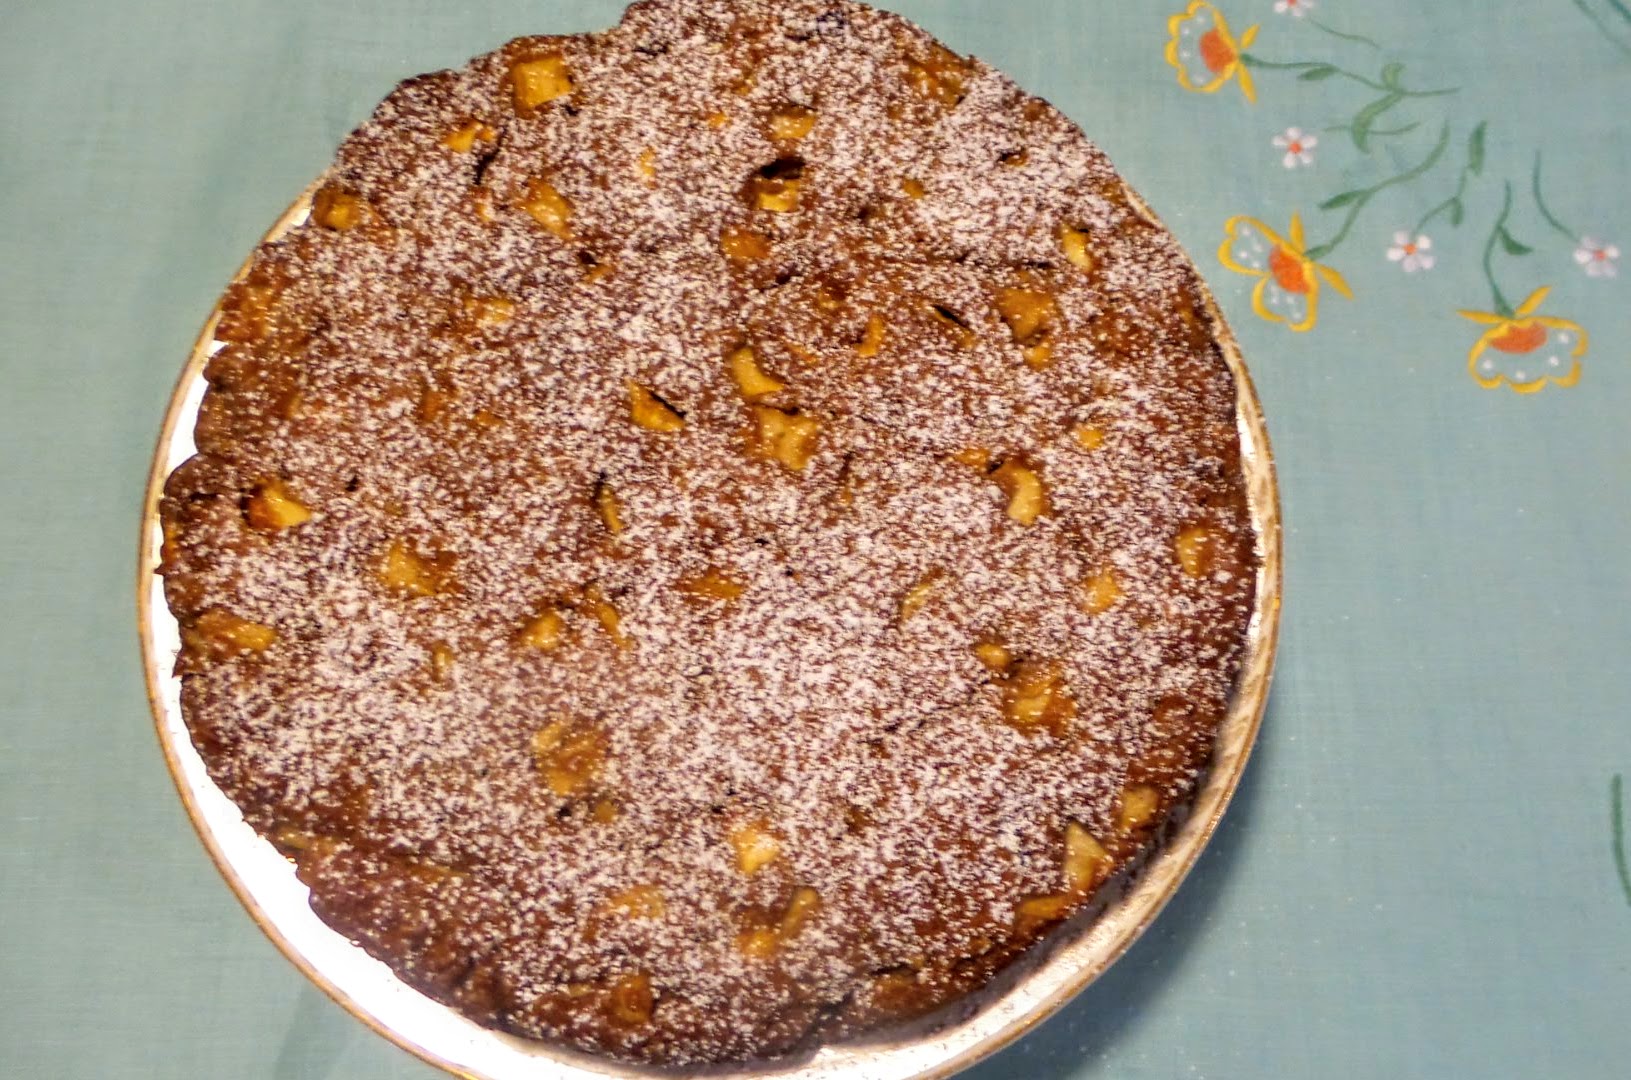
Ready to be iced if you wish.


Dusted with icing sugar

This recipe will make 2x20 cm cakes and this time I made a loaf cake and a round one, I have also made a large 23 cm cake, and a couple of muffin size cakes which can be frozen. Whatever works for you will be fine.

Ingredients:

6 large apples, or 8 small, preferably Granny Smith or some other sour variety

200 g (1 cup) demerara or raw sugar (or use a mixture of brown and caster sugar)

2 eggs, lightly beaten

few drops vanilla extract

125 ml (1/2 cup) Extra Virgin Olive Oil

200 g very fresh walnuts, broken up

250 g (2 cups) self-raising flour

pinch salt,

1 1/2 tsp ground cinnamon

1/2 teaspoon mixed spice or baharat

Icing sugar and thick cream to serve

Instructions:

Preheat the oven to 180 deg. C. Grease and line two 20 cm round cake tins or use loaf tins. 

This is a sit down job. Peel and core your apples. Cut and dice into pieces the size of a 5 cent piece. 

Place the apple into a large mixing bowl and add the sugar, eggs, vanilla, oil and walnuts.

Sift in the flour, salt, and cinnamon, and stir to make a smooth batter.

Divide the batter between the tins, then bake for 40 minutes. Test to see if it is cooked by inserting a skewer into the mixture and if it comes out clean, voila the tins are ready to place on a cooling rack. 

Cool the cakes in the tins for a few minutes, then turn them out onto your wire rack to cool.

To serve, dust with icing sugar and serve with a dollop of thickened cream or yoghurt. 

I hope you are enjoying a relaxing weekend, wherever you are.

Warm wishes,

Pauline


Thursday, February 18, 2021

Golden Zucchini and Spanish Onion Fritters


Who doesn't love a fritter, whether it's vegetarian or loaded with corned meat, or in the form of a rosti, a bhaji, or a potato cake. They are all based on the same theme, crunchy on the outside and delicious on the inside.What a wonderful surprise these fritters were, considering they are made with chickpea flour, and are gluten free, dairy free, and egg free, which isn't something I normally think about, so you can just about make them for everyone without needing to worry about any culinary issues. These are perfect for a meat free Monday dinner.

I purchased some chickpea flour from the supermarket especially for this recipe, after I had watched a cooking segment on the ABC News Breakfast programme (Australia), where Alice Zaslavsky, resident chef, presented them to the hosts Michael and Lisa and of course they were devouring them on air, how unkind, although they probably don't have time for brekkie before the show.  They looked delicious and made me just a bit peckish, I hadn't eaten brekkie either by then. Alice didn't actually cook them on the show, however there is a video on ABC Everyday of her making them, and I felt I needed to give them a try in my kitchen. 

Chickpea flour (or besan flour) whilst being free of gluten,  acts like egg when you add liquid to it. In this recipe the liquid from the zucchini after it rests with salt, is enough to bind the flour. As Alice said, the water you drain out of your chickpea tin can also act as a common plant-based egg replacement if necessary, aka aquafaba. The ratio of vegetable to flour is perfect in these fritters, however if you want to add more vegetable such as peas or grated carrot you can.

Let's Cook some fritters:

Ingredients:

Makes 10 - 12 fritters

400 g (3-4 medium sized ones) zucchini

100 g (1/2 a small one) Spanish or red onion

1 teaspoon salt flakes, plus extra for sprinkling

1 cup (110 g) chickpea (besan) flour

1 teaspoon baking powder

3 tablespoons olive oil

Method:

1. Use the grating function on your food processor to coarsely grate the zucchini and the onion, or do this using a hand held grater. I don't have a good relationship with graters so I avoid them whenever I can, but if you are ok with them use the coarsest teeth on your grater.

Sprinkle a teaspoon of salt flakes on top of the grated zucchini in a largish bowl and stir through the salt, mix it all up and let it rest for 5 - 10 minutes. It should get really juicy, as the zucchini releases all those lovely juices which binds the chickpea flour together.

2. Scatter the chickpea flour on top of the zucchini mixture, either through a sieve or by mixing it with your fingers to sift out any lumps. Sprinkle in the baking powder.  Stir all of this together with a spatula and it should start to come together to form a ball of batter in your bowl. If it is still too wet to come together, slowly add another tablespoon of chickpea flour until it binds together.

3. In a frypan, add two-thirds of the olive oil (2 tablespoons)  and when it starts to heat up, or "shimmer" add heaped tablespoons of the mixture into the pan, but not too closely together or it will be difficult to turn them over. They should be sizzling slightly. After putting the mixture in the pan, flatten each fritter slightly with your spatula or egg flipper. 

4. As the bases of the fritters start to cook they will become golden and crispy, and that is when you flip them over using your egg flipper and a spoon. Cook both sides, drain them on a kitchen towel on a plate, and whilst still hot, sprinkle lightly with salt flakes. Keep warm in the oven until they are all cooked.

The fritters will keep well in a covered container in the frig for 4-5 days, or an extra batch can be frozen, thawed out overnight and then reheated. I haven't done this, but Alice says to "whack'em in on a lined tray, crank up the oven to 160 deg.for 10-15 minutes, because by the time the oven's heated up, the middles have too."


Garnish with coriander or parsley and dive in.


Variations:

Add some frozen peas or corn to your vegetable combination. Just thaw them by pouring some boiling water over 1/2 cup of either, drain and add to the mixture. Other vegetables can also be used such as grated sweet potato, carrot, pumpkin or beetroot, how versatile is that?

Or add some spices such as smoky paprika, cumin, or curry powder, depends on what mood you are in, and what your gut tolerances are. Surprise your family by adding something different each time.

Thinking of all our friends overseas and in Australia who are still in lock down. Stay safe, the vaccinations can't come soon enough can they?

Happy cooking and delicious eating, 

Pauline


Sunday, February 14, 2021

Melt in Your Mouth "Custard Kisses" for Valentine's Day

Happy Valentine's Day everyone. I found this nostalgic recipe for Custard Kisses in one of my Mother's old recipe books and I thought they would be perfect to make for Valentine's Day for a little treat. They are a beautiful, melt in the mouth, dainty biscuit, perfect to enjoy with a cup of tea. When I ate my first one, it reminded me so much of the Yo Yo biscuits that we ate in a cafe in Stanley, in the Falkland Islands with our little grandson on Valentine's Day last year, that when I started looking at other recipes, I realised that a lot of the biscuit recipes for Custard Kisses, Melting Moments and Yo Yos are very similar. As these biscuits have custard powder in the mixture and the icing, and it is Valentine's Day, I am calling them Custard Kisses. Custard powder is such a successful ingredient in biscuits, and is really only cornflour, sugar and vanilla flavouring but produces the wonderful melt in the mouth texture of these biscuits. There are also tiny pink flecks throughout the icing from the custard powder which are pretty, however unfortunately you can't see those in the photo.

I can also understand the appeal of calling them Yo Yos, as the CWA (Country Women's Association) did, many years ago, as they do look like little yo yos. Remember those fun toys on a string  that were around when we were growing up? If you feel like having some more fun with them, why not make a few batches and make the icing in the middle in a few different colours for a party. These biscuits are a favourite in Australian coffee shops, and there is often a jar of them sitting on the counter to purchase with a cup of coffee or tea.

Let's Cook:

Ingredients:

225 g (1 1/2 cups/8 oz) plain flour, sifted

40 g (1/4 cup/1 1/2 oz custard powder), sifted

40 g (1/4 cup/1 1/2 oz) icing sugar, sifted

175 g (6 oz) unsalted butter, at room temperature

1/4 teaspoon vanilla essence

Method:

Makes 16 serves when joined together with icing

Preheat the oven to 180 deg. c (350 deg F.) 

Line a baking tray with baking parchment

Cream together the butter and icing sugar in an electric mixer, (I used my Kitchen Aid), until nice and creamy. 

Add the vanilla essence, and then add the flour and custard powder gradually to the bowl while beating on the lowest speed. As you keep beating this mixture gently on Speed 1, a beautiful dough will form.

Roll teaspoonfuls of the dough into small balls,  and place on the tray. 32 biscuits will fit on your tray perfectly.

Flatten the tops of each biscuit lightly with a fork.

Bake for 10 to 12 minutes until slightly golden on the base. Cool completely on a wire cooling rack.

Filling:

I used a separate clean glass bowl for this with my hand held mixer.

Beat the butter, icing sugar and custard powder together until well mixed and creamy. You may need to add a little extra butter if the mixture is still a bit crumbly. It needs to spread easily on the bottom biscuit.

When the biscuits have completely cooled,  match them up so that you have 16 pairs of equal size.

Place 1/2 teaspoon of the icing on the flat side of 16 biscuits, and then if you have some icing left over you can add more to each biscuit. Press the flat side of the other biscuit on top to sandwich them together. 

Allow the icing to set, before storing them in an airtight container for up to 1 week.

Warm wishes,

Pauline


Thursday, February 11, 2021

Chicken Enchiladas


Mexican food is fresh, vibrant, delicious, and should be fun to cook and eat. It's an easy way to feed the family and they will love it. Many of the essential  ingredients are available everywhere now, including tomatoes, coriander, capsicum, red onion, avocado, corn, canned beans, and limes, depending on which dish is being cooked. In this Enchilada recipe, the same spicy culprits are used that you will find in a lot of Mexican cuisine i.e. cumin, paprika, oregano and a little cayenne pepper. However this dish is cooked completely from original ingredients, there is no Old El Pasa to be found in this list, I like to cook from scratch whenever I can. This is a cinch to make and I know you will love it.

The result is an earthy and slightly spicy dish with an underlay of sweetness, and without the taste of preservatives or extra sodium content to be found in packet mixes and sauces. Cooking from scratch means that a little bit of extra effort is required, but it is well worth it, and the spices, the enchilada sauce, and the chicken filling can all be made in advance and refrigerated, ready for assembly the following day. For this dish, we want nice plump tortillas full of chicken filling, and plenty of rich enchilada sauce to serve with the tortillas, and of course it has to be very cheesy.  My recipe is based on one I found in the amazing Nagi Tin Eats blog, I doubled the ingredients, and now I have some in my freezer for those no cooking nights we all love.

 Beans and corn are staples of Mexican food, and the refried beans in this dish are essential in the chicken filling to provide earthiness of flavour and to bind the chicken filling together beautifully in the tortilla. Don't be tempted to leave out the tin of refried beans, trust me this ingredient is essential. We don't want a runny watery filling. Let's not forget the slight Spanish influence of spices and fresh ingredients either when it comes to Mexican food, however Mexican food uses more chilli and coriander than the Spanish and a lot more spice. 

Ingredients:

8 flour or corn tortillas

Let's just forget that I didn't add the flour tortillas to the ingredients photo.

Chicken Filling:

600 g chicken boneless thigh meat or chicken breast ( sliced in half horizontally)

2 tablespoons olive oil

1 onion, chopped

3 garlic cloves, minced finely

1 red capsicum, diced

400 g/14 oz refried beans 

400 g/14 oz canned corn

400g/14 oz can of black beans 

1/4 cup (65 ml) water

1 cup (100 g) shredded cheese (Mexican cheese blend preferably)

Enchilada Seasoning

1 teaspoon of salt

1 tablespoon of dried cumin powder

1 tablespoon of paprika

1 tablespoon of dried oregano

1/4 tsp black pepper

1/4 teaspoon to 3/4 teaspoon of cayenne pepper ( adjust to taste for heat)

TIP: Add 1 teaspoon of dried onion powder and 1 teaspoon garlic powder for extra oomph if you wish. People with a sensitive gut shouldn't use dried onion and garlic powder.

Enchilada Sauce:

2 tablespoons olive oil

3 tablespoons plain flour 

2 cups (500 ml) chicken stock or broth, low salt

375 ml or 1 1/2 cups tomato passata or puree (in the US)

Topping:

1 1/2 cups (150g) cheese, shredded

2 tablespoons coriander, roughly chopped

Method:

Enchilada Seasoning:

Mix all of the Enchilada herbs and spice ingredients together in a small bowl, ready to be used.

Enchilada Sauce and topping:

1. Firstly make a roux by heating the oil in a saucepan, then add the flour, and stir for 20 seconds until it comes together

2. Add 2 tablespoons of the Enchilada Seasoning, the chicken stock and the tomato passata to the roux. Stir it all to combine.

3. Simmer - Increase the heat on your stove to a simmering heat.Whisking the mixture regularly, cook for 4 minutes, until the sauce thickens. Remove the saucepan from the stove to cool.  

Chicken Filling:

Leave the chicken in large thin pieces to cook so that more of the surface area of the chicken is coated with the spices. Mix 1 tablespoon of oil through the chicken with your clean hands. Sprinkle with the remaining seasoning, and toss the chicken so that it is well coated.

Add 1 tablespoon of oil to a large pan, I used my Scanpan. Add the chicken and cook for 2 minutes on a high heat. Turn the pieces over and cook for another 1 1/2 minutes. Remove chicken from the pan, rest it for a couple of minutes, and then chop it into bite size pieces.

In the same pan on a lower heat, add the onion and the garlic, and cook for 1 minute, then add the capsicum and cook until the onion is fragrant and soft. At the same time, the brownings from the chicken can be scraped from the bottom of the pan.

Add the rest of the ingredients to the pan:

Add the refried beans, the cooked chicken, the corn, black beans and water. Stir this mixture until it reduces slightly, about 3 minutes. The chicken filling should be nice and thick  but still a bit moist.

Now for the exciting part, it's time to assemble your enchiladas and start baking them

1. Preheat your oven to 180 deg. C/350 deg. F.

2. With a spoon, smear a light layer of the enchilada sauce across the base of the baking dish, 22 x 33cm, 9 x 13 ",  to prevent them sticking.

3. Separate the tortillas and lay them on the bench. If they are a little stuck together like mine were, warm them up in the microwave for 50 seconds and they will ease apart without tearing. I bought a large family pack of 16 and a few had to be eased apart. 

4. Spread 2/3 cup of filling on the lower third of the tortilla, sprinkle with cheese or not if you prefer, then roll up. Place in the baking dish, seam side down and ends tucked in to hold them closed. Repeat this process to make 8, unless you doubled the recipe like I did.

5. Pour remaining sauce over the tortillas, and sprinkle well with cheese.

Bake for 20 - 25 minutes until cheese is melted and golden. I baked mine at 180 deg. C for 20 minutes, and then raised the temperature to 200 deg. C to beautifully brown the cheese. 


Hot and sizzling straight out of the oven

Sprinkle with lots of chopped coriander and serve straight away.  

Add some chopped capsicum for colour and vibrancy as well if you wish.

Serve with guacamole, sour cream, a green and red cabbage salad or any fresh salad,  fresh tomatoes, and whatever else you would like with it. This is the Guacamole recipe from taste.com I used and it was delicious. The  Shepherd avocados are amazing here at the moment. We eat some everyday. Avocado is a must to be served with Mexican food.

Cooked leftovers will store for 4 days in the frig, but I assure you they won't last that long.

TIP: All of the stages before assembly can be done the day before the dish is to be eaten. That way, it is easier to assemble the tortillas with cold ingredients on the next day. Tortillas will absorb less sauce during cooking, if they are assembled cold and it is easier too.

Freeze your leftovers, and bake them from frozen, for those nights you don't feel like cooking. I love those nights don't you?. Cover with foil, and bake for 20 minutes in a moderate oven, and then remove foil,  and bake them for 20 minutes at 180 deg. C/350 deg. F.

When I had the urge to cook some Mexican food, I might have been inspired by a book I had just read, titled American Dirt, written by Jeanine Cummins. It was on my Book Club's list, and when I finished it and read some book reviews I realised how controversial it has been in the United States, along with a lot of other upheaval. This was possibly because it was also on Oprah Winfrey's Bookclub list, a fact I'm pleased I was unaware of when I was reading it. It was basically about a middle class Mexican Mother and her son who were fleeing Mexico to escape the atrocities of a Mexican drug cartel, which had murdered her family, and now she feared for the life of her son and herself. It was quite a page turner, and fairly well researched. There wasn't much mention of cooking or food in the book that I can recall, but I was obviously very engrossed in it's Mexican flavour. 

Thanks for dropping by and I hope I have inspired you to spice things up a bit and cook some authentic Mexican food in your own home for a delicious change.

Adios, stay safe  and keep well,

Pauline


Sunday, February 7, 2021

IN MY KITCHEN - February 2021

 January 2021 was a month of recovery and readjustment from Christmas holidays, concern over the Covid crisis, tropical heat, some tropical rain, reading good books, relaxing, and not that much cooking or gardening. We were in Cairns, Far North Queensland for Christmas and New Year, and drove home on the 2nd January, just in time before the roads flooded the next day near Ingham cutting off the Bruce Highway to all traffic. We drove carefully through some torrential rain that day, and it was lovely and quite a relief to arrive home. Despite a wonderful holiday, there's no place like our own home. 

When we're in Cairns we always go to Chef Link, a countertop store and warehouse which supplies all of the Cairns restaurants, cafes and bakeries with their catering requirements, but is also happy to sell to and assist members of the public at no extra cost or the need for an ABN. I love this shop, and they are always so helpful. They will also accept orders online. Mr. HRK was looking at their coffee cups, I was looking for bread making equipment, and anything else that caught my eagle eye.

This time I bought a Herbert Birnbaum, plastic polypropylene Brotform, or a bread proofing basket. Brotforms, Bannetons, and bread proofing baskets are all the same thing. This range is made in Germany, is guaranteed to last a lifetime, and is recyclable.  I can't wait to try it. No need to use a tea towel or any cloth to cover the base, it just needs to be misted and lightly floured and the dough placed in it to rise. If it works to my liking, I'll invest in a rectangular one for a large loaf as well. I have a couple of round cane bannetons which I bought at Chef Link during 2020 last year, but they need a tea towel insert to work. Can't have too many though I reckon. 

Then we ventured onto the shopping centres, enjoying the air conditioning during the Cairns heat,  and whilst in a kitchen shop, we bought a new chopping knife. The Japanese make great knives, and their packaging is very attractive and designed to house the knife very well. Mr. HRK likes to use a good, sharp knife when he's chopping and I'm very happy to support him with that.


It is a Baccarat Kiyoshi Japanese Stainless Steel 42012 15 cm Chefs knife. The packaging says it is inspired by the traditional Japanese craftsman and Samurai sword makers.The blades are made from premium Japanese Steel that has been mined in the same Japanese region of Chuo-Ku, Chiba since the middle of the last century. I hope that is all true because I love a good story about the kitchen items we buy.


I still can't bear to discard the beautiful packaging, so I store the knife in its packaging in a drawer.

Australia Day, always on the 26 January,  was somewhat of a meat fest here , when good friends Paul and Jenny, brought over some very large, marinated beef ribs which we cooked in our BBQ. 


I made a sourdough cob loaf to complement the meal, and I used my cane proofing basket for this one.


There were some delicious salads, mixed grain, potato and tomato.


We had a great time and ate and laughed a lot.


And for dessert, I made Mango, Lime and Coconut Panna Cotta which I wrote about in a previous post, and here is the link to the recipe if you missed it and are interested. The recipe serves 6 people.

The seasonal Bowen mangoes were delicious during December and January here, but are finished now making way for the southern stone fruits.

I haven't been cooking nearly as much as I usually do, blame the heat and the holiday vibe. However I made some delicious Chicken Burritos from scratch recently. Believe me, there were no El Paso spice mixes to be found in this recipe. I'll be publishing it on my blog shortly. I just have to make them again  to take a photo of the finished product. I have photos of the process, but I forgot to take a photo before they all disappeared. Familiar story?

Throughout January it has been very hot and humid and we ate lots of salads. Salads, salads, and more salads was my mantra. Last week, I made some comfort food though, as my gut was telling me to take a step back and just eat some plain steamed vegetables, chicken, brown rice and so forth. Part of the problem I think is that Mr. HRK is waiting to have surgery on his sinuses this month, and as a consequence can't taste anything, which is quite frustrating for him so I have been trying to spice my cooking up a bit more than usual so that he can hopefully taste some food. I might have overdone it with spices when I have actually cooked, so I am being careful for a while and eating blander foods, while he continues to add condiments like Kewpie Mayo with wasabi and sweet chilli jam to our meals which he loves.

I made one of my favourite comfort food dishes last week for us, Paleo Beef Chow Mein which just has a minimal amount of curry powder added and is full of vegetables.  Always a winner. I used cabbage instead of kale which is in the original recipe.

Beef Chow Mein with some Kewpie mayo added for Mr. HRK.


Lots of fresh green cabbage added, yum.


Because I haven't been doing that much cooking compared to what I normally do, it's been the perfect time to clean and reorganise my pantry, spice drawer and baking products. I discarded quite a lot of unnecessary clutter and have made some space for the rest of the year. Mind you my friends, I found a couple of duplicate spice jars, as the small jars are now arranged in alphabetical order. I wonder how long they will stay that way. However I am very happy with the result.


We are looking forward to watching some tennis this month, with the Australian Open Tennis Tournament starting tomorrow in Melbourne. The overseas tennis players are so happy to be here and to be able to play after not much competition in 2020 because of Covid. Hope it all goes well for everyone. The summer of tennis in Australia is a long standing tradition. We love our tennis.

I am sending this post to Sherry of Sherry's Pickings for the In My Kitchen event, that was started by Celia of Fig Jam and Lime Cordial,  If you would like to join in, send your post to Sherry by 13th of the month.  Or just head over to her blog to read more In My Kitchens.
 
That's all folks and thanks for visiting.

Best wishes.

Pauline