
Thursday, May 26, 2022
Thai Chicken Risotto
Monday, May 23, 2022
We Are Harvesting and Preserving our Fresh Ginger, now is the right time to do it

Growing edible root ginger in the Tropics and sub-Tropics in the home garden is very easy, low maintenance and sustainable, the climate and the tropical environment is perfect for this crop. As long as the soil is fairly well drained, the crop thrives on heat and humidity, and tells us it needs to be harvested when it's flowers start to emerge from the ground on stalks and the leaves start to brown off. Sorry no photo of this. So for us, now is the time to harvest our crop. Fresh ginger is very expensive to buy, and can be used in so many dishes both savoury and sweet, in drinks, in smoothies, teas, really the list is endless. We love the flavour. It is also known for it's anti-inflammatory and anti-antioxidant properties, with gingerol thought to be its main bioactive compound. So lets get hot, spicy and sweet and start using ginger as often as we can.
Ginger is a root herb, and when it's dug up out of the ground the green foliage needs to be removed and placed in the compost bin, the soil needs to be washed off the roots, and the ginger cleaned very well ready for preserving how you wish, such as dehydrating, freezing or just cutting up fresh for use.

Over a cup of coffee one morning, Mr. HRK came up with the innovative idea of using our gurney to wash the ginger. What a great idea I agreed. So he placed our compost sifting rack over the compost heap box, spread the ginger over the rack and began gurneying. Ah, men and their gurneys, and women love them too here in the tropics. They are an essential piece of equipment to keep in the shed for reducing mould on driveways, garages, and all sorts of other essential things. Just can't do without them.
 |
| Cleaning the ginger with the gurney |

We were unprepared for what a great job the gurney did. Not only did the jet spray of water remove all the dirt, but also removed the outer shell leaving the fresh ginger ready for use. When we broke up some of the larger ginger clumps later, there was still a little dirt left in the crevices, but that was easily washed out in the laundry sink. I think we're onto something here he said. Yes, our annual ginger harvest has just become mechanised.
 |
| Mr. HRK sorting the ginger on the frame |
We harvested 2.6 kilos of ginger this time, which is a good amount for us to handle. We froze 500g in vacuum sealed pouches, and dehydrated the rest. 2.1 kilos of ginger dehydrated and ground to a powder, transformed into 319 g of dried ginger. Now, with supermarkets here selling ginger at $50.00 a kilo, no-one is going to buy ginger from the supermarket to make their own dried ginger spice. However, fresh ginger is selling at our local markets for $20.00 a kilo which sounds much more realistic. Given that the ginger we are seeing but not buying in our supermarkets is probably grown around Brisbane, being a Queensland crop, I wonder how the markup in price can be justified, when it can be sold locally for $15-$20.00 a kilo.The reality is though that a very small quantity is generally needed for cooking, so customers will buy a small knob of ginger and pay the price. I always leave a small amount of fresh ginger in the garden for our use, but the frozen ginger works in a lot of dishes.
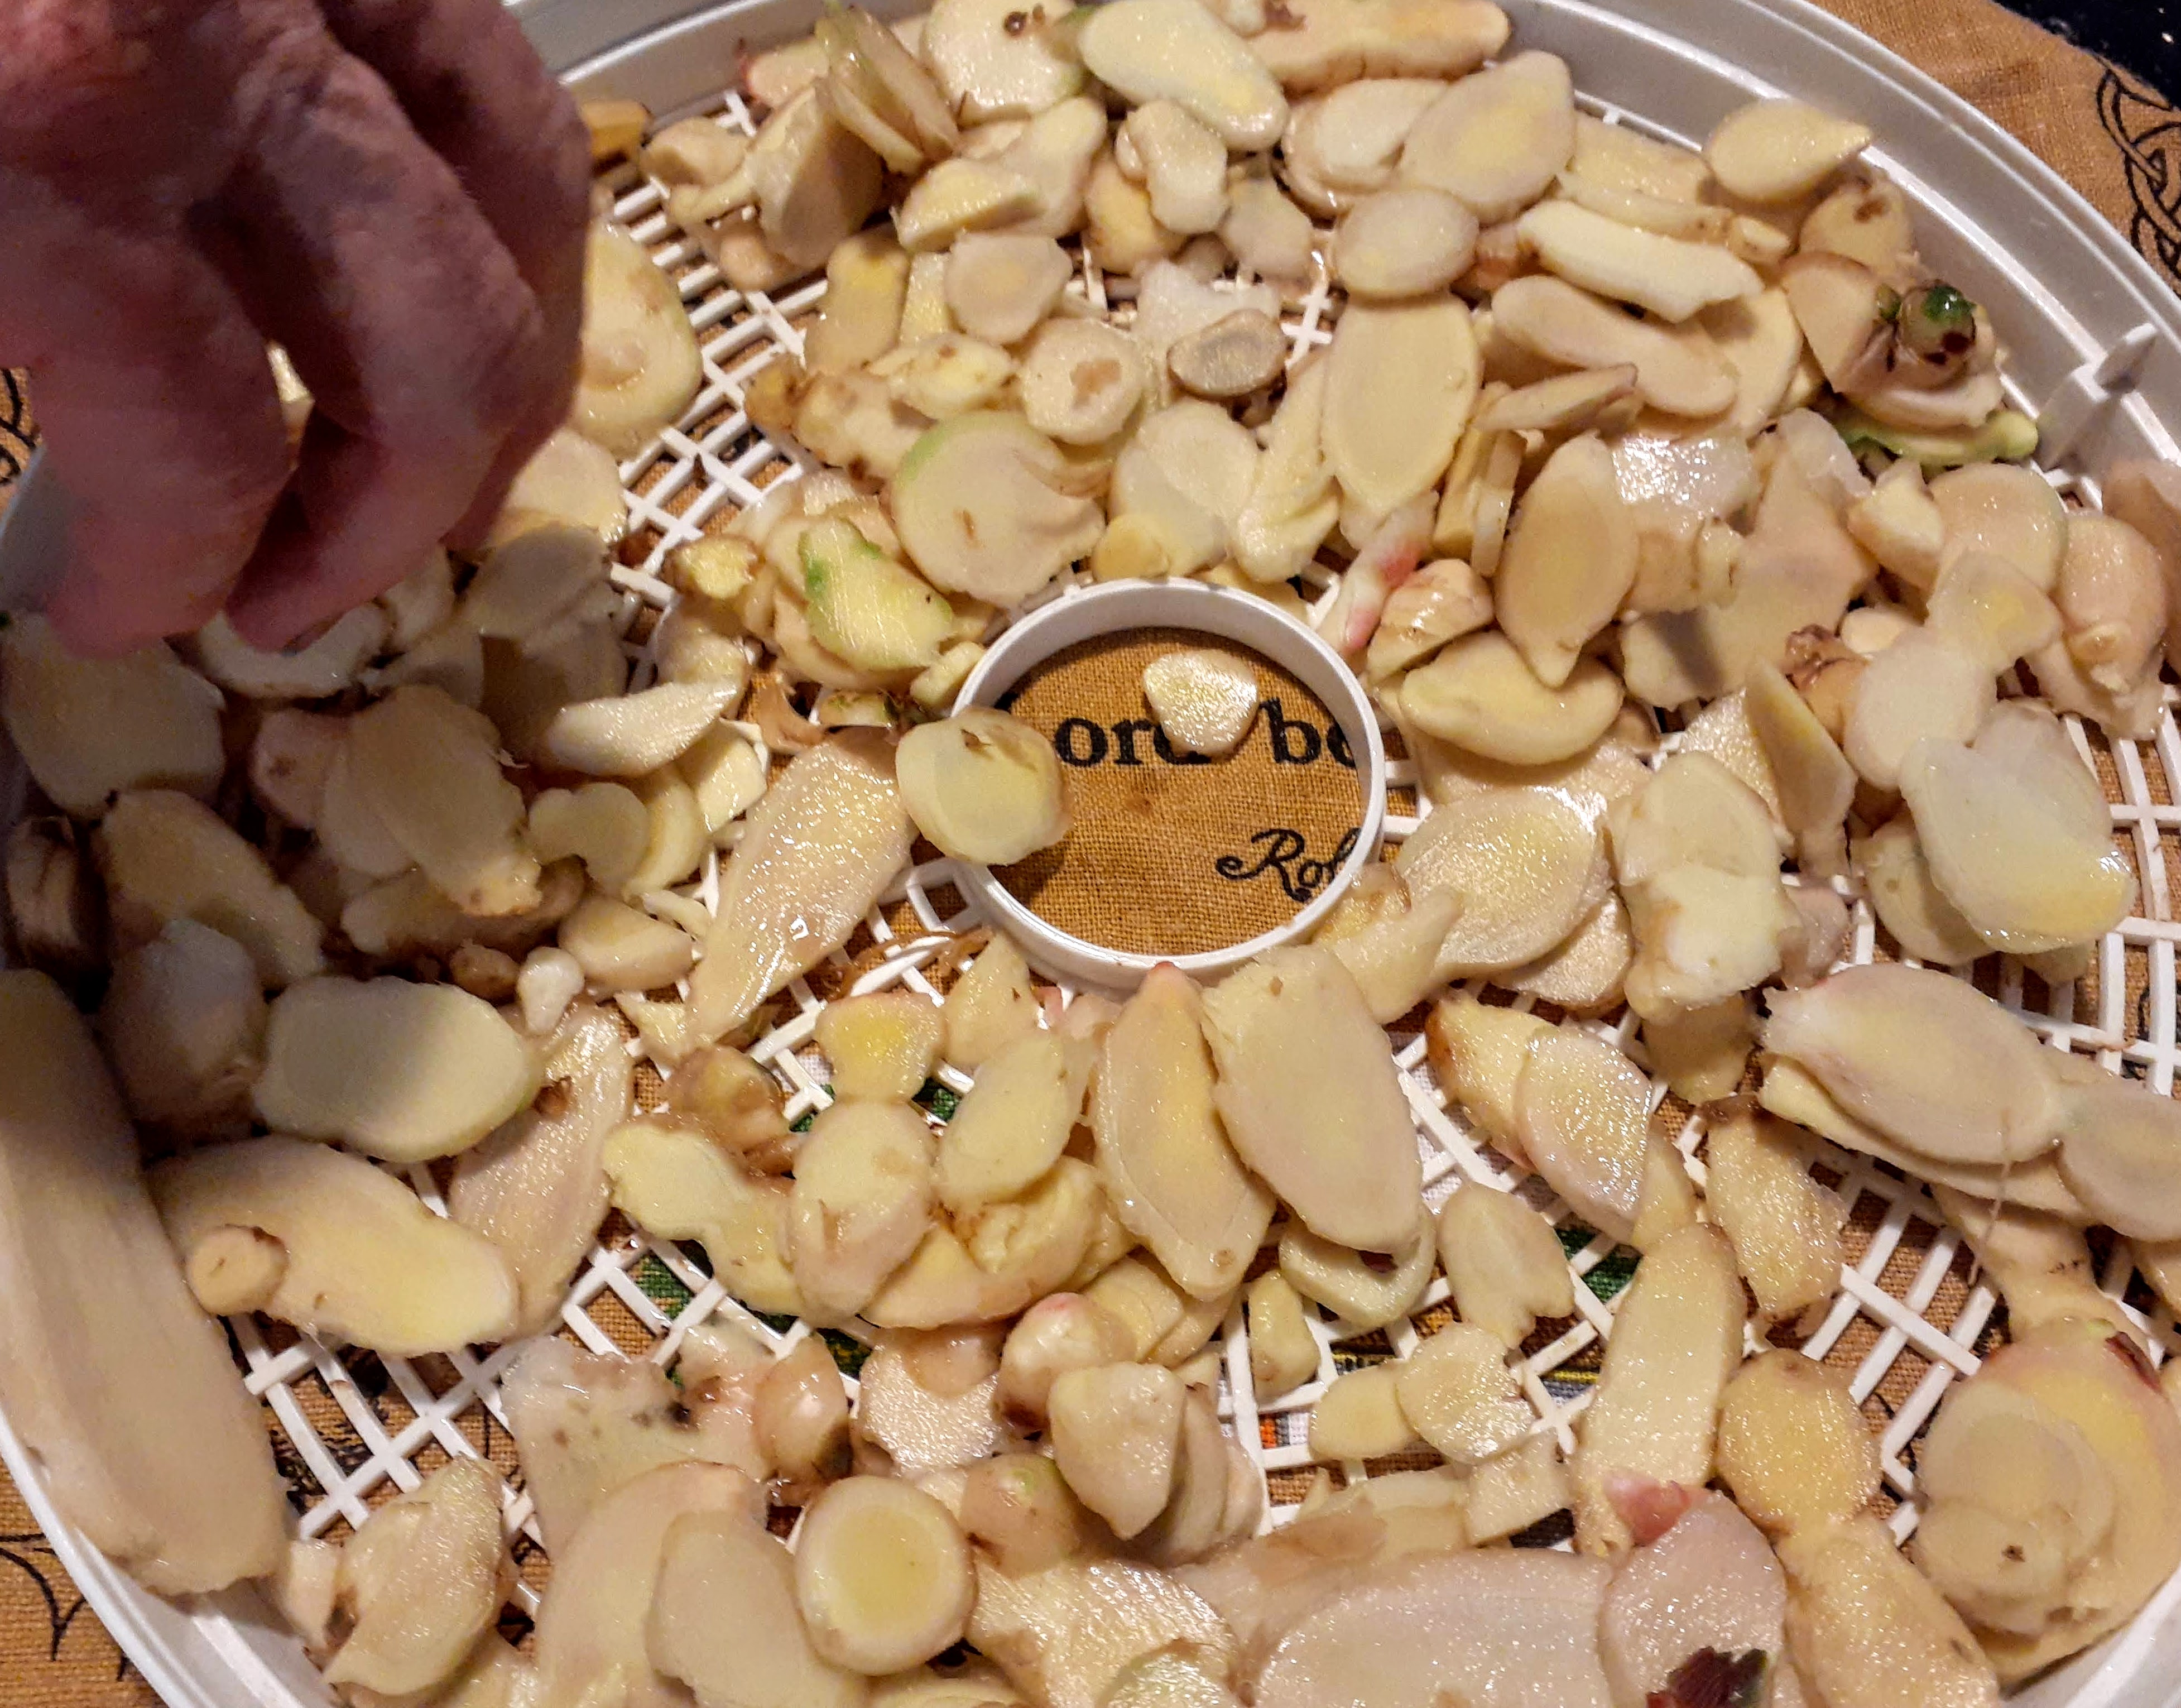
After washing and cleaning the ginger, it needs to be sliced finely for the dehydrator.

Ready for slicing and dicing

Mr. HRK sliced the large knobs very carefully using the mandolin, better him than me for that job, and I sliced up the small bits with a knife.

I washed some of the slices a little more in the colander to remove the last specks of dirt, dried them off with a clean tea towel, and then they were ready for the dehydrator.

Two large bowls of sliced ginger ready to be dehydrated

 |
| Washing off the last specks of dirt |
We arranged thin layers of sliced ginger on each tray of the dehydrator.

 |
| Dehydrated ginger |
The spice grinder is perfect for finely grinding the ginger into a powder

Oh my, the heady aroma coming from the ginger being ground up is quite intoxicating. I feel healthier by the minute.


And now we have our annual supply of dried and frozen ginger. The dried ginger we have made ourselves is so much more potent, aromatic and full of flavour than the ginger spice produced commercially.

It's quite traditional to now place a few pieces of ginger on a sunny windowsill until it starts to sprout some green shoots, which generally starts around spring time or even Summer and those pieces are then planted in the ginger garden, and become the new ginger crop for next year. However around that time, I find that even sticking a few pieces of ginger in the ground in early Summer will shoot and become healthy plants, without needing to have them shooting first.
Now for some cooking and baking, Ginger nuts, Ginger cake, Stem Ginger in Syrup, Ginger Pork, what else? I'd love to hear what your favourite recipe using ginger is.
Turmeric is also growing in tropical gardens, and right now is also the time to harvest and dehydrate or preserve your turmeric. Here is the link to a previous post I wrote about harvesting your turmeric.
Pauline
Saturday, May 21, 2022
Tropical Mango, Lime and Coconut Sago Pudding


Bring a little sunshine back into your life with this delicious Mango, Lime and Coconut Sago pudding. Sago pudding and Kensington Pride mangoes pureed with lime juice, are a perfectly balanced combination in this gorgeous dessert.
Wednesday, May 18, 2022
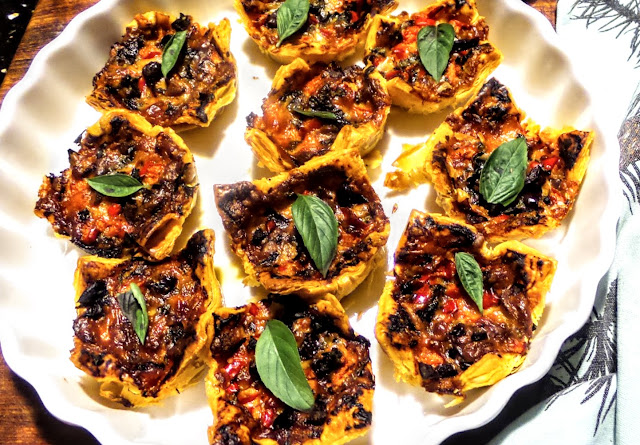
Vegetarian and Rustic Mini Party Pizzas


These very tasty vegetarian mini party pizzas are perfect for easy entertaining as finger food, or to eat on a lazy weekend for brunch with a salad, or as an appetizer. They can also be very economical and use up bits and pieces leftover in the refrigerator as the ingredients can be quite versatile, as you would find on most large pizzas. They don't need to be vegetarian either, add some finely chopped bacon, salami or ham as a topping, and add mushrooms or anchovies if you wish as well. The presentation can be quite rustic, as the small puff pastry shapes are never going to be uniform, even though they start out that way. I made up this batch when I was craving a slice of Italy with some pizza, and show me someone who doesn't love pizza flavours. Friends were coming over for drinks, so I made a batch of these for some simple and delicious finger food. The filling can be chopped up and mixed in advance, the night or the morning before, and stored in a covered container in the refrigerator.
It's Summer in Europe, the USA and the rest of the Northern Hemisphere, and casual entertaining with friends has started. My son who is living in France with his beautiful family, says that currently the Summer weather is lovely following a wet and miserable Winter, and people are celebrating and entertaining outdoors. Here in tropical North Queensland it's still warm and sunny in between rainy showers, so life isn't that different, we are still entertaining outdoors even though it is technically our Winter. We are waiting for the first real cold snap with excitement.

These Party Pizzas are so easy, that I feel a bit guilty about writing them up as a recipe. Do you sometimes just crave for something really tasty like pizza, but don't feel like making your own dough or visiting the supermarket to buy ready made pizza bases, or spending the money to buy take away pizzas? These are the easiest bite sized pizzas I have ever made. They may be just bite sized, but they have BIG-sized flavours, with zero effort. In fact you will feel as if you have had a night off from cooking and everyone will be happy to pitch in and help. Mr. HRK is is happy to cut the pastry sheets into squares for me while I oil up the muffin tins. So much of the preparation can be done in advance.
If you are planning some large scale entertaining, 90 little pizzas can be made from a 10 pack Puff Pastry box, and I have done this in the past for a party. They disappeared very quickly. Very economical when catering. This recipe is for 18 pizzas which Mr. HRK and I have been known to enjoy over a couple of days. Just increase the quantities as needed. These would also be perfect to take to work for lunches with a salad, if you are able to heat them up in a microwave. Perhaps though you are happy to eat them cold, some close members of my family are happy to eat cold pizza. I prefer it warmed up though.
Let's Cook:Preheat your oven to 180 deg. C
Equipment: Two medium size muffin trays
Ingredients for 18 mini pizzas
2 sheets of frozen Butter puff pastry
2 cups grated tasty pizza cheese
1 finely chopped red capsicum
1 cup classic pizza sauce (homemade or purchased)
1/2 cup chopped fresh basil or oregano
1/2 cup roughly chopped black olives
Finely chopped bacon, ham or salami to sprinkle over the top of the pizzas before baking if you wish for a non-vegetarian edition of these pizzas.
Partially thaw out two sheets of Puff Pastry. Cut each Puff pastry sheet into 9 squares. (For a larger quantity of pizzas, buy a 10 pack box of Puff Pastry and cut 9 squares from each sheet until each person has at least 3-4 pizzas)
Let's cook:
Grease two muffin trays very well with vegetable or olive oil, or use a spray can of oil, and place a pizza square in each muffin hole (18 for this recipe). Coat the pastry with tomato sauce with a small pastry brush. Prick the base of the pastries twice with fork to ensure the pastry base doesn't swell up. Cook in the oven for 10 minutes until the puff pastry is just coloured and starting to crisp up. This can be done in advance as well. Allow them to cool very slightly and then very gently ease the edges of pastry around the top away from the tin with a knife, sometimes it sticks to the tin. If the pastry has risen up from the bottom, just press it down gently with your fingertips to make room for the filling. This first step will ensure the pastry cases come out of the tin easily when cooked. I have made them before without prebaking the pastry cases first, but it makes removing the cooked pizzas a little more fiddly.
Throw the combined ingredients into a large bowl. Mix well together.
3/4 fill pastry cases with ingredients and sprinkle with ham, bacon or salami if desired.

Cook in a moderate oven, at 180 deg. C, for 10 minutes or until pastry and filling is cooked.

Ingredients for 18 mini pizzas
2 sheets of frozen Butter puff pastry
2 cups grated tasty pizza cheese
1 finely chopped red capsicum
1 cup classic pizza sauce (homemade or purchased)
1/2 cup chopped fresh basil or oregano
1/2 cup roughly chopped black olives
Finely chopped bacon, ham or salami to sprinkle over the top of the pizzas before baking if you wish for a non-vegetarian edition of these pizzas.
Partially thaw out two sheets of Puff Pastry. Cut each Puff pastry sheet into 9 squares. (For a larger quantity of pizzas, buy a 10 pack box of Puff Pastry and cut 9 squares from each sheet until each person has at least 3-4 pizzas)
Let's cook:
Grease two muffin trays very well with vegetable or olive oil, or use a spray can of oil, and place a pizza square in each muffin hole (18 for this recipe). Coat the pastry with tomato sauce with a small pastry brush. Prick the base of the pastries twice with fork to ensure the pastry base doesn't swell up. Cook in the oven for 10 minutes until the puff pastry is just coloured and starting to crisp up. This can be done in advance as well. Allow them to cool very slightly and then very gently ease the edges of pastry around the top away from the tin with a knife, sometimes it sticks to the tin. If the pastry has risen up from the bottom, just press it down gently with your fingertips to make room for the filling. This first step will ensure the pastry cases come out of the tin easily when cooked. I have made them before without prebaking the pastry cases first, but it makes removing the cooked pizzas a little more fiddly.
Throw the combined ingredients into a large bowl. Mix well together.

3/4 fill pastry cases with ingredients and sprinkle with ham, bacon or salami if desired.

Cook in a moderate oven, at 180 deg. C, for 10 minutes or until pastry and filling is cooked.
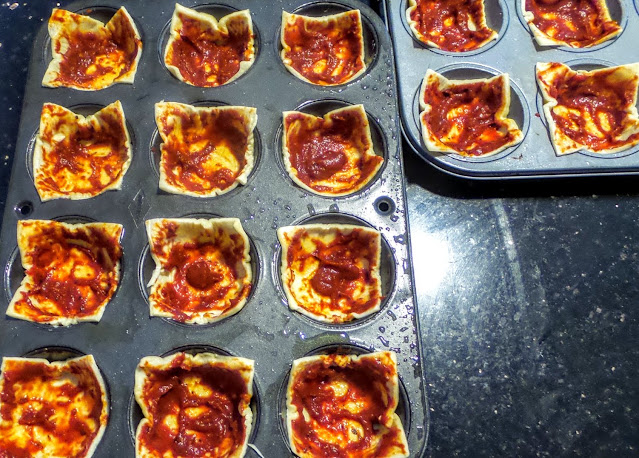
 |
| Straight out of the oven |
Allow to cool slightly, then carefully remove from the muffin tins using a butter knife, easing the edges out gently. Garnish with individual basil or oregano leaves, but be prepared, these little pizzas will do the disappearing act as soon as your family or guests dive in.

Notes:
- I make these mini pizzas quite regularly and they are always delicious, but when a friend asked me for the recipe, I changed the baking process slightly to ensure she would be very happy with the result. If you are using Teflon coated muffin tins which are not scratched at all, and still quite new, and you are short of time like most of us are, you could get away with not prebaking the pastry in the oven, which is what I have generally done. The tins still need to be greased very well with oil. However, I am advising you to prebake the pastry cases if you have time and your tins are well used, to ensure the pizzas can be removed easily from the muffin holes. Always leave the cooked pizzas to cool slightly before easing them from the tin
- Make these tropical, by adding a little finely chopped fresh or canned pineapple. Add some finely chopped ham, and there will be squeals of delight from the kids big and small, as who doesn't love ham and pineapple pizza. I know some of my readers don't like pineapple, however in my family we love it. Ham and pineapple pizza was always a favourite when our kids were growing up.
This is the link to our original "Make It Like a Man" style Pizza recipe ,which Mr. HRK makes when the Rugby League State of Origin matches are on. It is always delicious, and he adds lots of meat, however it is also delicious with a vegetarian topping similar to the one in my mini pizzas. We make one of each. Pizza toppings really are so versatile aren't they?
Bye for now,
Pauline
Bye for now,
Pauline
Friday, May 13, 2022
Lemon Sour Cream Bundt Cake

My Lemon Sour Cream Bundt Cake is tangy with lemon flavours, and has a firmer texture to it, which is essential for a Bundt cake. Pouring lemon juice over the cake when hot from the oven is the final touch to ensuring very citrussy flavours, which we all love.
Monday, May 9, 2022
Lime salsa with Sweet Potato Mash
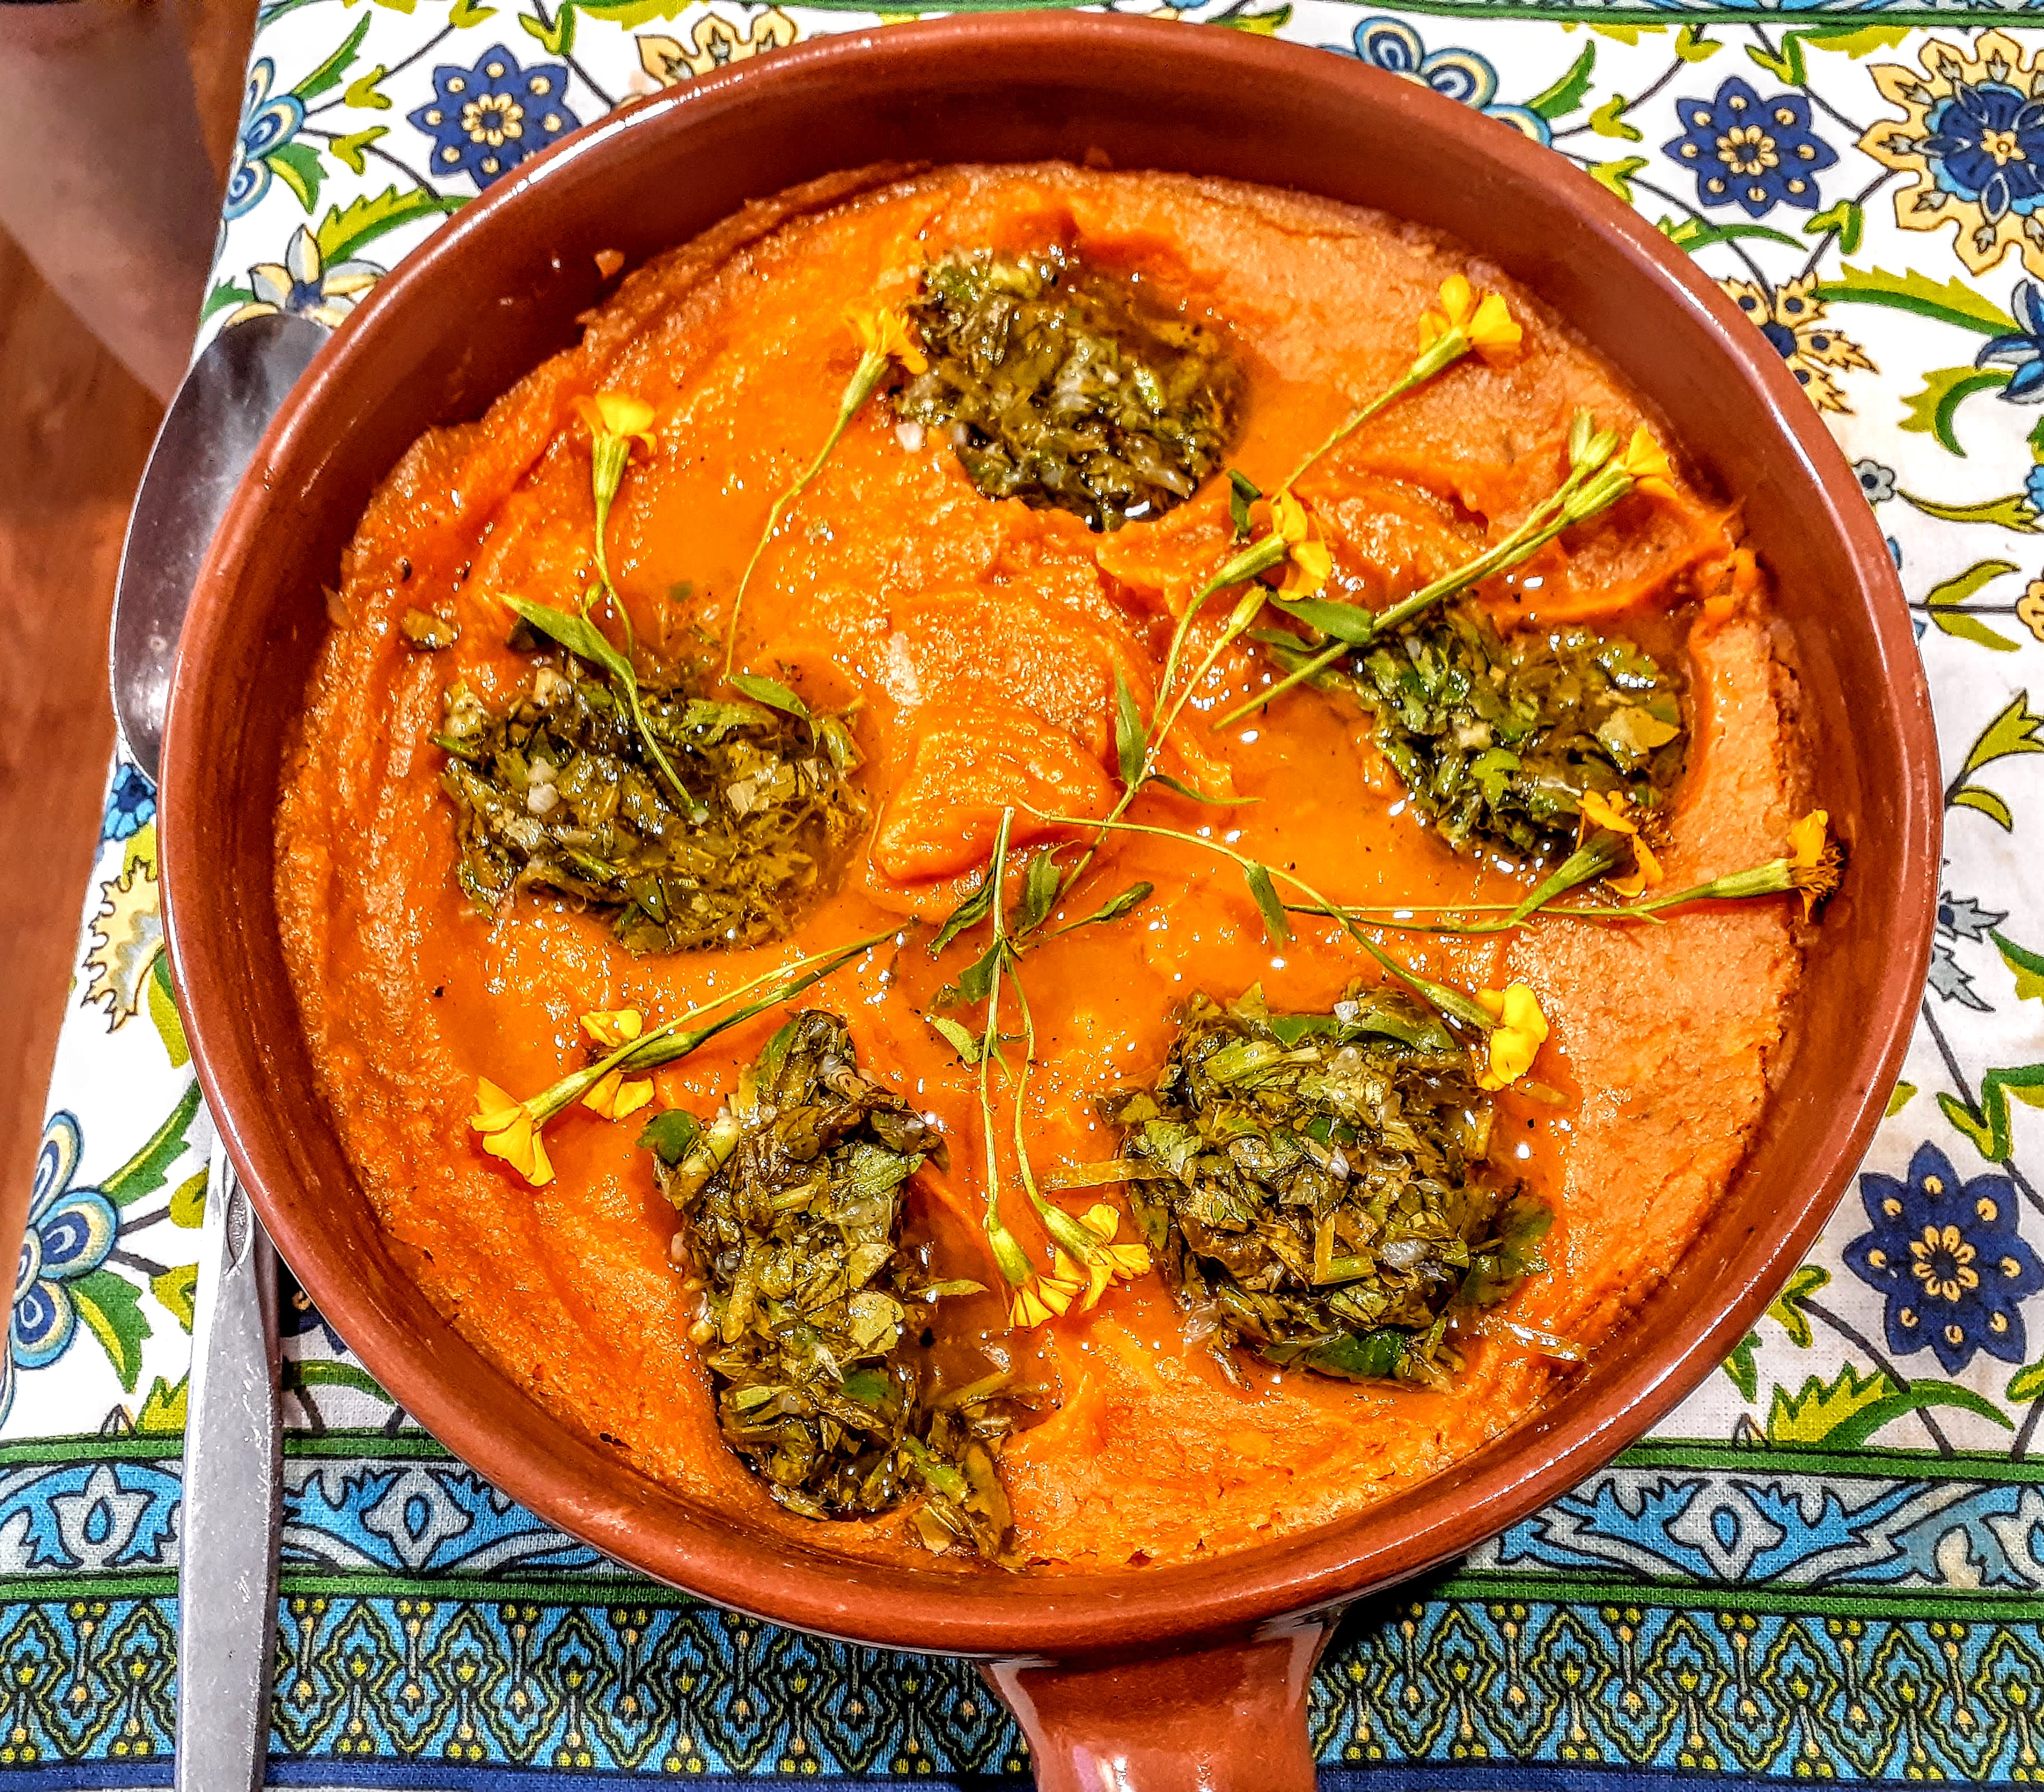
Sweet as sweet potatoes are exactly what their name suggests, lending themselves perfectly to both sweet and savoury cooking. They are in abundance right now, and along with tangy juicy limes also in season, I hope this simple recipe will tempt you to eat and celebrate the beautiful produce in season. Herby lime salsa is the perfect counterpart to the versatile sweet potato, which is only a distant relative of the normal potato by the way. Sweet potatoes are high in fibre, and their bright orange colour tells us they are also high in the antioxidant beta-carotene and Vitamin A., all supporting our immune function.
When I first tasted this dish at our foodie friends P&J's home, I just loved it, the lime salsa combined with the sweet potato was such an exciting surprise to my palate. It really tickled my taste buds. This dish shines alongside all sorts of foods, Middle Eastern cuisine, humble grilled sausages or a vegetarian or vegan spread. I baked the sweet potatoes ahead of time and kept the mash refrigerated to be reheated later, made the salsa the same morning, which meant the dish was easy to assemble just prior to eating.
Yotam Ottolenghi also suggests that after cooking, we keep the skins, brush them lightly with olive oil and roast them again for about 8 minutes, at 200 deg. C fan forced, and eat them as a crisp-like snack. Waste not, want not. Yes, it's one of Yotam's clever recipes.
Let's cook:-
Preheat the oven to 200 deg. C fan.
Serves four to six as a side
Ingredients:
1 kg orange sweet potatoes washed, skin left on and cut in half lengthways, from top to bottom
60 ml olive oil
5 g basil leaves, chopped
5 g coriander, finely chopped
1/2 garlic clove, crushed
2 large limes, finely grate the zest to get 2 teaspoons, then juice to get 1 tablespoon
salt and black pepper
Method:
Massage the cut sweet potatoes with 1 tablespoon of oil and season with 1/4 teaspoon of salt. Line them up on a high sided baking tray lined with baking parchment, flesh side down, and roast for 30-35 minutes, until very soft. Be careful removing from the oven as some juice will have come out of the potatoes.
While the sweet potatoes are roasting away, make the salsa.
Put the remaining 3 tablespoons of olive oil into a small bowl. Add the remaining ingredients with a good pinch of salt, and gently stir to combine.
Remove the sweet potatoes from the oven and allow to cool. Remove the skins, they should just slide off easily, or scoop out the flesh. Baking them this way results in a softer vegetable and better flavour. Set aside the skins to use later if you wish. Mash the flesh in a bowl with 1/8 teaspoon of salt and plenty of black pepper until quite smooth.

Transfer to a platter, make dips in the surface of the sweet potato, and spoon in the salsa. Decorate with extra herbs or some sprigs of tarragon.
Serve hot.
The 2nd edition below of Sweet Potato Mash with Lime Salsa.

Warm wishes
Pauline
Sunday, May 1, 2022
Orange and Barley Salad followed by Coconut Lime Syrup Cake, it's a citrussy kind of day

Subscribe to:
Posts (Atom)