There's no place like home, as we say. We have been home from holidaying in Cairns for a week now, and although it was a very lovely break, and we had a wonderful time with our family and very special times with our daughter, it's nice to be safely home. The Bruce Highway is very busy to drive on at this time of year, people are travelling North to Cairns and the Cape, in caravans and campers, often in convoys, and so the secret is to leave very early in the morning before the caravanners pull out from their free roadside parks and caravan parks. Many of the new In My Kitchen pieces this month are from holiday shopping. This post is part of the monthly In My Kitchen series, a global event, hosted by the lovely
Sherry from Sherry's Pickings. I hope you enjoy it.
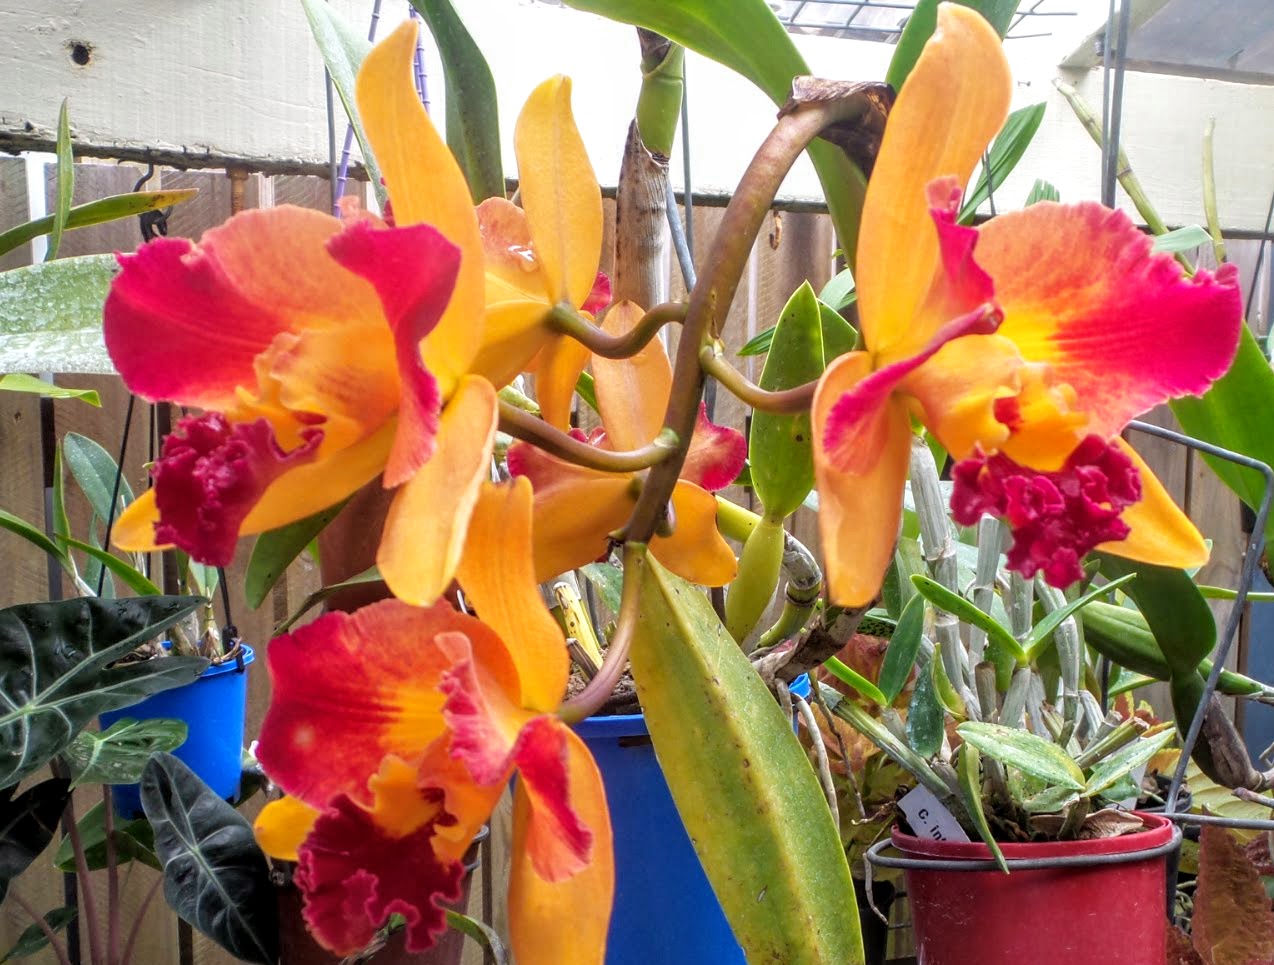
I came home to the flowering Sunny Chief. Rth. Chief Sunny Dragon is her/his simple name and I am always thrilled when this orchid is in bloom. I love being able to look at the flowers from my kitchen when I am cooking in there.
I took this photo of the Chief from another angle on my kitchen bench next to a vase of nasturtiums and a lovely golden double gerbera from our garden, a combination of some of my favourite colours to brighten up the kitchen. I love to have fresh flowers in the house, don't you?
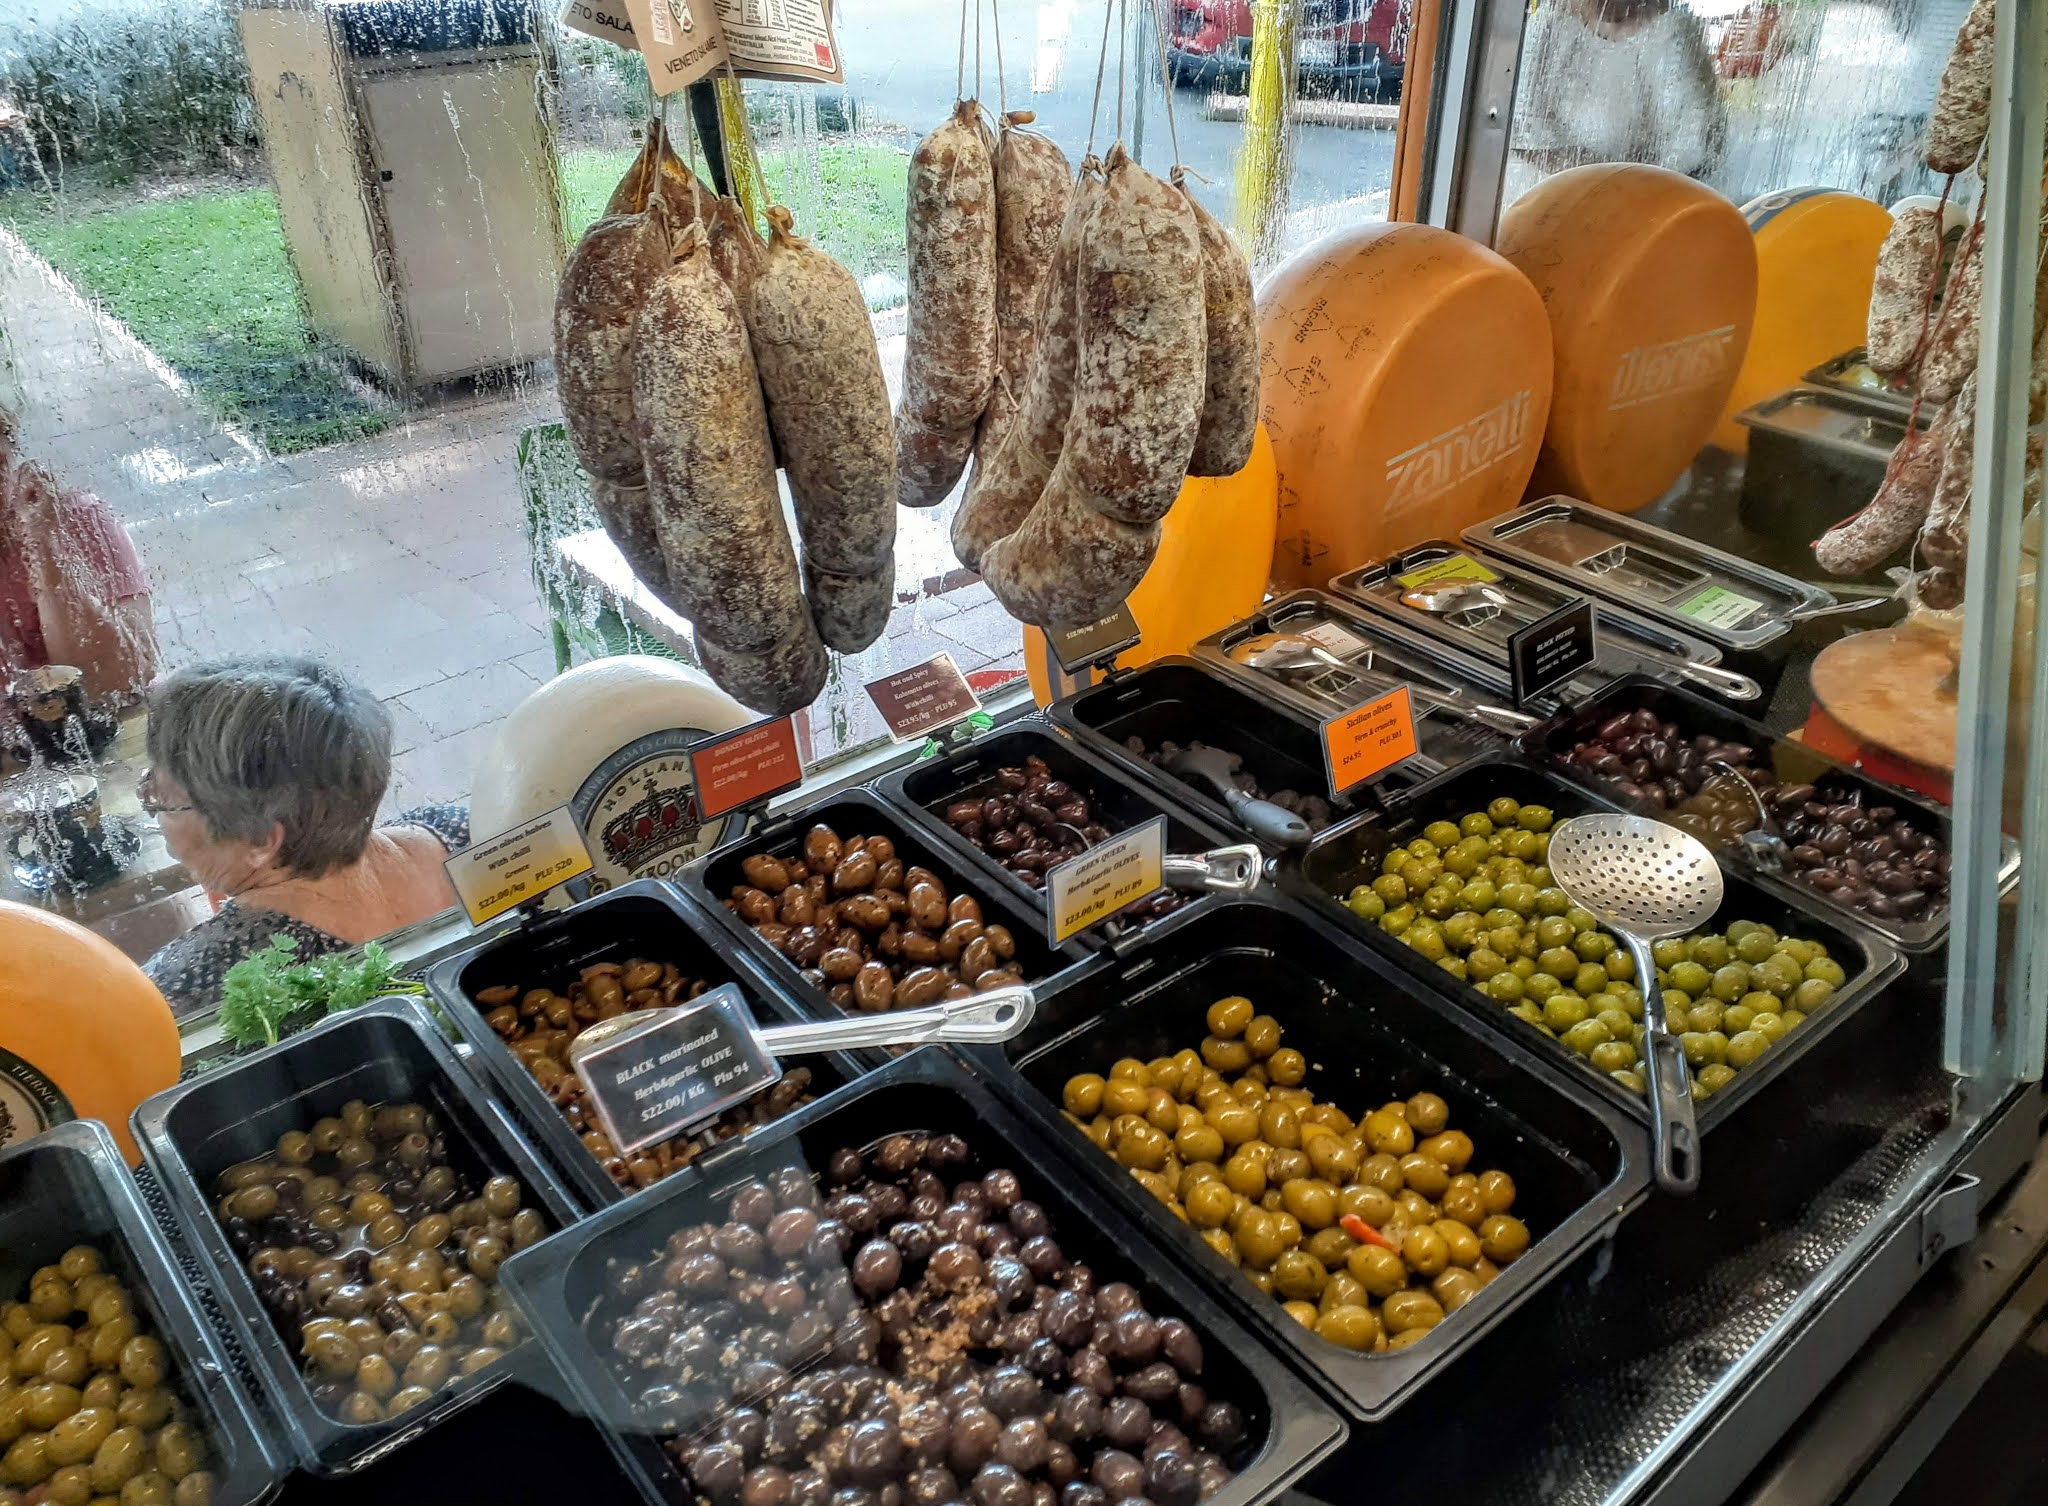
We took it a bit slower driving to Cairns this time, and stayed overnight in Ingham, about 5 hours drive from Mackay, to break the drive. Because we then had a whole day to drive to Cairns and it should only take four and a half hours at the most, we indulged by stopping in Innisfail, a little further North, and visited an amazing little Italian deli called Oliveris which has been on my list to explore for a few years now. It is an institution in Innisfail, and to walk through the front door is to step back in time and explore an authentic Italian owned business, catering to a a proud and food loving predominantly Italian population.
Oliveri's is a food lovers destination and has the best selection of olives, salamis, packaged Italian goods, and noughat, and will also make visitors a delicious lunch. What impressed me is that the staff behind the counter are really interested in each customer and take plenty of time to answer any questions. They really know their stuff.
Next time we pass through we will hopefully have our car refrigerator on board, and then I can really shop to my heart's content.
 |
| This is my kind of relish, and it's not too hot. |
 |
| This was delicious on our salad last night. |
While I was inside shopping at Oliveri's, Mr. HRK and Locky mingled with the locals, and walked the main street of Innisfail. They found another shop which he said stocked everything, and my hubby who usually doesn't like shopping, lashed out and bought me a very solid grater, with a beautiful wooden handle. He knows I have a hazardous relationship with graters, but this one will hopefully be a lot safer to use. I love it. In a future post, I'll write more about our road trip to Cairns, but for now I am aware that this event is about what's actually In My Kitchen, and everything I am writing here is my opinion.
 |
| My new heavy duty Grater |
I also plan to make a pillow slip for my little grandson out of the beautiful new tea towel the grater is sitting on. It is designed in Australia and has colourful images of sea creatures, corals etc, perhaps it replicates out great Barrier Reef. Hugo is obsessed with sea creatures.
When we are in Cairns, we go out for coffee most mornings which is a holiday treat for us as we don't tend to do it here at home, as Mr. HRK makes a delicious espresso coffee for us each day, every bit as good as anything we can buy. One of the coffee shops we like to visit up there is the Sipping Duck, which is near Freshwater on the Northern side, and has now branched out into making coffee based products. I thought the Coffee Spice Rub and the Dukkah looked very interesting. The staff at Sipping Duck are very good at imaginative coffee art, and a clever Sipping Duck often decorates the coffees.


We drove up to the Atherton Tablelands from Cairns for the day, and visited the Nerada Tea Plantation. This business is owned by the Russell Family, 3rd generation tea producers., who celebrated 50 years of tea production in 2021. The family started out in Britain, before heading to Malaya in 1880, and then later started their tea plantation in Australia when they realised the conditions on the Tablelands were perfect for growing tea. An Australian owned business during an era of foreign ownership is something to be celebrated and supported.
 |
| Photos of the Nerada tea plantation |
I have a new Bread Proofing basket, this one is oblong, which I am looking forward to using. Another locally owned business that we like to visit in Cairns is Chef Link, a large kitchen warehouse, which caters for the local restaurant and cafe business but is also open to the public. The staff there are very knowledgeable and I suspect they were chefs in a previous life. I never fail to find something I need to bring home from there.
I was given some very juicy backyard limes last week by a generous neighbour, and made a couple of batches of Lime Curd with them, always delicious, using exactly the same technique and quantities as my Lemon Curd recipe. You can find my
microwave lemon curd recipe here. I had some tart shells in the freezer, which were a perfect size for these tartlets.
Here are some of my Lime Curd Tartlets that I garnished for a bit of fun with
dried mandarin slices using mandarins from our mandarin tree, cinnamon spice, and golden kiwi fruit, and lots of fresh cream. Yum,they were delicious. You can also read the story on how we dehydrated our mandarins
here if you missed it last time.
I bought these sweet pastry shells recently at a local deli, they don't require any cooking, and would also be perfect for making fast and easy tartlets.
My heartfelt thoughts are with those of you still in lock down. I hope you are managing to enjoy the simple things in life, including some delicious homemade meals. We aren't in lock down here but need to sign in with our Queensland phone app at supermarkets and restaurants etc. However we still need to be fastidious with hygiene and I am quite happy to avoid crowds these days, thankfully I love being at home. Until next time, thanks for stopping by.
Warmest wishes
Pauline