"If the answer is chocolate, who cares what the question is."
%206.jpg) |
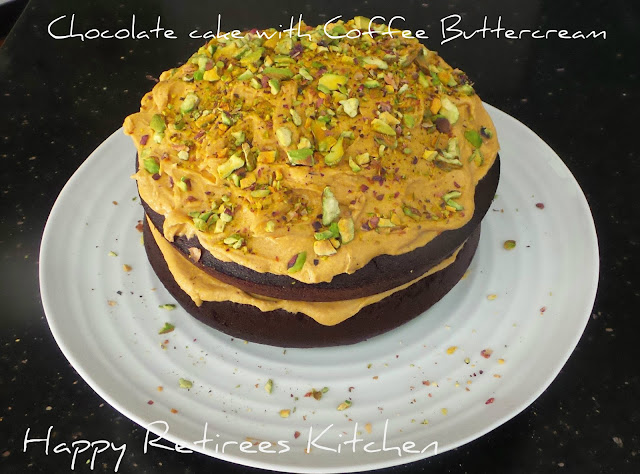
| Chocolate Fudge Cake with Coffee Buttercream |
I'm in "Chocolate Heaven" with this cake. I might have mentioned previously that I've been working through chocolate cake recipes in my quest to find what I think is the perfect chocolate cake for all occasions, my go-to no fuss chocolate fudge cake, my signature cake. This is it for now, my perfect chocolate cake. MasterChef Winner Emelia Jackson says that this cake will always produce the same amazing result, whether it be for a birthday party, or a casual get together with friends where dessert is required, just decorate it accordingly. Dress it up with a heavenly ganache or go simple with a dusting of cocoa or icing sugar, and a serving of cream. Bake it into cupcakes, use it in a trifle, loaf cakes, there is no limit to how you can bake it or use it. Instant coffee is the secret weapon in this cake, it enhances the flavour of the chocolate without adding its own coffee flavour. I also like that there's no melted dark or milk chocolate in this cake batter, just rich, dark Dutch cocoa.
I have been debating whether or not to post this recipe just yet as there is another buttercream that I would like to fill and cover this cake with, and hopefully that is coming when the weather continues to cool down. I'll let you know when that happens, because Emelia's Malted Buttercream that I'm talking about looks like a real showstopper for a special occasion. This cake recipe is extracted from "First Cream the Butter and Sugar", by Emilia Jackson, and I can't wait to try some more of her recipes, because I love this cake. Needless to say, I couldn't wait and had to share the recipe with you.
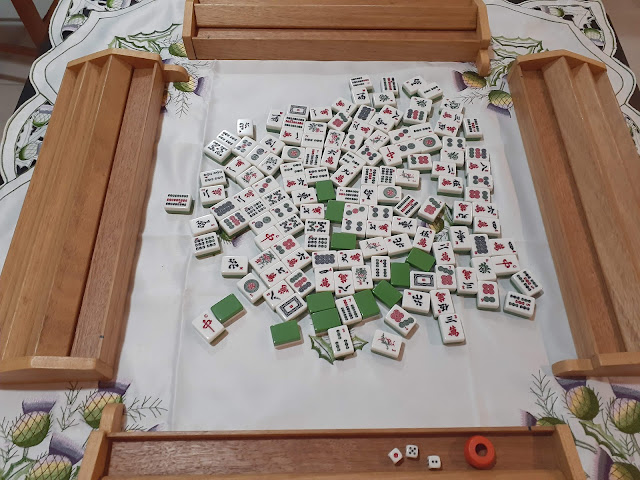 |
| Mahjong table setup in the air-conditioning and waiting for my Mahjong friends to arrive. |
I chose to make Nigella Lawson's Coffee Buttercream this time because I love it, and I've made it before with a different chocolate cake recipe. I was in a bit of a rush because I'd made this cake for the Mahjong afternoon tea at home, it comes around quickly, and I wanted a buttercream that I could depend on when made in advance. Even though the air-conditioning was on at home the day I iced this cake, there were a lot of other things going on around me. Aren't there always though?
Ingredients:
Makes a 20 cm two tier cake
380 g light brown sugar
250 g cake flour (store bought or see tip below for making your own)
100 dark Dutch cocoa powder (I used Plaistowe premium Dutch processed from Woolworths)
1 1/2 teaspoons baking powder
1 teaspoon bicarbonate of soda
1 teaspoon fine salt
2 teaspoons instant coffee powder
200 ml boiling water
100 ml neutral-flavoured oil, such as vegetable or canola
200 g sour cream
4 eggs
chocolate shavings to garnish (optional)
Method:
Preheat the oven to 160 deg. C (140 deg. C fan forced)
Line two 20 cm round cake tins with baking paper
Whisk the brown sugar, flour, cocoa, baking powder, bicarbonate of soda and salt to ensure that there are no lumps. (No need to sift)
%205.jpg)
Dissolve the coffee in the boiling water in a largish jug, then add the oil, sour cream and eggs and whisk until thoroughly combined. Make a well in the centre of the dry ingredients and pour in the egg mixture. Fold until just combined. We want a lovely tender cake, with a good crumb, overmixing will prevent this from happening.
%203.jpg)
Split the batter between the cake tins and bake for 50 minutes. This was perfect for my oven but test it with a skewer inserted into the center of the cake. If it comes out clean, the cake is cooked.
Leave the cakes to cool for 15 minutes before turning them out onto a wire rack to cool completely.
%202.jpg)
Pauline's baking notes:
Adding coffee to the cake batter enhances the flavour of the chocolate. You can't taste the coffee.
What I also love about this cake is that it doesn't sink in the middle as some do.
Cake flour: After making this cake, I am really on board with using cake flour, for a superior and tender cake crumb. Cake flour is a low protein flour that creates a very tender fluffy and light cake. You can make your own. Just measure out 430 g plain flour, then add 70 g corn flour and sift together. By adding the corn flour, the gluten content in the plain flour is reduced from 11 per cent to between 7 and 9 per cent. (Emelia Jackson). I've started making it in a large batch so I am always prepared for a cake making session.
For medical reasons the only nuts I eat now are walnuts as they are the softest nut, so I didn't add any chopped nuts to the photo of the cake. However, it looks and tastes lovely with chopped pistachios on top of the buttercream.
Nigella Lawson's coffee buttercream
Generally, when I make icing for a cake, I just do it the traditional way as I have always done and add the ingredients until it looks, feels and tastes right. However luscious Buttercream is a different story so I followed this recipe.
Ingredients:
350g icing sugar.
175g soft Unsalted Butter. softened
Instant Espresso Coffee Powder, 2 1/2 teaspoons, dissolved in 1 x 15ml tablespoons just-boiled water
(All of my tablespoon measurements are 20ml and that is what I probably used in this recipe with no problems)
This icing is a cinch to make in a food processor. Because it is warmer and more humid where I live than where this recipe was probable tested, I thought I might have problems with the icing melting all over the cake, but it held its consistency beautifully.
Method:
- Pulse the icing sugar in your food processor a few times to remove any lumps but make sure the feeding funnel on the lid is covered so that icing dust doesn't fly everywhere:)
- Add the softened butter and blitz to mix, scraping down the bowl once or twice.
- With the motor running again, pour the coffee down the funnel of the processor and quickly blitz. Remove the blade carefully and scrape down the blade with a spatula.
- Place one of the cakes on a serving plate or stand, flat side up. It is probably better to place the highest cake as the base. Spread the lower layer generously with half the coffee butter cream, then make a sandwich with the second layer, with the top of the cake facing upwards.
- Pile the rest of the buttercream on top and use a wide icing knife or spatula to spread the icing, over the cake. Nigella uses the word "swirlingly" to describe this technique which I love.
%204.jpg)
.jpg) |
The bottom layer of the Chocolate Fudge Cake is iced.
One iced layer of the cake might be enough for morning or afternoon tea, so sometimes with a double layer cake I freeze one of the layers for another occasion. |
 |
| This is a different chocolate cake recipe that I made a few years ago when I used the Coffee buttercream as well. |
Cake bakers say that money can't buy happiness, but a divine chocolate cake can. Decorate as you wish. I sometimes use smashed pistachio nuts, or you could use chocolate covered coffee beans as Nigella Lawson did or white chocolate buttons for contrast. It is your choice. There is so much to choose from.
I think I need to tell you all that I'm not a chocaholic, in fact I rarely eat chocolate at all, however I love a delicious chocolate cake. How about you?
Warm wishes,
Pauline
.jpg)

%206.jpg)

%205.jpg)
%203.jpg)
%202.jpg)
%204.jpg)
.jpg)


