Hot Buttered Fruit and Nut Sourdough Toast for breakfast or anytime: makes 1 loaf

It's time again for BKD (Brookford Kitchen Diaries) cookbook club. Sometimes I manage to link up, sometimes not depending on whether or not life gets in the way. I'm promoting cookbooks in a circular kind of way in this post, and bread, yes I'm a fan. Most of my bread baking is with sourdough. This month we're talking about all things bread, whether it be toasties (formerly toasted sandwiches), jaffles or hamburgers. I am thinking sourdough, as that is what I mostly work with, however does pizza qualify? Why not I say, it's really an open Italian sandwich after all.
The book that Jo is referencing is Tara Wigley's How to Butter Toast: rhymes in a book that help you cook. It's not a cookbook, but essentially a poetry book, poems that will help you cook, no recipes included. So as the theme is about how to Butter Toast, what springs to mind for me, in addition to crusty toasted Sourdough bread, is Sourdough Fruit and Nut Toast, hot and buttered, with real salted butter. I don't have time to create anything new for this post, as there is a short timeframe for linking into the club, so time is of the essence. Therefore I am revising a previous post of mine on toast, that is Sourdough Fruit and Nut Bread Toast. It works for me, it's delicious, I hope it works for you too. There may be a couple of other thoughts to follow as well, time permitting.
Credit for the original recipe goes to Emilie Raffa from her cook book "Artisan Sourdough Made Simple", for the inspiration to make a delicious fruit loaf. This is my sourdough baking Bible. I tend to sometimes play with the dried fruit combinations in this loaf, depending on what I have on hand, but I love the addition of dried apricots.
There's no need to go to a coffee shop or a bakery to experience a delicious slice of raisin toast, you can make the equivalent yourself, only better, baked from scratch. Chewy sweet apricots and nutty sunflower seeds combined with your own selection of dried fruits are a powerhouse lineup. You can use bits and pieces of whatever dried fruits and nuts you have for this recipe, so it's both economical and fun at the same time. I always have half full packets of dried fruit and nuts in my refrigerator, as they can go mouldy during our Summer, so this a perfect way to use them up. You can enjoy a thick, toasted buttered slice of fruit and nut loaf with a cappuccino on the side, in the comfort of your own home.
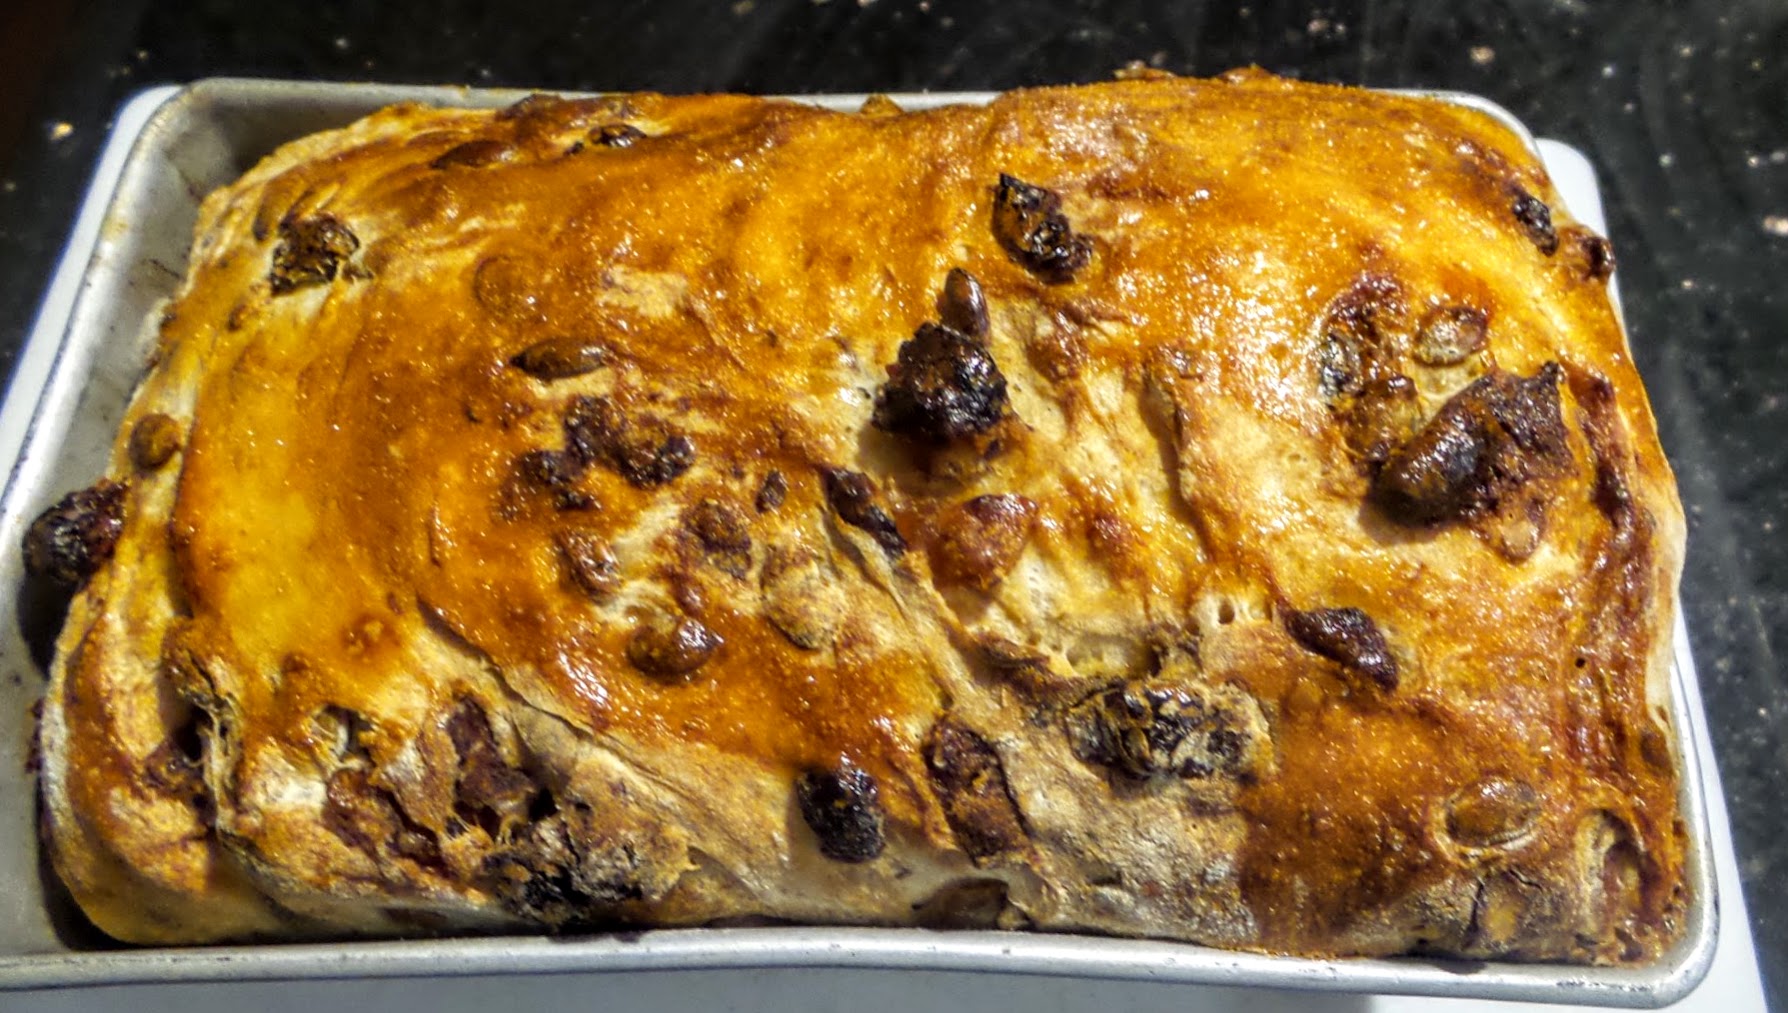
Baking with sourdough isn't a quick fix, but it's well worth it, for superior flavours, great crumb, the health benefits of sourdough yeast, and the self satisfaction of having achieved a great result. The moisture in the dried fruit will keep the loaf fresh for 3-4 days and there's no need to add extra sugar to the recipe. Store wrapped in a tea towel or alfoil in a bread bin. However, if it is hot and humid where you live, I suggest you keep the loaf covered in the refrigerator.

The fruit should be chopped into small pieces as it will plump up when soaked. I always think that Sunday morning breakfast is special, so I like to prepare this loaf the night before, and bake it Sunday morning in time for breakfast, which can be a little late on a Sunday, don't you think? Your home will smell like the artisan bakery up the road, delightful. Let's start baking, I'm in the mood, how about you?
Ingredients:
The Dough:
A few days before you need to start baking, feed your sourdough starter until bubbly and active. (Although mine is often bubbling after 2 days. Store at room temperature until ready to use.)
65 g (1/3 cup ) bubbly, active sourdough starter
325 g (1 1/3 cups plus 1 tsp) warm water
500 g (4 cups plus 2 tbsp) bread flour
9 g (1 1/2 tsp) fine sea salt
Fruit and Nut Filling:
100 g (about 1 cup) mixed dried fruit which can include raisins, cherries, blueberries, and cranberries. All roughly chopped.
50 g (about 6 whole) dried apricots, diced
50 g (1/3 cup) sunflower or pumpkin seeds
10 g (2 tsp) pure vanilla extract
24 g ( 2 tbsp) sugar
1 g (1/2 tsp cinnamon)
Butter for coating the loaf tin
An egg for some egg wash
Preparing your dough:
Add the bubbly sourdough starter and the water to a large bowl and whisk together with a fork. Gradually add the flour and the salt and mix to combine with the sourdough. Using your hand, just form a dough which is still a bit dry, and a bit rough. It will look a bit shaggy. This is all you need at this stage. Smooth dough will come later. Cover the dough with a damp tea towel and let it rest for 45 minutes to an hour. Even two will be ok, depending on your commitments.
At this stage you might wish to feed your remaining starter with fresh flour and water for use with another baking project such as a loaf of bread, and store it in a warm place.
Chop up your dried fruit, and place the sunflower seeds and the fruit in a bowl and add just enough warm water to cover the mix. Add the cinnamon, sugar, and vanilla extract and stir to combine. You will need to drain any excess liquid from the mix before adding to the dough. There won't be much liquid and the dried fruits will have soaked up the flavours.
Adding the fruit and seeds:
After 45 minutes of the dough resting, add the drained fruit and seeds to the dough mixture in the bowl. Gently knead the dough in the bowl, until the fruit and seeds are incorporated. This will only take a couple of minutes, if that.
Overnight bulk rise:
I use a plastic shower cap to cover the dough in the bowl however using a damp tea towel will be fine. Find a warm spot and let the dough rise at room temperature until doubled in size, this will take about 8 - 10 hours. That's why it's good to let the dough rise over night, while you are sleeping. Suggested temperatures for rising are 70 deg. F or 21 deg C. However don't lose any sleep over these temperatures being correct, just a warmish spot will be fine.
Shape the dough:
In the morning, tip the dough onto a slightly floured bench. Using your finger tips, gently dimple the surface of the dough which will release some of the air. Roll the dough into a log, and tuck the ends underneath. Let this rest for 5 - 10 minutes.

Select a loaf pan, 23 x 13 cm (9 x 5 inch). Prepare your loaf pan by lightly coating it with butter.
Using your lightly floured hands, tighten the shape of the dough by patting it between your hands and pulling it toward you until it will fit in the tin.

Now for the Second Rising!
This should only take 1 to 2 hours, not long at all. Cover the dough in the loaf tin again with the shower cap. Let it rise to about 2.5 cm (1 inch) above the rim of the tin.
Preheat your oven to 230 deg. C (450 deg. F)
Time to Bake:
Add some egg wash with a pastry brush to the top of the loaf to create a shiny, brown crust. Egg wash is a simple mixture of egg and a little milk. Place the loaf tin on the centre rack of your oven and reduce the heat to 200 deg. C (400 deg F). Bake for 45 to 50 minutes.
Check the loaf halfway through baking, and use alfoil to cover the loaf like a tent if the fruit is starting to brown too quickly.

Cool the loaf in the tin for 10 minutes. Transfer to a wire rack and finish cooling the loaf before cutting into slices and spread with fresh butter.


#sourdough #sourdough bread #baking #bread baking

I love fruit and nut breads -- and yours looks fantastic, Pauline. I have still yet to play with sourdough -- I have always liked yeast breads. Maybe someday. Bread is always a good subject for a cooking book club -- and, yes, pizza counts!
ReplyDeleteThanks David, it's never too late to start playing with sourdough. Just back home from being away, I have two loaves of sourdough bread proofing this morning. Will be nice for lunch.
DeleteOh. My. That is the toasted fruit bread of my dreams. With real butter. Melting. Yum! As an aside, that pizza looks the business already. Happy new pizza oven.
ReplyDeleteJo thanks so much for your reply. I know that we are really going to enjoy our pizza oven, I love that hubby has taken it on board too. The fruit loaf really is delicious.
DeleteThe fruity sourdough loaf looks sensational! Love that golden rustic looking pizza too.
ReplyDelete
DeleteThanks Angie, the pizza was really good, and we adore the fruit loaf
I'm thinking about how divine a slice of this would be right now!
ReplyDeleteTandy I need to make another loaf very soon. Thanks so much for your very nice comment.
Deletethis looks absolutely amazing Pauline! These days a sandwich seems to be anything that has two slices into which you put a filling :=) I've seen the 'bread' slices being thin chicken for instance... A friend gave me a Herman the german starter years ago which clearly was in fact a sourdough starter but i didn't know so i just used it all up...
ReplyDeleteI remember the Herman the German starter, I used it all up too, I think I got a bit tired of it, not knowing much about sourdough back then. I wonder if there are still remnants of it around now...
DeleteThat looks like a fantastic fruit loaf! Much better than what you can buy :)
ReplyDeleteIt is certainly a lot tastier and more filling than the ones you buy. Thanks for your comment Lorraine.
DeleteA good slice of buttered, toasted bread is one of the underappreciated things in the food world. And this bread looks fantastic! With the dried fruit and seeds, this sounds like something from a fancy bakery. I would love a slice right now with my morning coffee!
ReplyDeleteDavid, this fruit bread always goes down very well in our house. thaks so much for leaving a comment.
Delete