What a memorable month February was. It might have been the shortest month of the year, only 28 days, but it was action packed, with a Pickleball tournament to be entered, and I can mention that as even the sport we play has a foodie name; and my birthday was almost "smack bang in the middle" of fabulous February as well.
Showing posts with label March. Show all posts
Showing posts with label March. Show all posts
Tuesday, March 3, 2026

Saturday, March 26, 2022
Baked Eggplant or Aubergine with anchovies, parmesan and crunchy garlic breadcrumbs
.jpg)
These tasty baked globe eggplants or aubergines are delicious enough to be the hero and stand alone served with a salad, or will still hold their own as a part of larger banquet. This is such a delicious way to cook and serve eggplant. The peak season for growing eggplant in Queensland is from December to April, so they are still at their best right now. I was gifted these eggplant by our good friends who have a very sunny garden which really suits the growing of eggplant, so whilst the vegetables were still only a couple of days old, I needed to cook them. They need to be really fresh for this kind of recipe where they are baked and aren't cooked in a sauce. However being organic and home grown, they weren't as large or as consistent in size as those at the supermarkets. At the supermarkets they would be called the Odd Bunch, however I think they are the Perfect Bunch.
I had spotted iconic Australian cook Maggie Beer's eggplant recipe during the week, and this was the perfect opportunity to cook it. I'm so glad I did because this is just the best way to enjoy eggplant and it's a cinch to make. I wish my photos were as good as Maggie's in the magazine though, however minus professional stylist Michele Cranston and photographer Con Poulos, it was just me, but I'm pretty sure they taste just as good as the ones Maggie cooked. Next time though I will remember to leave the stalks on the eggplant, oops. Not that the stalk is edible, it just gives the eggplant a better shape in the photo.

I ate two of these for dinner, and Mr. HRK who can generally take or leave eggplant ate one and really enjoyed it. There is still a variety of opinion as to whether or not eggplant needs to be salted before cooking to remove the natural bitterness. Because these were so fresh I didn't salt them and I rarely do these days, and there was no bitterness at all.
Let's cook:
Ingredients:
Serves 4
Preparation and cooking time 40 minutes
2 medium (600 g) eggplants
1/2 cup (125 ml) extra virgin olive oil
4 (20 g) anchovies
2 cloves garlic, roughly chopped
1 cup (75 g) coarse sourdough breadcrumbs
1/3 cup parmesan or pecorino cheese, finely grated
2 tablespoons each of mint and parsley, coarsely chopped
Method:
Preheat the oven to 240 deg. C (220 deg. C) fan forced
With a small sharp knife, cut the eggplants in half lengthways, leaving the stalk in tact. Then remove the eggplant flesh carefully, so as not to pierce the skin of the eggplant.
Place the eggplant skins and the flesh on a baking tray that has been lined with baking paper.
Measure out 1/4 cup of the olive oil, and drizzle this over the eggplant. I also used a pastry brush to distribute the oil evenly over the eggplant shells and the flesh.
Season with freshly ground black pepper and salt and bake for 15 minutes. The skins should be crispy and the flesh tender. If the eggplants are very fresh, and hopefully they are, this might take longer than the recommended 15 minutes.
Select a small frying pan, add the remaining olive oil, and over a low heat gently cook the anchovy fillets and the garlic. This should only take a minute for the anchovy fillets to break down and the garlic to soften. You will also smell the heady aroma of the garlic and the anchovies cooking.
Add the breadcrumbs and cook for 2 minutes until they are lightly toasted in the pan.
 |
| This is tasty enough to eat on it's own like this. |
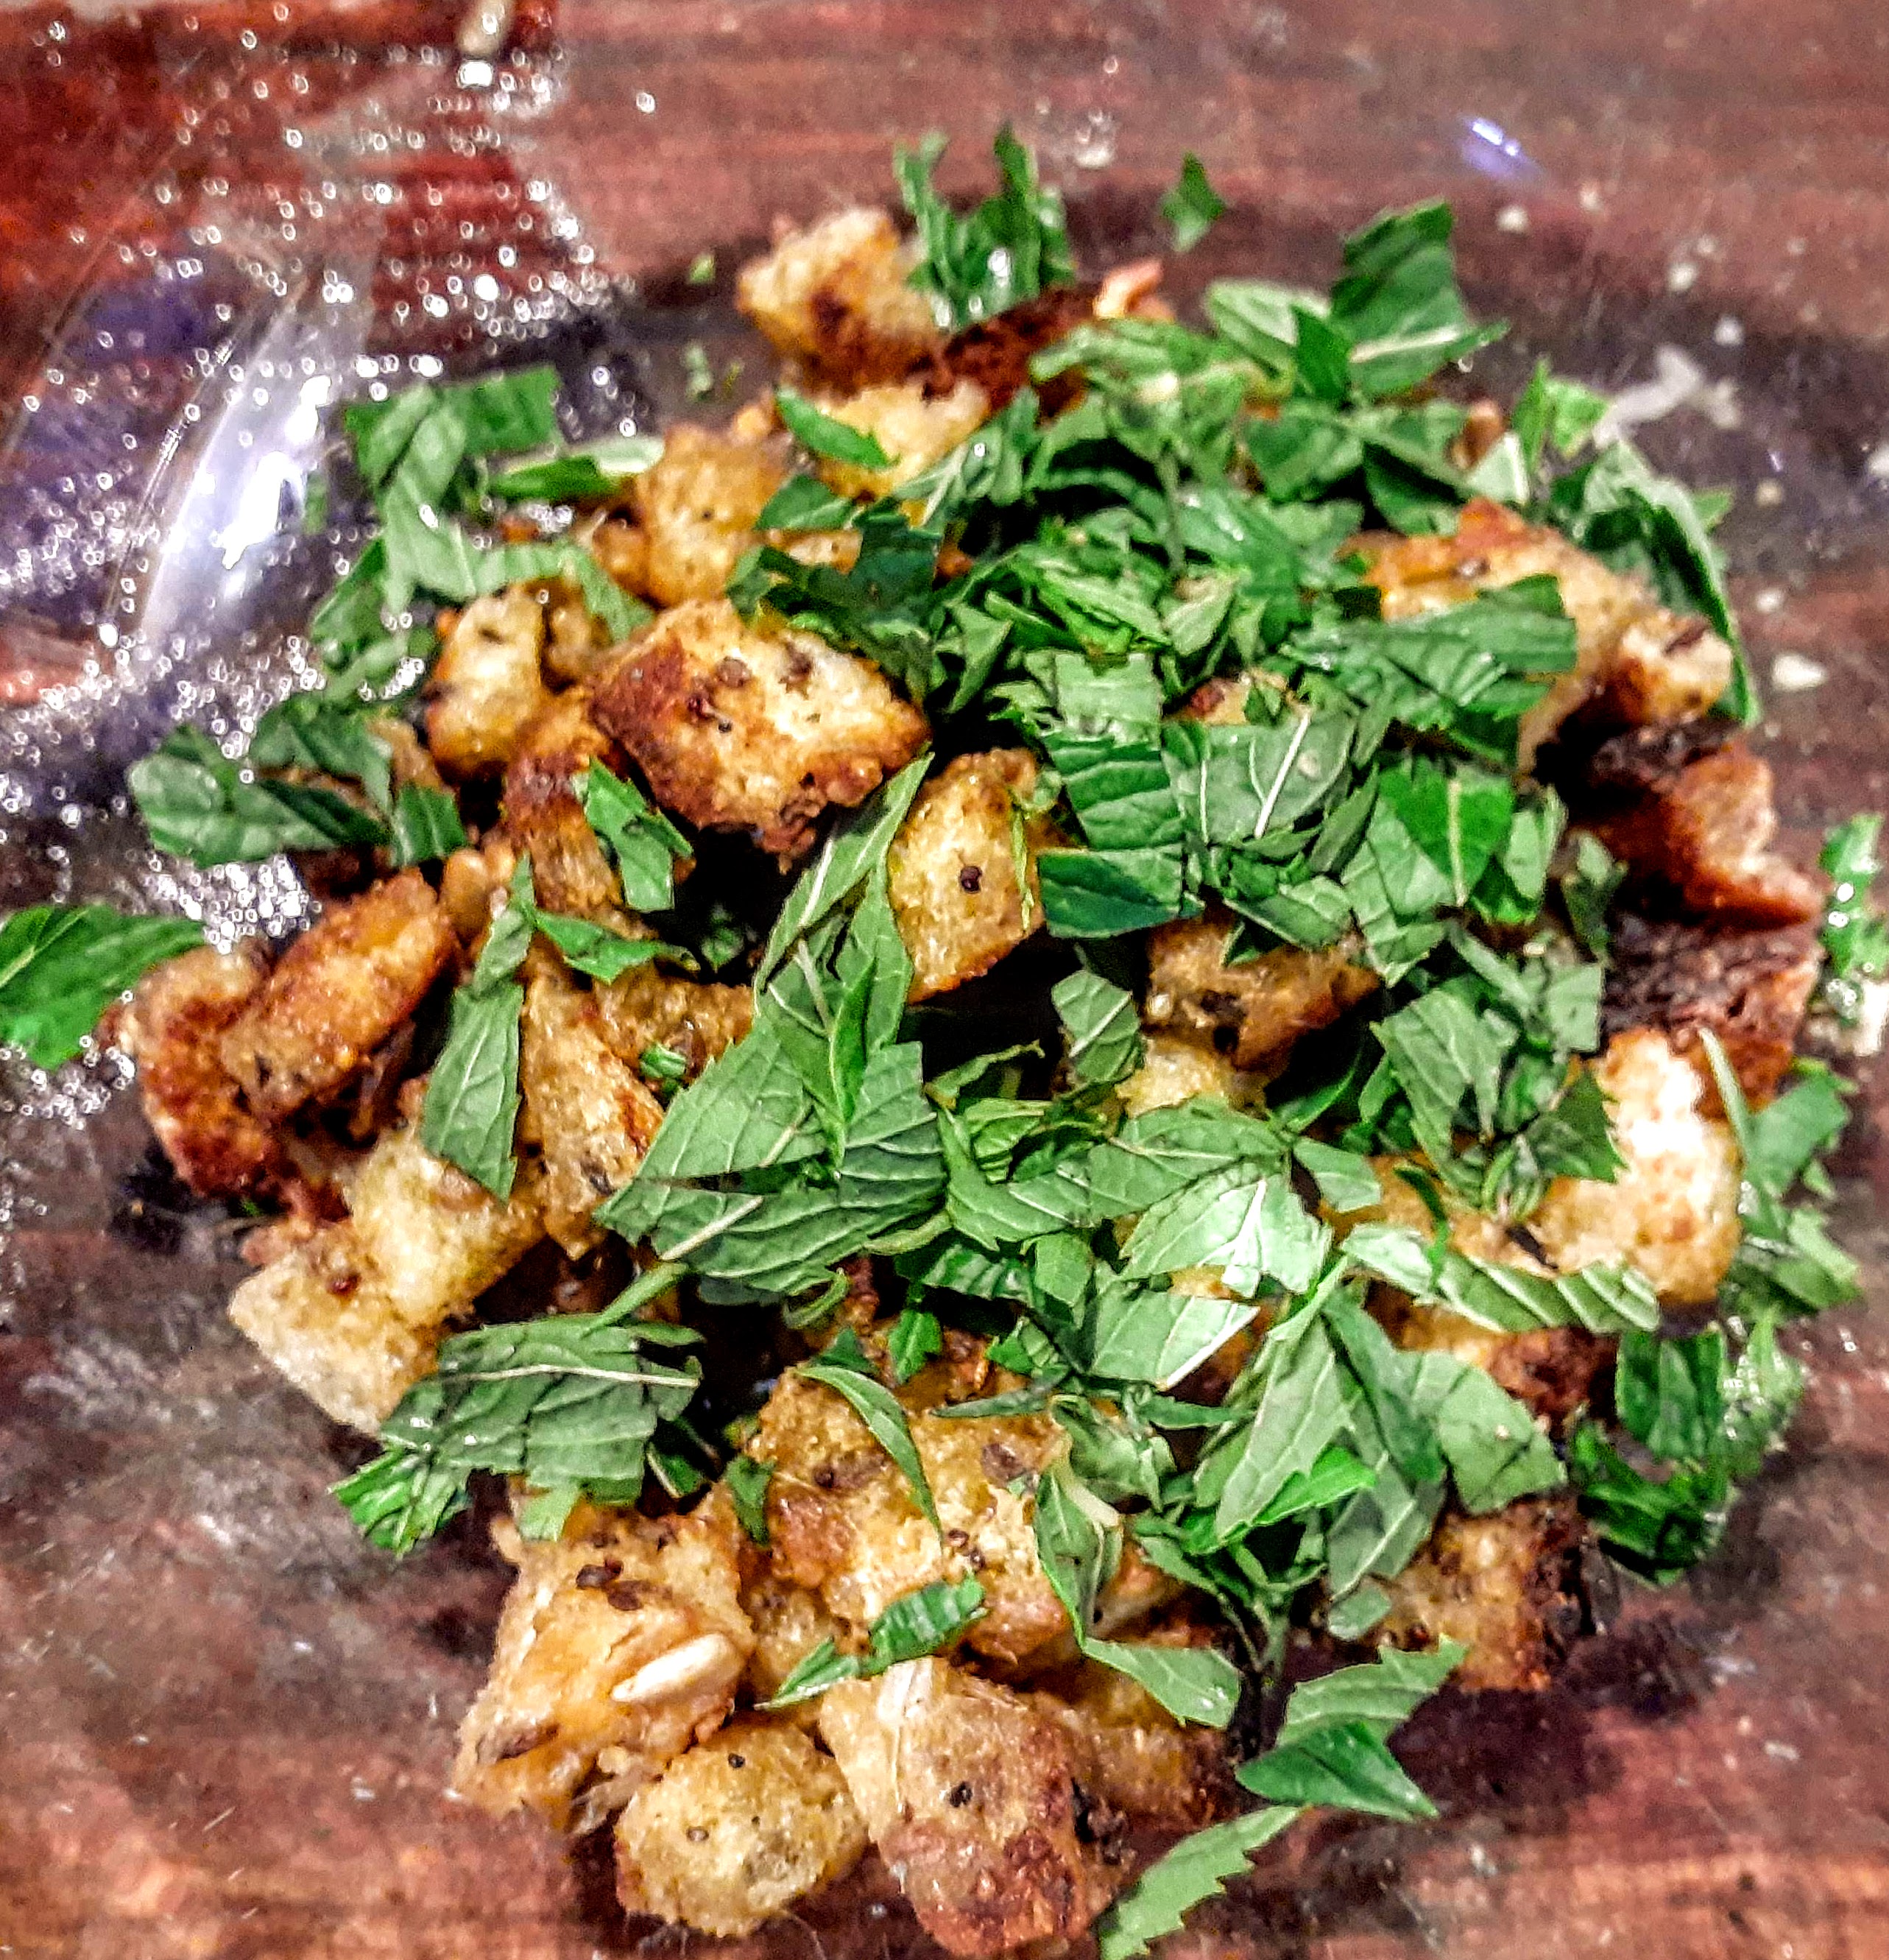 |
| I used some extra mint because I love it. |
Spoon the eggplant mixture into the eggplant skins. Top with finely grated parmesan and a drizzle of olive oil, and place the eggplants back in the oven for 10 minutes until golden.

When cooked, remove from the oven, place tray on a cooling rack and rest the eggplants for 5 minutes.
Before serving, add the remaining mint and the parsley to serve. I also added a few basil leaves because I grow them.

Cook's tips:
- This dish isn't suitable to freeze
- Small cubes of sourdough bread instead of breadcrumbs, might be an easier way to incorporate the sourdough, and works really well. One thick slice of sourdough bread cut into small squares works well, or use breadcrumbs.
- If you really enjoy the flavour of anchovies, add another few to this recipe.
- If your eggplant are over a few days old, draw out the natural bitterness by sprinkling them with salt and stand for 30 minutes. Rinse off the salt before you cook them. Because the ones I used were so fresh, I didn't salt them.
I just had to share a photo of my beautiful Cattleya orchid with you, I hope she brightens up your day. She is flowering on my patio at present.
Her name is: Blc. Haadyai Delight x Blc. Laddawan Beauty. I bought her from a local orchid nursery in 2021, and I am thrilled she has flowered for me again this year.

Have a wonderful weekend,
Warm wishes,
Pauline
Friday, March 25, 2022
Simply Smoky Chilli

This Smoky Vegetarian Chilli con Carne recipe has a secret ingredient, which you can't taste at the end, but is essential for the smoky flavour, along with the herbs and spices of course. The secret ingredient is espresso coffee. Mr. HRK imports green coffee beans through an Australian supplier, and then roasts them himself on an apparatus he designed to work in our outside Barbecue. Ingenious!
Saturday, March 12, 2022
In My Kitchen, March 2022
Let's start our day in the kitchen with a delicious breakfast. Large Portobello mushrooms can be prepared like toast, and that is just what I did with these. Only not toasted, but grilled. This is such an easy way to cook big, flat, fresh mushrooms. Mushrooms, goat's cheese, pine nuts, and freshly snipped chives from the garden, what's not to love about this vegetarian dish for a weekend brekkie? Add a little finely chopped garlic straight onto the mushrooms if you wish. This is also a perfect meal for a Meat Free Monday dinner served with a delicious salad. They also make a surprisingly "meaty" accompaniment to anything from a baked potato gratin to a grain salad.
Portobello Mushroom Toast with Goat's Cheese, Pine Nuts and Chives, a perfect breakfast treat
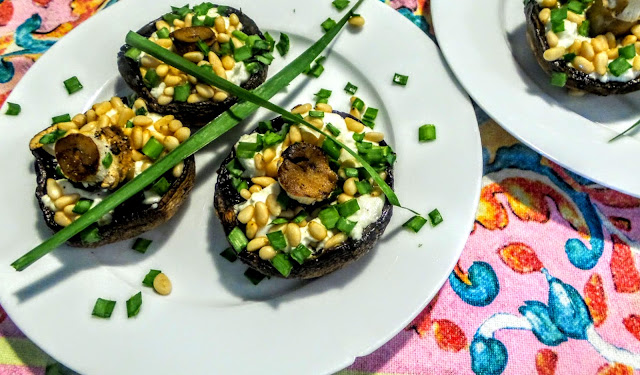
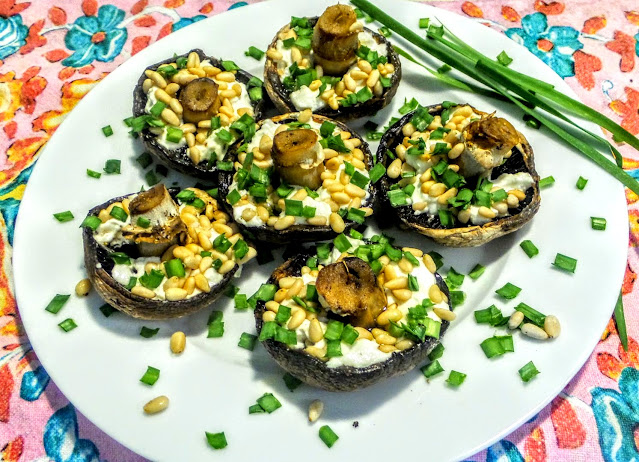
I try to cook mainly with vegetables that are in season, and cooking with mushrooms is an easy decision as they are available all year round now in our shops in the Southern Hemisphere. I hope it's the same for those of you in the Northern Hemisphere. I'll only buy them though, if they are available unpackaged, as I don't see why they often need to be so heavily packaged in plastic. Storing them in the refrigerator crisper in a brown paper bag is the most sensible storage option.
Portobello Mushroom Toast with Goat's Cheese, Pine Nuts and Chives
Ingredients:
Serves 2
4 Portobello mushrooms
Slurp of olive oil on each one
60 g soft goats cheese (Meredith Dairy soft goats cheese works well), or choose hard cheese
2 tablespoons pine nuts
2 handfuls of fresh chives, snipped
Method:
Turn the oven grill to high.
Place the mushrooms open side up on the baking tray, drizzle with the oil and season with a pinch of salt and plenty of black pepper.
Place under the grill for 3 minutes.
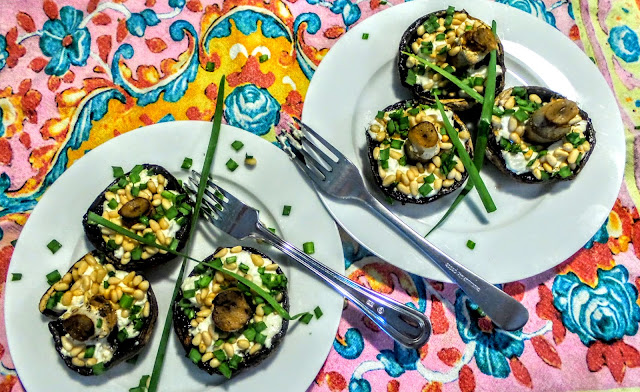
Remove the mushrooms from the grill, dot on the Goat's cheese and sprinkle with the pine nuts.
Place the mushrooms back under the grill for a further 2 minutes until Goats cheese is further softened and pine nuts are toasted. The pine nuts need to be watched as they will burn if left under the grill for too long.
Sprinkle on the snipped chives to serve.
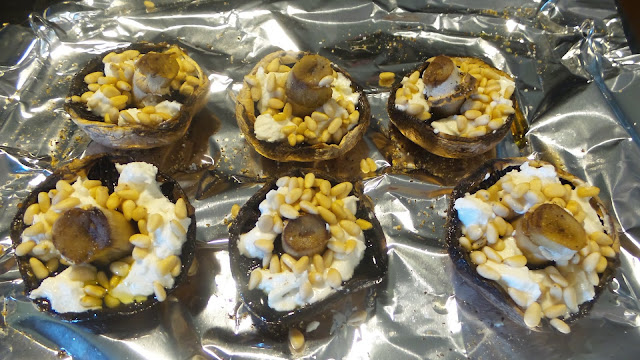
Served with homemade spicy tomato relish, or any savoury relish, in my opinion these rival any meal served in a cafe for brekkie. Add delicious bread on the side if you wish.
Beef stir-fry anyone?
Given the unbelievably high price of beef at the moment, and showing respect for the mission by many that we reduce our meat intake for the sake of our own health and for the health of the planet, I now think really seriously about how I'll prepare the meat that I buy. This beef stir-fry with a citrus kick was worth the little extra effort required to take it from the level of a quick "throw all in the wok" stir fry, to one with marinated very tender beef, and delicious flavours with a kick of lime. You can find the full post on the recipe at this link. I'll definitely be making this one again.
Beef Stir-fry with a Citrus Kick
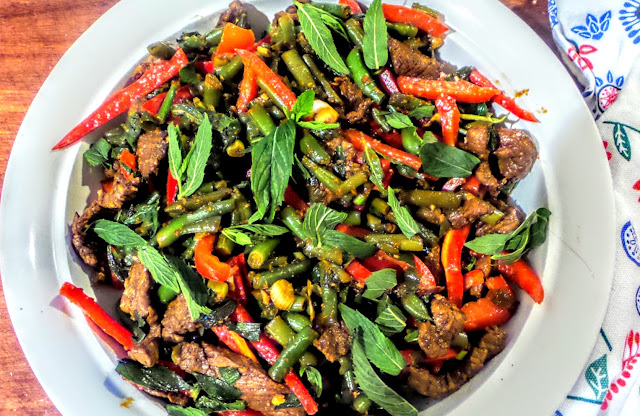
Recipe serves 4
Ingredients:
Preparation 15 minutes + 15 minutes marinating time. Cooking time: only 10 minutes because it's a quick stir fry.
400g - 500g rump steak, Scotch fillet, or even Sirloin steak, thinly sliced across the grain into 6 mm thick strips (marinating the meat will give very tender results). I used Rump steak.
2 tbs fish sauce
2 tbs soy sauce
2 tbs vegetable oil divided
1/4 tsp cornflour
1 red capsicum, seeded and thinly sliced
200g green beans, trimmed and halved diagonally
1/2 cup (70 g) thinly sliced shallots
1 tbs finely chopped garlic
1 tbs finely chopped ginger
1 cup coriander leaves, divided
1 cup mint leaves
1 lime juiced, divided
1 tbs sugar
Steamed rice to serve
Method:
- Prepare the fish sauce, soy sauce and sugar in a small bowl by whisking it until the sugar dissolves. Place the sliced beef in another medium sized bowl, add 1 tablespoon of the soy sauce mixture and mix the sauce into the meat. Set the bowl of meat aside for 15 minutes to absorb the flavours. I marinated mine for 2 hours, covered the bowl and stored it in the refrigerator, until ready to use, as I had the time to do that.
- Whisk the cornflour into the remaining soy sauce mixture and cover.
- Remove the beef from the bowl and pat it dry with a paper towel. Add 1 tablespoon of the vegetable oil to a large hot frying pan, and add the beef, spreading it over the base of the pan in a single layer. Without stirring the beef or touching it, cook for 2 minutes until well browned. You can see why the pan needed to be hot to begin with.
- Stir fry the beef, and continue to stir and fry it for 40 seconds until cooked through.
- Transfer the beef now to a plate with a rim to catch the juices.
- You are now ready to cook the vegetables.
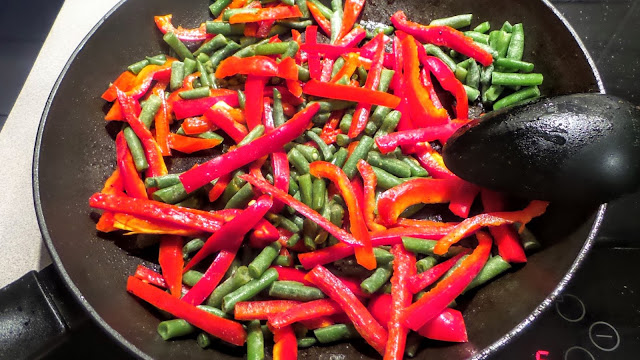
- Add the remaining oil, (1 tablespoon), and the capsicum and beans and cook for 2 minutes until the vegetables soften slightly. Stir and fry the vegetables. You want them still quite crisp. Stir in the shallot, garlic and ginger,
- Add the remaining soy sauce mixture, and the beef and the juices to the pan with the vegetables. Stir and fry for 1 minute until the beef is just heated through, the vegetables are tender, and the sauce has thickened slightly.
- Take your frypan from the stove and stir in half the coriander leaves, the mint leaves, and the lime juice. I can't emphasize enough how important it is to add the lime juice and at least one of the herbs.
- To serve divide the rice among the serving bowls. Top the rice with the beef stir fry, and drizzle with the remaining lime juice and for presentation, sprinkle with the remaining mint and coriander leaves.
- Serve with extra lime wedges if you have them
Regardless of what else is happening, I always find time to read. During a very busy time while we were away in Cairns, this book by Australian author and doctor Joanna Nell, was an interesting and relaxing read. She navigated some of the politics in hospitals and how a dedicated group of volunteers found a way to deal with the bureaucracy. I enjoyed it.

There's a strong synergy between a lot of what we grow in our garden, and what I cook with in my kitchen. We try to grow as much as we can given space constraints, and the time of the year. Let's face it though, growing our own produce presents challenges, and there's a lot of trial and error with growing fruit and vegetables for our own use. However, growing what is suitable in our tropical climate is the key for us, that's not rocket science I know, even though at times we've tried growing a pomegranate tree, a finger lime tree (that should have grown well), vanilla bean vines, and other more exotic plants, but the pests and bugs can make life very difficult and know how to completely ruin our efforts. So here are a few photos of what we are having success with at the moment. These were taken before storms and showers over the last few days, and as I write this, Mr. HRK is out in the garden pruning and tidying up, and just enjoying the garden under slightly cooler conditions.
There's always a chilli bush or two growing in the garden, and it's great to be able just to pick them as needed for so many dishes I cook. If I had been in my own kitchen at home, I would have used one of these in the Beef stir-fry recipe above.

The odd bunch of chillies just picked. They still taste great though.

Edible ginger and turmeric thrive in the Summer garden in the tropics.
 |
| The lush turmeric is flowering, and the pineapple sage in front with the pink flowers |
Our edible ginger is looking very healthy after the rain and will be ready for harvesting quite soon, however in the meantime it's great to be able to dig some up when required.

This Paw Paw tree below self seeded, so time will tell if it is bi-sexual, and actually bears fruit, or if it develops a disease such as bunchy top.I have high hopes for this one. Fingers crossed.

We have a cumquat tree, which is just beginning to flower. Can you see the small white buds on these two photos. I'm hoping that by the end of Winter there will be enough fruit to make some more


These are photos of some not so edible gingers growing in the garden, They bring beautiful colour, joy and biodiversity to our garden which is important.

This very happy lemon tree was the subject of a recent post of mine. I used the first lemons to make some very nice little lemon puddings.


A new Market basket that I bought will be very useful, when I head off to market.
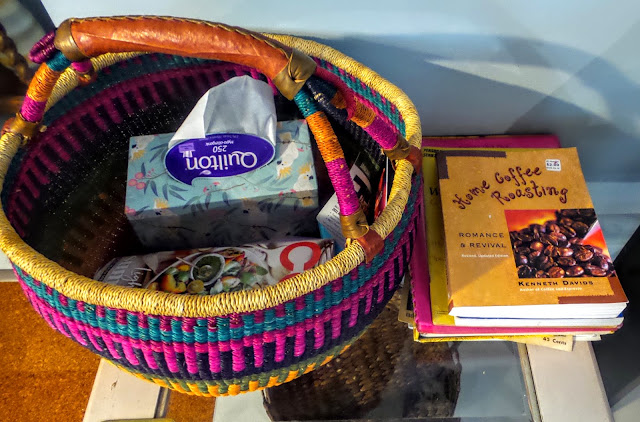
I made my first sourdough loaf of bread for quite a while. Now that the weathers a bit cooler I'll get back into more baking. Bread is such a staple, and sourdough bread is good for our wellbeing. I wish I could send some bread to the people left in the Ukraine, I doubt they are in a position to be making bread. It's all so sad.

Hot off the press, we just discovered that our 15 year old Mandarin tree, was damaged during last night's storm. A large branch which is about 1/3 of the tree broke off. The tree is heavily laden with fruit, so we estimate about 100 mandarins were on that branch, and it was probably just the wind and the heaviness of the branch that caused it to break. So Mr. HRK has been busily sawing off the remaining branch. I am hoping I can salvage some of the green fruit to make jam or something else. Do you have any ideas? There is a hint of yellow on some of the fruit so they are beginning to ripen. If a cold snap comes during Winter, the remaining mandarins on the tree should be nice and sweet.


I am sending this post to Sherry of Sherry's Pickings for the In My Kitchen event. If you would like to join in, send your post to Sherry by 13th of the month. Or just head over to her blog to visit more kitchens.
cumquat marmalade. It's so delicious and a precious commodity.
 |
| This newly planted red ginger is growing in its own garden next to the cumquat tree. |

 |
| Lemon puddings with a topping of homemade lemon curd. Yum! |
Our wonderful friends P & J, brought us back this bag of roasted coffee beans grown near Byron Bay. We are so excited about trying this coffee. They were in Ballina in New South Wales, and thankfully weren't trapped by the floods for too long as so many were.
I made my first sourdough loaf of bread for quite a while. Now that the weathers a bit cooler I'll get back into more baking. Bread is such a staple, and sourdough bread is good for our wellbeing. I wish I could send some bread to the people left in the Ukraine, I doubt they are in a position to be making bread. It's all so sad.
Hot off the press, we just discovered that our 15 year old Mandarin tree, was damaged during last night's storm. A large branch which is about 1/3 of the tree broke off. The tree is heavily laden with fruit, so we estimate about 100 mandarins were on that branch, and it was probably just the wind and the heaviness of the branch that caused it to break. So Mr. HRK has been busily sawing off the remaining branch. I am hoping I can salvage some of the green fruit to make jam or something else. Do you have any ideas? There is a hint of yellow on some of the fruit so they are beginning to ripen. If a cold snap comes during Winter, the remaining mandarins on the tree should be nice and sweet.
 |
| The broken branch to the left |
I am sending this post to Sherry of Sherry's Pickings for the In My Kitchen event. If you would like to join in, send your post to Sherry by 13th of the month. Or just head over to her blog to visit more kitchens.
Watch this space for an update on our backyard Italian beehive, in a future post. There's been a lot of activity in the bee world in our back garden.
That's all for this edition my friends, there is work to do in the garden.
Have a nice weekend.
Warm wishes,
Pauline
Wednesday, March 9, 2022
Little Lemon Puddings

This lemon pudding dessert is the perfect finish to a delicious meal, tangy, lemony, citrussy, light and satisfying. My recipe celebrates the start of the lemon season for us from our backyard.
Sunday, March 6, 2022
Beef Stir-Fry with a Citrus Kick
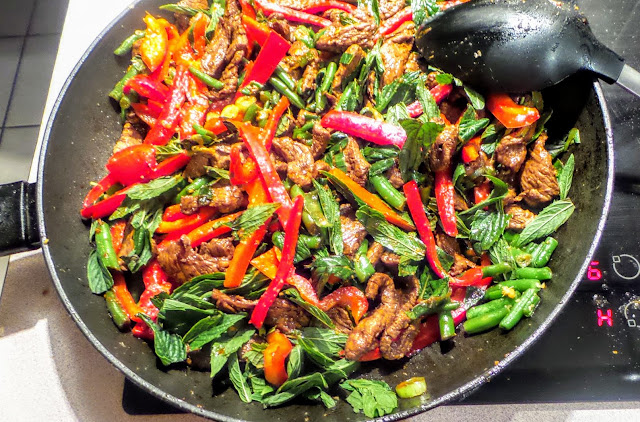
Sometimes it's Mr. HRK that cooks the stir-fry in the wok, outside in our BBQ area on the patio while I prepare everything in readiness. This time, because a little bit more of an effort was required, and I was still cooking in my beautiful daughter's kitchen, I prepared and cooked this meal. We were all thrilled with the result.
We are home now, and the temperatures up here in North Queensland are soaring to 37 deg. C. some days. We are running our air-conditioner almost 24/7, however if we turn it off for a few hours in the morning and keep the house closed up, it stays beautifully cool. We can't ever remember the humidity or the temperatures being so continuously high here in Mackay, and with no real rain forecast for us, although it must be coming. However, south Eastern Queensland and now Northern New South Wales have been absolutely hammered by the recent rain event and have suffered significant devastation, and those poor people affected are now cleaning out their flooded homes and salvaging what belongings they can. The badly affected have lost almost everything. The Australian Army is spreading themselves thin trying to help those in need to clean up, as are available and well meaning residents and volunteers not as badly affected. It is all very sobering. I fear that these extreme weather events will be exacerbated as a consequence of the developing climate change scenario.
This recipe is my twist on one that I saw in a recent Coles monthly supermarket recipe book, originating from our very own Aussie chef Curtis Stone, who was wanting to move back to Australia from Covid stricken Los Angeles. I'm not sure if he has or not. These catalogues tend to promote the supermarket's own home brand product, which isn't necessary to produce a a great result, and the photographs are always nice and inspiring. This recipe is perfect to cook during the Australian Summer, although it is no longer Summer, but the beginning of Autumn. Bring on the Autumn temperatures, please.
Recipe serves 4
Ingredients:
Preparation 15 minutes + 15 minutes marinating time. Cooking time: only 10 minutes because it's a quick stir fry.
400g - 500g rump steak, Scotch fillet, or even Sirloin steak, thinly sliced across the grain into 6 mm thick strips (marinating the meat will give very tender results). I used Rump steak.
2 tbs fish sauce
2 tbs soy sauce
2 tbs vegetable oil divided
1/4 tsp cornflour
1 red capsicum, seeded and thinly sliced
200g green beans, trimmed and halved diagonally
1/2 cup (70 g) thinly sliced shallots
1 tbs finely chopped garlic
1 tbs finely chopped ginger
1 cup coriander leaves, divided
1 cup mint leaves
1 lime juiced, divided
1 tbs sugar
Steamed rice to serve
Method:
- Prepare the fish sauce, soy sauce and sugar in a small bowl by whisking it until the sugar dissolves. Place the sliced beef in another medium sized bowl, add 1 tablespoon of the soy sauce mixture and mix the sauce into the meat. Set the bowl of meat aside for 15 minutes to absorb the flavours. I marinated mine for 2 hours, covered the bowl and stored it in the refrigerator, until ready to use, as I had the time to do that.
- Whisk the cornflour into the remaining soy sauce mixture and cover.
- Remove the beef from the bowl and pat it dry with a paper towel. Add 1 tablespoon of the vegetable oil to a large hot frying pan, and add the beef, spreading it over the base of the pan in a single layer. Without stirring the beef or touching it, cook for 2 minutes until well browned. You can see why the pan needed to be hot to begin with.
- Stir fry the beef, and continue to stir and fry it for 40 seconds until cooked through.
- Transfer the beef now to a plate with a rim to catch the juices.
- You are now ready to cook the vegetables.
- Add the remaining oil, (1 tablespoon), and the capsicum and beans and cook for 2 minutes until the vegetables soften slightly. Stir and fry the vegetables. You want them still quite crisp. Stir in the shallot, garlic and ginger,
- Add the remaining soy sauce mixture, and the beef and the juices to the pan with the vegetables. Stir and fry for 1 minute until the beef is just heated through, the vegetables are tender, and the sauce has thickened slightly.
- Take your frypan from the stove and stir in half the coriander leaves, the mint leaves, and half the lime juice. I can't emphasize enough how important it is to add the lime juice and at least one of the herbs.
- To serve divide the rice among the serving bowls. Top the rice with the beef stir fry, and drizzle with the remaining lime juice and for presentation, sprinkle with the remaining mint and coriander leaves.
- Serve with extra lime wedges if you have them
Cook's Notes:
- Please believe me, the lime juice adds a delicious zing and kick to this beef stir fry.
- If you are having trouble finding fresh produce in the supermarkets or markets at the moment because of recent weather events, frozen beans added toward the end of cooking will be fine.
- The quality of the beef will be much better if you buy it whole and slice it yourself. For a stir fry buy the steak or fillet as a whole piece, and slice it yourself, or buy from a reputable butcher and ask them to slice it for you. I have never had great results with beef that I have purchased already sliced from a supermarket, which is being sold as stir-fry beef.
- Using coriander and mint leaves will produce superior flavours, however the first time I made this I only had mint on hand, and it still tasted amazingly good.
- Please don't skimp on the lime juice, it's a game changer.
- Whilst I love to generally cook brown rice or even cracked bulgur wheat whenever I can as a side for health reasons, with a stir fry like this one, white rice is the perfect accompaniment.
- Marinating the beef for up to 2 hours before cooking, ensures very tender meat for a stir fry and is packed with flavour.
- 400g of beef might be enough for you if you aren't big eaters, but I used 500g.
- If you are time poor, 15 minutes marinating the beef will be ok, however if you have plenty of time, marinate the beef for up to 2 hours before cooking for maximum flavour and tenderness.

We are being careful with what we eat at the moment, with low calorie meals being the preferred choice during the week. Stir-frys are a perfect option for healthy eating. Here's the breakdown per serve for you if you are interested:
Per serve:----------------------------------------------------------------------------------------------------------------
Calories: 309/ 1292 KJ, Protein 28g (56%),Fat 16g (23%),Sodium 1763mg (88%),Carb 12g (4%),Sugar 10g (11%),Dietary fibre 6g (20%)
Warmest wishes,
Pauline
Wednesday, March 24, 2021
Slow Cooker Vietnamese Pulled Pork with Char Sui Sauce and a Wombok Salad

Vietnamese cuisine is one of our favourite styles of cooking, and whilst we enjoy eating out occasionally at a very good Vietnamese restaurant here in Mackay, it is also very easy in this tropical weather we are still experiencing to place all of the ingredients for the Char Sui Pulled Pork into the slow cooker, set it for 8 hours, make a delicious Wombok salad to accompany it, cook some rice, and eat in the comfort of our own home.
Wednesday, March 17, 2021
Edith's Perfect Plum Dessert Cake
"IT'S ALWAYS ABOUT THE FOOD"
(Monday Morning Cooking Club, 2017)
Perfect for morning tea and for dessert as well, I adore baking and eating this plum cake. The cake batter after beating, has a light and fluffy creaminess to it, and then when taken out of the oven, the tart yet sweet cooked plums taste heavenly in this nostalgic style of cake. Surprisingly, it is also delicious eaten cold out of the refrigerator, in fact that is how Mr. HRK prefers it, with thickened cream on the side of course. For dessert we prefer it with ice cream.


Ingredients:

Black and Red Plums are in season and plentiful in the fruit shops so it's the perfect time to make this cake right now. I used the black plums for this recipe at $3.50 a kilo, which is a pretty good price for here.
Serves 14-16 (18 at a stretch)
180 g (6 1/2 oz) unsalted butter, at room temperature
345 g (1 1/2 cups/12 1/4 oz) caster (superfine) sugar
4 eggs at room temperature
1 teaspoon vanilla extract
finely grated zest of 1 lemon
300 g (2 cups/10 1/2 oz) self-raising White Wings Flour (A good quality flour must be used)
12 medium plums, or 25 sugar plums, halved and pitted
Icing sugar (confectioner's sugar), for dusting
double cream or ice-cream, to serve
Method:
Preheat the oven to 180 deg. C (350 deg. C/Gas 4)
Line a 33 x 23 cm (13 x 9 inches) rectangular baking tin. Leave an overhang of baking paper up the sides of the tin to make lifting the cake out easier. (I bought a new baking tin from Woolworths supermarket just this morning ($11.00), to cook this cake in as my other one this size is very old and has other uses now in Mr. HRK's man shed!)
Cream the butter and sugar in your electric mixer on quite a high speed, around 6 on my Kitchen Aid, until light and fluffy.
Add the eggs to the mixture, one at a time, beating well after each addition. Add the vanilla extract and lemon zest.
By hand, use a large spoon to fold in the flour gently until just combined.
Now spoon the cake batter into the lined baking tin and spread it evenly with the spoon. Lay the halved plums cut side up in rows on top of the batter, trying not to press them into the batter.

Bake for 1 hour, and test after 45 minutes by inserting a skewer lightly into the centre of the cake. It should come out clean when the cake is cooked. It took exactly 1 hour in my oven. Even though it was browning nicely on the surface, it still wasn't cooked through at 45 minutes.
Cool the cake completely in the tin, and lift out using the baking paper. It is much easier to cut into slices when cool.

I made this for afternoon tea yesterday when my group of friends came to play our weekly game of Mahjong. I dusted slices with icing sugar and we ate it with some thickened cream. For dessert, I would serve this warm or cold with ice-cream, and with more fruit on the side if you like.
This cake should keep well in a tin for up to 4 days in a cooler climate, however in the North Queensland tropical heat that we have been experiencing when I baked this, I store leftovers in a covered container in the refrigerator. Reheat gently if you wish in Winter, but as I said above, it is also delicious cold. Needless to say, the leftovers didn't last long this time.
Black and Red Plums are in season and plentiful in the fruit shops so it's the perfect time to make this cake right now. I used the black plums for this recipe at $3.50 a kilo, which is a pretty good price for here.
So who was Edith? This was her family cake recipe, and I love a good cake story and to share the importance of continuing it's legacy. Edith wasn't a relation of mine, but was Garry Enston's mother, and Garry contributed her recipe, to be judged along with 9 other plum cakes for inclusion in this book. This particular one was chosen and I know why, it's simply marvellous. Edith and her husband emigrated to Perth, Australia from Prague, in 1939 during the German occupation and she loved good food and loved to entertain although Garry says she wasn't a passionate cook herself. She had several wonderful cake recipes from her Mother and her uncle who was a pastry chef at the Palace Hotel in Prague, and reading between the lines, this is one of those recipes, laced with Czechoslavakian nostalgia.
Hope, my Mother, was also a very good cook, particularly sweets, which I really appreciate now, and she loved to serve good food within the confines of our budget, so my love of cooking and eating good food is definitely genetic. If you are reading my blog and this story, I think you must love quality food with traces of nostalgia as well. Is your love of food genetic or acquired and is there a nostalgic element to some of your cooking?
Happy baking,
Pauline
Sunday, March 7, 2021
In My Kitchen, March 2021
It's March already, and as I start to write this, the tropical heat has been replaced by rain showers today, as Cyclone Niran builds up off the Far North Queensland coast to a Category 3 and keeps us all guessing as to her next move. These systems are so unpredictable and still seem to keep the meteorologists guessing, despite all the technology at their disposal. One minute they are intensifying and moving out to sea, next report it is stationery and could track south. So we will see. I have a well stocked pantry, however many times living here on the coast we have burst into action fortifying our property as the cyclone approaches, only for it to wave to us as it passes down the coast further south. However the winds and rain from this cyclone have already annihilated valuable banana plantations up North costing the industry millions of dollars.It's tough being a farmer. P.S. A week later, life took over for a while, and thankfully for us the cyclone has moved East and is now a very destructive Category 4-5 over New Caledonia. They are in our thoughts as they battle this dreadful storm.
I brought these orchid flowers inside when they bloomed a few weeks ago. This is my Cattleya Bowringiana Orchid, a very old species which my Mum originally gave me. The Cattleyas are showing signs that they will flower in the next couple of months, and I'm really looking forward to that. I hope to have some flowers to show you over the coming weeks. With the weather starting to cool down slightly, I hope to start some gardening again in a few weeks.

February was a quiet time for us, with Mr. HRK having sinus and septum (nose) surgery two weeks ago, and thankfully he is starting to feel a bit better now. Recovery hasn't been pleasant. So leading up to this and up until now I have been cooking the kind of meals he loves, which is just good old fashioned cooking. I don't have many photos to share but we really enjoyed this dish of Cottage Pie, although my Mum always called it Shepherd's Pie due to her Scottish origins I suppose. Cottage Pie is made from minced beef, and Shepherd's Pie traditionally is a base of savoury minced lamb. Both are delicious. The topping is creamy mashed potato, and lots of it. I often add a layer of seasoned sliced tomato between the mince and the potato.

Savoury minced beef has lots of potential for use as a base in minced pies, Cottage pie, pasta sauce, Chilli Con Carne or just mince on toast for an easy tea or cooked breakfast. It also freezes very well as a batch. I lightly sauteed 2 onions, 4 carrots, 3 stalks of celery, added a kilo of beef mince and browned that off, and added my secret ingredient, a tablespoon of vegemite and mixed it in well. The vegemite is Mr. HRK's family secret. Then for extra flavour, 2 teaspoons of dried mixed herbs or fresh equivalent if you have them, and 2 tablespoons each of Worcestershire sauce and Tomato sauce take the dish to superstar status. I also added a can of tomatoes, and sliced zucchini and finely chopped capsicum can also be added. Mince for a cottage pie may need to be thickened with a little cornflour and water or the juices will spill over the side during the cooking process.

Then for dessert I made Apple Crumble, another family favourite. I also poached some pears in a red wine sauce, served with ice cream of course for a little extra pink pizzazz. Mr. HRK could actually taste all of this food after his surgery, so he was in seventh heaven. This is all very easy cooking, the type of food I grew up with. However it is healthy, tasty and just perfect for those times when we aren't feeling very well. I feel a bit guilty even writing about these dishes dear reader as they are probably in your regular cooking repertoire as well, however I can't really presume that they are.Much better for us than refined food from the supermarket or takeaways and they contain lots of fibre. I am so pleased that all of our food is mostly cooked from scratch.
APPLE CRUMBLE
FRUIT (apple)
4-6 Granny Smith cooking apples, peeled and chopped into quarters
1-2 tablespoons sugar
1/3 cup water
FRUIT (apple)
4-6 Granny Smith cooking apples, peeled and chopped into quarters
1-2 tablespoons sugar
1/3 cup water
(However when rushed I have also used a large can of cooked apples, it does the job.)
Other Fruit Variations
Rhubarb and apple
Pie peaches
Stewed dried apricots
CRUMBLE
1 cup plain flour (wholemeal is preferable)
3 tablespoons butter or margarine
3 tablespoons brown sugar
3 tablespoons coconut
1/2 teaspoon ground cinnamon
1 tablespoon Rolled oats
Pie peaches
Stewed dried apricots
CRUMBLE
1 cup plain flour (wholemeal is preferable)
3 tablespoons butter or margarine
3 tablespoons brown sugar
3 tablespoons coconut
1/2 teaspoon ground cinnamon
1 tablespoon Rolled oats
 |
| Crumble waiting to be added as topping for the apple |
Let's cook
- Peel and core apples and slice thinly.
- Place in a saucepan with water and simmer gently until soft. Add sugar to taste and stir to dissolve.
- Allow to cool then pour into a pie dish, keeping back excess juice.
- Place flour in a bowl then rub in butter with the fingertips.
- Add sugar, coconut, rolled oats and cinnamon and mix well until a good crumbly consistency.
- Sprinkle lightly on top of apples.
- Bake in a moderate oven until lightly browned on top.
- Serve hot or cold with boiled custard .
POACHED PEARS IN RED WINE
This Poached Pears in Red Wine recipe is simple but sophisticated and because it is based on fruit and red wine, must be healthier as a dessert.
Serves 4. Prep and cook time: 40 minutes
Ingredients:
2 cups sugar
2 cups red wine
2 cups water
1 cinnamon stick
Juice of 1 lemon or 2 strips of lemon rind
4 cloves
4-5 just ripe pears, with stems attached
Let's cook:
4-5 just ripe pears, with stems attached
Let's cook:
Place sugar, wine, water, cinnamon and lemon juice into a medium saucepan. Stir over medium heat until sugar dissolves and mixture comes to boil. Reduce heat; simmer for 5 minutes or until slightly reduced.

Meanwhile, peel pears and, using a small sharp knife, remove cores from underside of pears.
Lower pears into the poaching liquid and simmer upright in the sauce, uncovered, for 20-30 minutes or until tender, turning pears occasionally during cooking so that they colour evenly.You might like to cover the pears with a round of baking paper nicked with scissors, so that the stems poke through. It helps if the pears fit snugly into the saucepan to reduce movement. My saucepan was a little too large but the pears still cooked beautifully. I should have added an extra pear for good luck.

Transfer pears to a heated plate and cover to keep warm. Boil the remaining liquid for about 10 minutes or until it becomes syrupy. Serve pears with syrupy red wine sauce and ice-cream or double cream, if desired.
TIP: I cooked the pears early in the morning before I left home for a mid-morning appointment, and kept them in the frig with some of the sauce in a covered container. I warmed up the pears and the sauce in the microwave just before I served them. They were delicious.
Another option is to simmer down some of the sauce until it is almost like a toffee consistency. This is then really delicious dribbled down the pears.
One other night I cooked a Baked Rice Pudding, which is always very easy to make and delicious. It is Mr. HRK's favourite.
 |
Ready to pop in the oven |
 |
| A baked rice pudding, straight out of the oven |
February was my birthday month, and I had a lovely day, which was just a few days before Mr. HRKs operation. Wasn't that lucky? We went out for lunch to our favourite Vietnamese restaurant, spoke to our daughter and our family in the Falkland Islands, and I received lost of beautiful messages from my special friends.
I don't have any expectations about receiving gifts for my birthday anymore. However Mr. HRK and my wonderful daughter collaborated and bought me a cast iron Challenger Bread oven pot, online from the U.S. I was pretty amazed. So my friends I am now educating myself in perfecting an oval cob loaf in my new breadware. The first loaf I made turned out pretty well, but could have been larger. However the crust was very crusty and the bread tasted delicious.

Cooking in this pot requires a very different technique to cooking sourdough high top loaves in my loaf tins, and the high top sandwich loaves are more suited to slicing and freezing. I like to make a cob loaf for the weekend.

The only fault with this bread ware is that is very heavy to take out of the oven when it is very hot, and it does get very hot. It is meant to be heated in the oven for an hour prior to baking at 260 deg. C., the bread dough is then added, and the temperature reduced to 224 deg. C for 15 minutes. The lid is then removed and the bread cooks for a further 30 minutes. It then produces a lovely crusty loaf of bread.


So this weekend My Kitchen activity has focused on bread making and experimenting and researching as we stay quietly at home until Mr. HRK feels a lot better. Our house has been smelling like a bakery, not hard to take at all.
These are photos of my first attempt at cooking my first sourdough loaf in my new bread pot.
 |
| An improvised oval banneton for proofing |
Adding an ice cube to the pot for some steam.


The final product. When I am happy with the whole process, I will let you know. In the meantime, if you use Challenger bread ware, please contact me and let me know what works best for you.I would love to hear from you.
My first cob loaf baked in the Challenger Breadware.

I am sending this post to Sherry of Sherry's Pickings for the In My Kitchen event, that was started by Celia of Fig Jam and Lime Cordial, If you would like to join in, send your post to Sherry by 13th of the month. Or just head over to her blog to read more In My Kitchens.
Best wishes
Pauline
Subscribe to:
Posts (Atom)