Cauliflower you say, for a main meal dish? Yes, this Cauliflower vegetarian dish really earns it's stripes on flavour. It can also reflect the seasons, which is one of the things I love about vegetarian food. This dish is a riff on Jamie Oliver's Cauliflower stew.
Hello, I'm Pauline, a passionate home cook with over 40 years of recipe development experience and over 12 years of food blogging. I live in Tropical North Queensland. What began as a simple way to document family recipes has grown into Happy Retiree's Kitchen, a trustworthy source for achievable, delicious recipes. I'm a self-taught cook and food and travel blogger, and have spent over a decade perfecting how to make home cooking achievable, flavoursome, and very accessible. Let's cook.
Thursday, June 3, 2021
Wednesday, May 26, 2021
Rosemary Pumpkin Spice Cake with Cream Cheese Frosting
•2 cups sugar
•1 cup vegetable oil
•4 large eggs
•2 cups SR flour
•2 teaspoons baking soda
•2 teaspoons ground cinnamon
•1/2 teaspoon ground ginger
•1 teaspoon baking powder
•1/2 teaspoon salt
•2 cups cooked mashed pumpkin
•1/2 cup chopped pecans
Preparation:
Combine sugar, vegetable oil, and eggs in a large mixing bowl and mix well. Sift dry ingredients into a separate bowl, stir into the oil mixture, beating well. Stir in the pumpkin mash. It's as easy as that.
![]() |
| Adding pumpkin to the cake mixture |
•2 tbs butter, room temperature
•125 g cream cheese, room temperature
•1 teaspoons vanilla extract
Saturday, May 22, 2021
Surviving in My Kitchen during Renovations
![]() |
| Aussie Beef Salt Bush Pie, read on |
Now that the dust has settled, literally, I have some time to write on my blog again. Have you noticed I've been a bit quiet in the blogging world? Last week after taking a deep breath, we had our whole house retiled, except for two bedrooms and the bathrooms. All the furniture was removed from the lounge, dining area, and the two main bedrooms. It happened quickly, as surprisingly the tradies were ready to do the work. So the house inside was shrouded in plastic as the first couple of days were very dusty and noisy when the existing tiles were removed.
Luckily, we could move into the bedroom at the back of our house near the kitchen and still use the guest bathroom until the last day of tiling. There was less upheaval for us that way, and it was quite comforting during all of the mayhem to still be in our own home and to be able to use my own kitchen and laundry, even though friends offered for us to stay at their house during the tiling, which we really appreciate. The plastic was removed from the kitchen once the old tiles were removed. I also found some comfort in going shopping!We chose our tiles, they were laid over three days and now we are very happy with the result. I love our new look. Mr. HRK and I moved all of the furniture back into the house, the beds, the lounge suite, the China Cabinet, the dining suite etc, and along the way we needed to make compromises about what we should keep and what should be sold or disposed of. This was the perfect time to scale down and decide what we really don't need. It really came down to what is essential for us now, and what we are emotionally attached to. Now our lounge, dining area and bedrooms have a whole new layout, lovely refreshing new tiles and we are happy with the result. Our backs were sore for a day after the shifting, but that was the least of our worries. It was done. However there is still some sorting through cupboards and drawers to be done, but the worst of the renovations, the heavy lifting and the decision making, is over.
But how did we survive with enough food to nourish us during this experience? Those of you who read the last In My Kitchen post, will already know that we have a mandarin tree which has just been laden with fruit, so we have had plenty of fresh citrus to enjoy, and as I am writing this post I am sipping on some freshly squeezed mandarin juice. It's really delicious. We've had a couple of cold snaps and some rain, so the mandarins are at their peak of juiciness. We've also had lots of dried mandarins to nibble on.
I'm really happy that we didn't need to buy any takeaway meals, and we didn't dine out during all of the upheaval, as nice as that is. We were too tired to be bothered. In anticipation of what was going to happen, I made my very easy and tasty Zucchini and Bacon slice which is always a great standby during any kind of upheaval and busy times. I also delivered a couple of slices to a sick friend, and another friend who visited during the mayhem was plied with a slice for lunch. The slice stretched a bit like the Biblical Loaves and Fishes tale.

Zucchini slice was originally created, back in the 1980's to assist busy parents to cook a healthy, nutritious and very tasty savoury slice for the whole family, requiring no precooking of any ingredients, just some grating and slicing. It became so popular, that you could depend on there being a Zucchini and Bacon slice at any family gathering or party. Bring it back I say.
There are many variations available now, however the basic ingredients of eggs, flour, cheese, zucchinis and bacon still provide the base for a popular and economical meal.
Zucchini and Bacon Slice
Ingredients:
375 grams zucchini (approx. 2 large or 4 small)
1 large very fresh onion, finely chopped
3 rashers bacon, finely chopped, fat removed
1 cup very tasty grated cheese
1 cup SR flour
1/2 cup Rice Bran oil
5 eggs
salt and pepper to taste
I added a 1/2 cup of corn this time, and 1 grated carrot.
Method:
Grease and line with baking paper a 30cm x 20cm Lamington Tin.
Grate zucchini in a food processor and finely chop onion and bacon. Combine zucchini, onion, bacon, cheese, corn, sifted flour, oil and lightly beaten eggs.
Season with 1/2 teaspoon of salt or to taste
Pour into your lined and greased baking tray, or you can also use a pie dish or a large quiche dish. Top with sliced tomatoes if you wish.
Bake in a moderate oven for 30 to 40 minutes or until brown.
Homemade Chicken stock or Broth
![]() |
| Homemade Chicken stock being cooked |
It must be nearly Winter if I am writing about soup here in the Tropics. With three containers of my homemade chicken stock in the freezer, and the weather cooling down, it was also very easy to make some chicken and barley soup, which only takes about an hour to make. It has been a wonderful standby to have on hand for an easy dinner or lunch.
Ingredients:
1 1/2 kg chicken wings, or 1 whole free-range chicken, or 1 1/2 kgs of bony chicken parts such as necks, backs, breastbones, frames and wings ( whatever you have works)
3 1/2 litres of water ( so that it covers the chicken) and 2 tablespoons vinegar
2 roughly chopped carrots
1 onion, peeled and halved
4 stalks celery roughly chopped
3 stalks fresh parsley, chopped
2 bay leaves
1 garlic clove peeled
A few peppercorns
Bring to the boil in a large stainless steel pot, and simmer the ingredients on the stove top for 8 hours so that the marrow from the bones is completely removed and enriches the stock. The longer you cook the stock, the richer and more flavoursome and healthy it will be.
About 10 minutes before finishing the stock, add the parsley.
Remove the whole chicken pieces with a slotted spoon. If you are using a whole chicken, let this cool and remove the chicken meat from the carcass for other uses such as sandwiches and curries, enchiladas or salads. (The chicken meat can also be removed from the bones after only 2 hours of cooking when it will be nice and firm.) I don't bother removing the fat from the stock now by chilling it first and letting the fat rise to the surface, as I think the fat gives the stock a beautiful flavour. However that is a personal choice. You might also prefer to make your stock in the pressure cooker or slow cooker. The stock can then be stored in the refrigerator or freezer.
I really believe that chicken soup made from scratch is very healing. Some say it reduces allergies, improves digestion, and gives us strength. I love to give chicken soup to friends and family who have colds and flu, I'm sure it helps their recovery.
Chicken Barley Soup Recipe
2 Litres homemade Chicken Stock4 finely chopped carrots
1 finely chopped brown onion
4 stalks celery, finely chopped
1/2 cup barley or short pasta (rinsed in water)
2 teaspoons Fish Sauce
Leaves from 4 stalks of fresh celery, finely chopped
Salt and ground pepper to taste
A Handful of fresh herbs
I make this very simply. Fry up all the vegetables in 2 tablespoons of olive oil until the onion is translucent and vegetables slightly softened.
Add the stock, fish sauce (my secret ingredient) and bring to the boil. Then bring the heat down to a simmer. Add the fresh chopped herbs including parsley, the barley, and salt and pepper to taste. Simmer until the vegetables are softened, taste to check the seasoning. and the soup is ready to serve.
Last Tuesday night our football team was playing, they are the North Queensland Cowboys. This is Rugby League football, for those who don't really follow it. Mr. HRK played Rugby League when I first met him, and then when he moved away to Teacher's College he stopped playing competitively, but never stopped loving the game. In the morning, I assembled my Salt Bush Beef Stew in the slow cooker and it was cooked by lunchtime. The Aussie meat pie and football are synonymous, and feeling that we needed some stamina to watch the football and hopefully will the Cowboys to win, I converted the beef stew into a meat pie. I added a couple of extra teaspoons of Worcestershire Sauce to give it the Beef Pie edge, and because I was short on time and the tilers were still around, I used frozen shortcrust pastry for the base, and puff pastry for the top layer. It worked a treat. Mr. HRK loved it. After all, what's not to love about a delicious Aussie Beef Pie with Tomato Sauce. And the Cowboys had a great win. Overall, a successful night.

You can find the Aussie Salt Bush Beef Stew recipe at this link on the blog where I have loaded it previously.
![]() |
| Football night |
Hope you are all having an enjoyable weekend,
Warm wishes
Pauline
Thursday, May 6, 2021
In My Kitchen - May 2021
It's citrus season, and Dried Mandarins feature in this edition of the May IMK. Where did April go? And now that it's May, the weather here in the Tropics of North Queensland is cooling down so we are spending a lot more time in the garden preparing the garden beds for Winter planting, and also it is really a pleasure now to be preparing delicious food in the kitchen.
A lot of the activity in my kitchen this last month and in Mr. HRK's workshop, has been centred around the mandarin fruit. The branches of our mandarin tree in the front garden have been sagging to the ground with the weight of the mandarins it is producing. Even though the skins hadn't ripened, and are only just starting to ripen now, the flesh is sweet, and we needed to pick some of those mandarins to ease the load off the tree, and then find a way to use them, as well as give a lot to friends. We also needed to find a way to preserve them. Did you know that even though the skin of the mandarin fruit is still green, the fruit can be ripe enough to eat, and in fact be very juicy and delicious? It takes a cold snap in the weather, which we are really still waiting for, for the skins to change colour. We also don't have a clue what variety of ,mandarin this tree is.
When my Mum passed away on the 13th May, 13 years ago, just after Mother's Day, my Aunty Mary, my Mum's stepsister, gave me a mandarin tree to plant in memory of Mum, a lovely and very thoughtful idea. That was in 2008, so the mandarin tree is 13 years old, and this is the best crop it has yielded. This is all very special to me as my Mum would have been 100 years old this year. During those 13 years due to the tree's lack of interest in producing fruit, Mr. HRK has threatened it, cajoled it, fed it, watered it, but not hugged it, however something has worked because this year it has excelled itself, just when seriously it was under threat of being faced with it's demise. Because of it's sentimental value to me, of course I have protected it, or it might have met it's sad end a few years ago, but it just shows that trees have feelings and after 13 years it is coming into its own, a late bloomer. Sadly Aunty Mary is also no longer with us either, but I will let my cousins know this story. We never found out what the variety of this mandarin is. But it is a large fruit, thin skinned, with very few seeds and very sweet. If you have any clues as to what it is I would love to hear from you. Anyway it has adapted to living in the tropics, like all of us.
![]() |
| These are the fruit just starting to colour up. There are a few green ant nests in the tree as well just for added value. |
This is the mighty mandarin tree in our front yard surrounded by some tropical colour; Coleus, Ixora, a Desert Rose, purple ground Orchids, Geraniums and the large leafed exotic Caladium with a pink heart. Around the base of the tree is well cleared though as it needs to be.
And bucket loads to give away.
However when we started thinking about how to preserve some of them, Mr. HRK was very keen to experiment with dehydrating them. So the dehydrator moved into his workshop to work away quietly during the night, and off we started. Well the good news is that they are delicious dehydrated, and will keep bottled and well sealed in a cool place for 12 months. For the first batch we tried, we left the skins on the fruit when we sliced them up, however because the skin was still green, the fruit tasted quite tart when dried. However if you can dry them with the golden skin still on the fruit they will look very pretty, even prettier than mine:) I hope that enough fruit will survive the bugs and not become stung by fruit fly before they ripen enough to pick them, so we can dry some more with the skin on. That was another reason why we were fearful about leaving the fruit on for too long, as the fruit fly wreak havoc on citrus in our part of the world. We try to spray with eco friendly sprays and hang bottles of various concoctions from the tree guaranteed to repel the bugs but some fruit still gets stung.
This was our second batch where Mr. HRK removed the skins, and sliced the mandarins as finely as he could, and then dried them in our dehydrator overnight.
Then I decided to sprinkle a spice rub over the next batch before drying for some extra flavour, which took them to another level, and this photo below is the result. We have taste tested them on friends, and I recommend this method to you for oranges and mandarins. Bottle them up, label them, enjoy them at home, and they will also be delicious edibles to give as gifts. I still need to print off some labels, but they look really nice bottled in jars.
We are now sprinkling the mandarins over our cereal in the morning as well. We also dried some pineapple slices which is more popular and commercially available for sale than the mandarin, and we think it's delicious as well, and great for a snack if you are travelling.
SPICE RUB FOR DRIED MANDARINS
Ingredients:
4 large mandarins or oranges thinly sliced
1/2 cup coconut sugar
1 teaspoon ground cinnamon
1/4 teaspoon ground ginger
large pinch of sea salt
Method:
Fruit can be dried in the oven or in a dehydrator or even in the sun. Using the dehydrator is an easy way to do it as it can work overnight, and if not quite dry enough in the morning, then adjusted by the hour until the fruit is just right.
Wash and dry your fruit, then cut them into very thin slices, (as thin as possible)
Mix the spices and the sugar in a bowl and sprinkle evenly over the mandarins or oranges
Layer them on dehydrator trays, or if you want to use your oven, dry them on trays lined with baking paper at 200 deg. F for 2 1/2 to 3 hours. They may take longer.
We were using two dehydrators by this stage.
When dried, they can be stored in ziplock bags, or in bottles. Store them in a cool, dry place and they should store well for 12 months. In my neck of the woods, the humidity can cause problems, so they need to be packaged as soon as possible.
Dried mandarin or orange slices can also be added to decorate a cocktail, a fruit shrub, or any drink really. There are endless possibilities to how they can be used, only limited by our imagination. The flavour is really developed by the drying process.
The other day, whilst I was cooking a chook with stuffing in the oven for lunch, I made a Banana Sultana cake and to save time and electricity, I baked it in the oven with the chook. The cake was delicious, so was the chook by the way. I used some dried mandarin to decorate the top of the cake before baking. The dried fruit browned off a little too much for my taste when it was cooked, however it didn't take away from the overall success of the cake at all. This cake was just so delicious straight out of the oven that I will definitely be baking it again. I can't see any reason not to add both walnuts and sultanas if I have the ingredients on hand. This is a photo of my cake before it went into the oven.
Here is the recipe, which just happened to be on the back of a Sunbeam sultanas packet. I think the sugar content could be halved if you are watching calories, and this would still be to your taste.
Banana Sultana Loaf
Ingredients:
70 g butter
1 cup brown sugar
1 egg, beaten
3 ripe bananas, mashed
1 1/2 cups self raising flour
1 cup sultanas
2 tablespoons milk
Method:
Preheat oven to 180 deg. C.
Grease and line the base of a loaf tin, mine measured 22 cm x 12 cm and was perfect
Beat the butter and sugar together until light and creamy, add the beaten egg, and then add in the bananas one at a time
Add the flour, sultanas and the milk and stir by hand to combine
Pour the mixture into the prepared loaf tin and bake in the oven for 45 minutes. AT the end of the cooking time, insert a skewer into the centre of the cake and if it comes out clean it is cooked.
Cool in the tin and then slice to serve while it is still warm and enjoy.
When I was growing up and still living in my family home, I remember that this kind of cake was often served warm and with butter spread on it, gosh we were naughty back then weren't we, but it was so very good.
If you read my blog regularly, you will already know that I play Mahjong once a week, and as well as having the fun of playing Mahjong with friends, we also enjoy some delicious cake at each others homes. This week was my turn to host Mahjong, and I made my Ginger Syrup cake, which is a recipe I really enjoy making, and this time I decorated it with a slice of the dried mandarin. The ladies really enjoyed it. The cake recipe is now being distributed to all the Mahjongers. You can find it at this link. The flavours of the spice rub and the intense ginger flavour of the cake complimented each other perfectly, all enhanced by the wonderful espresso coffee made by our barista for the afternoon, Mr. HRK.
Well that's it from me for this edition of In My Kitchen. This is part of the IMK event hosted globally by Sherry from Sherry's Pickings, where lots of bloggers participate to showcase the highlights of what they have been doing in their kitchens for the month.
Take care, and thanks for dropping by,
Best wishes,
Pauline
Friday, April 30, 2021
A Turkish Feast - Lamb Kofta, Bazlama (Turkish flat bread), Tabbouleh, a simple Turkish salad, and Baklava
Eating fresh and healthy food has never been more important for everyone given the Covid epidemic still looming on our doorstep, and the change of season to Winter in the Southern Hemisphere anyway.
Thursday, April 22, 2021
Middle Eastern Lamb Siniyah a la` Yotam Ottolenghi
Rich and comforting, one pot stewed lamb with a tahini crust are the stars of this Middle Eastern version of Shepherds Pie. Who doesn't love a tasty Shepherds Pie? Well I promise you, this dish will exceed your expectations even further. Yotam Ottolenghi has created a very clever recipe here, one of many in his book "Simple".
Monday, April 19, 2021
Light and Cheesy Green Vegetable Coconut Soup
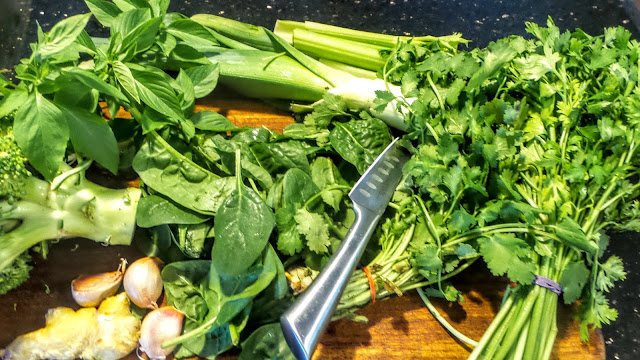
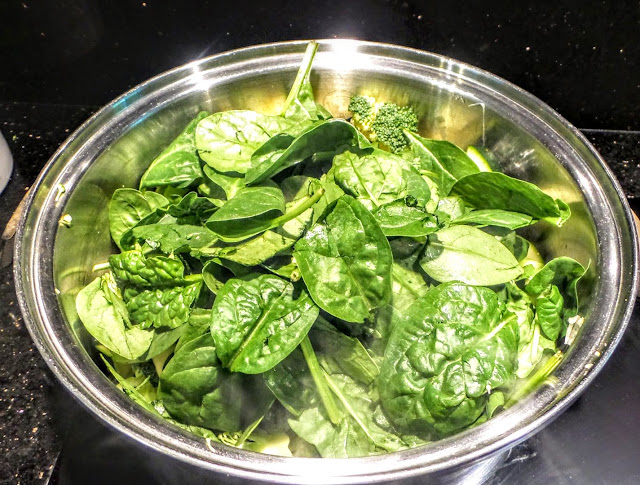
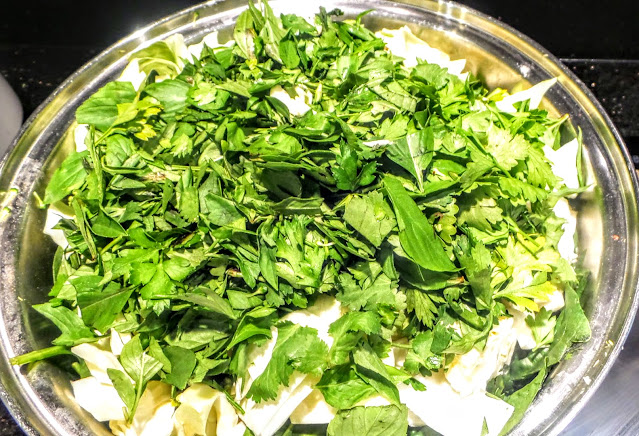
Vegetable lovers, this one is for you. This soup is a celebration of all the beautiful green produce coming into season right now. I have made no compromises with this soup my friends, it is all vegetable based, using totally green produce, organic is preferable. Leek, broccoli, zucchini, celery, peas, baby spinach, garlic and fresh ginger are the basis of my soup this morning but any edible green vegetables you find lurking in your vegetable crisper, will be perfect. Frozen green veg can be used as well. It's Meat Free Monday in our kitchen, and the perfect day for it. It's a wonderful time of the year to increase our intake of fruit and vegetables. With the weather cooling down even here in the tropics thank goodness, the markets and supermarkets are stocking a beautiful selection of fresh produce at reasonable prices. Broccoli is $2.99 a kilo today, reasonably priced at last. Will it go lower in price, I hope so. The weekend is often the time when we spend time socialising with friends and family, consuming delicious food and enjoying a couple of drinks so let's give our bodies a chance to recharge on Monday and also help the environment by going meat free. Never has it been more important to keep healthy and boost our immune system, and that is our responsibility.
Oh I just realised, I probably can't call the garlic or the coconut oil green, however they are both produced organically, and the garlic I use is grown locally at nearby Eungella.
Broccoli and zucchini are now recognised as being key vegetables for people suffering from high blood sugar and Type 2 diabetes or pre-diabetes. Without going into too much detail about it, broccoli is a rich source of Chromium, a mineral which helps to improve insulin action in pre-diabetes and control blood glucose, an important factor for everyone these days I think. Never has it been more important to keep healthy and boost our immune system. Green vegetable soup is also quite creamy when pureed, thanks to the texture and structure of the versatile zucchini. This soup makes it so easy to include broccoli in your family's diet in a very appetising way, and to control our weight as well. However, for some variety and to be economical, try using up green leftovers and bits and pieces in your crisper by adding celery, beans, chives, eschallots, peas, spinach or silverbeet, a mix of herbs, or anything green and edible. I used 1 cup of frozen peas and beans in this soup which is so convenient.
Ingredients:
- I love the flavour of leeks, however you can use onion.
- Use butter, olive oil or ghee instead of coconut oil to fry the vegetables if that is what you prefer, and add some coconut milk at the end of the cooking time for a delicious coconut flavour.
- Swap the green vegetables around using whatever you have on hand.
- Use chicken stock instead of vegetable if that is all you have.
- Use fresh rocket for some punch if you wish.
- If you are vegetarian, add some cooked green lentils for extra protein in your diet.
- Use up most of the green vegetable. Use the green stalk of the leek if still fresh, the leaves of the celery
- Zucchini is a great vegetable to use as it makes the soup nice and creamy
- Add some blue cheese at the end if you have some on hand (did I say blue, you'll be forgiven this time because it tastes great) but parmesan will be delicious