PASSIONATE ABOUT DELICIOUS HOME COOKING AND SIMPLE LIVING IN THE QUEENSLAND TROPICS
Wednesday, December 14, 2022
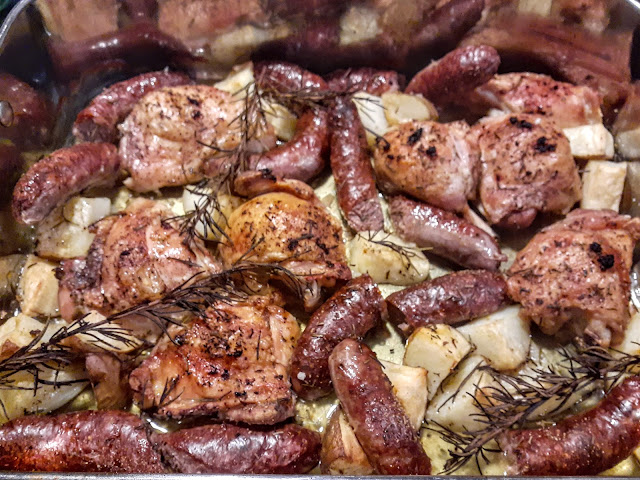
Italian Chicken and Sausage Tray Bake
Saturday, December 10, 2022
Rosemary Sourdough Focaccia Bread
It's the "Silly Season" when Focaccia bread is perfect to serve to friends with a Grazing Platter or a Charcuterie board and to take to a Christmas party. I've taken a long break from breadmaking for a number of reasons, and consequently I haven't been feeding my Sourdough "Mother" as often as I should. Trying not to eat too much bread which is impossible when I make my own, lack of time, lack of availability of the flour I like to use, travel, all of these things meant that I have sometimes fed my sourdough Mother sparingly just enough to keep her alive in the refrigerator. That sounds awful doesn't it? However, a few days ago I decided a good place to start with breadmaking again would be to make Focaccia. It's delicious and substitutes perfectly for crackers and biscuits. It makes a really nice change. We have an old and faithful rosemary bush growing in our front garden which keeps soldiering on and produces wonderful flavours in so many dishes, and particularly in this bread, and a batch of focaccia doesn't take as long to make as a sourdough loaf does. It's a perfect choice at this time of year.
I fed my sourdough Mother jars with plain flour and water, I have three Mothers now, as she has grown over the years. I placed two jars back in the refrigerator and left the other one out to ferment, and two days later she rewarded me by bubbling away happily. This is a refresh of a post I wrote a few years ago, and hopefully will inspire me and you too my friends to start baking some sourdough as a weekly tre in the New Year, to not only stretch the budget, but to also keep healthy as sourdough is great for the gut.
I was recently told by a dietician friend, that sourdough bread is most nutritious if baked long and slow, like most foods, so that is one of my projects for 2023, to research the best way to bring the best sourdough qualities out in my bread. Even though the dough has a slow overnight rising process, apparently the bread needs to bake long and slow as well, for maximum health benefits. I'd love to hear from you if you already bake your sourdough loaves this way.
Let's Bake some Sourdough Focaccia Bread:
This is how I make my Sourdough Rosemary Focaccia Bread. There are also plenty of recipes around for how to make this with instant yeast if you don't have a sourdough starter which will still be delicious. To substitute instant powdered yeast for sourdough starter, replace 100 g of starter with 5-7 grams of instant powdered yeast, or 12-15 grams of fresh bakers yeast.Makes 1 large focaccia, about 940 g., leftovers can be frozen. It reheats well.
- 4 sprigs fresh rosemary
- 30g (2 tablespoons) extra virgin olive oil, plus extra for drizzling
- 500 g (4 cups) plain flour
- 295 g (1 1/3 cup) lukewarm water
- 100 g (1/2 cup) liquid sourdough starter that is very active and bubbling, or substitute 5-7 grams of instant yeast
- 1 1/4 teaspoons instant powdered yeast (which I used) or if you can get it, use 7 g (2 1/2 teaspoons) fresh bakers yeast, in addition to the sourdough starter
- 10 g (2 teaspoons) salt
- Sea salt flakes for sprinkling


Put the dough in a shallow baking pan lined with baking paper.

Just before you put the focaccia in the oven, pour 1/4 cup or 50 g of water into the baking dish in the bottom of your oven.
Bake for 15-20 minutes.
Remove from the oven when beautifully browned, turn out the focaccia , and leave to cool on a wire rack.
Pauline
Thursday, December 8, 2022
In My Kitchen, December 2022
This is the Christmas Edition of In My Kitchen, and 'tis the season for baking. This also means my friends, that it's the season for Mangoes and Lychees here in tropical North Queensland. Bowen Mangoes which are the best to buy in our humble opinion, were costing $15.00 a bucket at our local market last Saturday. Just this morning we picked up a bucket for $12.00 from a roadside stall, and a bag of lychees. Bowen is just a couple of hours North from us. The lychees were a bit more expensive, the first of the season, but we couldn't resist them, they are a precious commodity, and for Christmas holidays only. We'll be freezing, dehydrating and eating mangoes for the next month, and then eating frozen mango with ice cream and yoghurt for the rest of the year. Dried mango is great for just snacking on. We'll also be looking out for the Common mangoes from backyard trees, strictly for making delicious Mango Chutney with, which we traditionally eat with our Christmas ham.
Thursday, December 1, 2022
Vanilla Custard made from Scratch
There are so many beautiful things involved with cooking your own custard. The result is just delightful. Making your own, without a packet of Foster Clark's custard powder to be seen is a labour of love, but so well worth it. Allow an hour max to make it. On the day of THE big event such as Christmas lunch, if you making it to have with Plum Pudding or dessert or even for an evening dinner, I would suggest making it first thing in the morning, even before you open the presents, and then it's done. In my part of the world in North Queensland, that's how we beat the heat on Christmas Day. Your custard will keep in a covered jug, on your kitchen bench until you are ready to serve it. This recipe is Part 2 to my previous post on how to cook your own Christmas Plum Pudding. This is the perfect custard recipe to serve with your Plum Pudding, with Apple Crumble, or another type of fruit crumble.
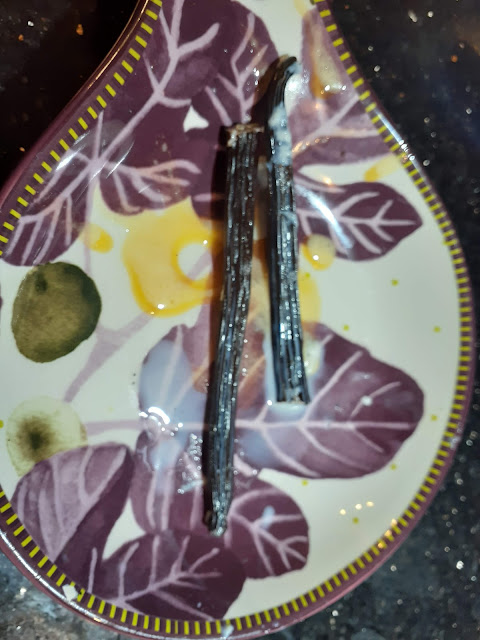
Using a precious Vanilla Pod is very special and gourmet in cooking, and brings a unique flavour to the custard. However, Vanilla Custard was made from scratch many years ago before we had access to vanilla pods, so good quality vanilla extract or vanilla bean paste will still work beautifully. It is definitely acceptable to substitute vanilla extract for the vanilla pod. However, vanilla essence can be of poor quality, so it is preferable to use a teaspoon of vanilla extract, not essence, or a teaspoon of vanilla bean paste will still disperse those beautiful flavours of vanilla through your custard.
Did you know you can make your own vanilla extract quite easily by steeping 3 vanilla beans in 1/2 a cup of cheap vodka for about 4 weeks. This is all that vanilla extract is. You can find out more about how to make your own vanilla extract in a previous post I have written, at this link.
Before I made this jug of custard I compared Jamie Oliver's recipe to my family recipe, the one that we always used at home, and the only real difference was the use of the vanilla bean. There are many fancier ways of making vanilla custard from scratch, and Jamie Oliver has a great video and recipe which uses cream and milk and serves more people, but I am happy to use this more cost effective one, using more full cream milk and without the bottled cream. On Christmas Day, a custard without even more calories suits me just fine. It still tastes delicious and with a beautiful consistency.
Ingredients:
Makes 500 ml, and serves 4-6 people. Allow an hour cooking time
600 ml full cream milk
4 large and very fresh free-range egg yolks
1 vanilla bean
2 tablespoons caster sugar
1 tablespoon cornflour
Method:
Halve the vanilla bean down the middle lengthways and scrape out the seeds with the tip of a knife.
Separate the egg yolks from the whites, and if you don't intend to use the whites in the short term, I suggest you store them in a covered container in the freezer for that pavlova you are making in the future.
Add both the bean and the seeds to a saucepan on a medium-low heat, pour in the milk and bring the milk just to the boil. You will know this is starting to happen when light steam evaporates off the milk.
Take the saucepan off the stove, and leave to cool slightly, then remove the vanilla beans.
Meanwhile whisk the egg yolks with the sugar and cornflour until pale. (I started this before I heated up the milk.) My eggs never became really pale as I used large, organic, free range eggs from a local supplier. They were expensive, but I thought it was worth it.
Pour a ladle of milk into the bowl and whisk well.
Then gradually add the warm milk, a ladle at a time, whisking well each time.
Pour the milk mixture back into the saucepan and cook gently on a low heat for about 20 minutes or until thickened, lightly whisking continuously in a figure of 8 motion. Please don't leave the stove or allow yourself to be interrupted during this process. It's only for 20 minutes at the most. Your reliable kitchen apprentice could help with this.
To check if the custard is thickened, dip a wooden spoon into the custard, and run your finger along the back of the spoon. If this leaves a line through the custard it is thick enough.
This custard is delicious served with Christmas Plum Pudding, and any type of fruit crumble. You can find the link to my recipe for Christmas Plum Pudding here.
Sunday, November 27, 2022
My Family Recipe for Christmas Plum Pudding
Monday, November 21, 2022
Mexican Chicken and Capsicum Tray Bake
Mexican food is always full of flavour and colour, and when the ingredients can be combined into a homemade Mexican style traybake, with a few shortcuts, then it's a winner in my humble opinion. The first time that I cooked this dish we all loved it, I honestly couldn't fault it.
Wednesday, November 16, 2022
Easy Sweet and Sour Chicken for a delicious mid-week meal
This is such an easy and economical version of Sweet and Sour chicken with delicious flavours and using basic ingredients. It's so easy to put together if you are feeling just a bit lazy at home mid-week but still have a yearning for something tasty that is simple to cook. We both felt like some Sweet and Sour chicken tonight, but because of the heat we are experiencing here at the moment, we just can't be bothered dressing up and going out to a restaurant either. Know the feeling?
Take away meals or restaurant eating for my generation growing up in an Australian country town in the 60's and 70's, often started with Chinese food, that was before the influx of Vietnamese, Thai, and Indian restaurants which have been great as well. Now just about every style of cuisine is catered for in the cities anyway. When I was still living at home, a take-away Shandy from our local Chinese restaurant was our big treat when my Mum didn't feel like cooking. The dish we ordered was always a Shandy, which from memory was Sweet and Sour chicken, Chow Mein, Fried Rice, two prawns, and something else, can't remember, can you? It could have been chicken and almonds. Those Shandy's gave me the taste for simple and delicious Chinese food at a young age. Meanwhile, the ladies were also enjoying a drinkable Shandy out on the Queenslander verandah, a combination of beer and lemonade, always more of the latter in the chilled glass.
More vegetables such as zucchini, carrot, peas or snow peas can be added to this dish if you have them on hand. Tonight I added some frozen peas, finely diced carrot and broccoli pieces, just to boost up the vegetable content. This is also so much healthier for us all when we are in a rush than reaching for a ready made jar of Sweet and Sour sauce from the supermarket with too many additives for my liking, and tastes even better and is just a cinch to make. This recipe was given to me by Jacquie, a young work colleague, many years ago when I was working in public libraries, and I have thanked her for it ever since. I think that this recipe has stood the test of time. When Jacquie gave me this recipe, we were all at a very busy stage in our lives, we had young children and were working fulltime. It's amazing that I still have this recipe really.
Left over cooked chicken or a cooked chook bought from the supermarket, can also be used as a substitute for the fresh chicken in the recipe. Just cut it into cubes or shred it, doesn't really matter, and add it at after cooking all of the other ingredients. So easy and fast. Have a night off from fancy cooking my friends, and treat yourself to this easy meal. I promise you, you and your family will love this one.Ingredients:
2 tablespoons Olive oil
3-4 diced chicken breasts or chicken thighs, or equivalent chicken already cooked
1 capsicum cut into cubes
4 celery stalks finely chopped
1 tin of pineapple pieces, or use fresh if you prefer
1 tin of tomato soup
1 teaspoon sugar
1 teaspoon curry powder
1 teaspoon fresh garlic (optional)
Let's cook:
Cut chicken pieces into bite size pieces and fry in oil until lightly browned. Remove from the pan.
Add chopped vegetables and fry until slightly softened.
Add sugar and curry powder. Stir together and simmer until vegetables are cooked but still slightly crisp.
Serve with white or basmati brown rice, some fried rice, or noodles.
Pauline x
Saturday, November 12, 2022
In My Kitchen, November 2022
I am looking forward to Christmas so much this year, it will be a Summer's Christmas at the beach for us, sun and surf, can't wait. With the promise of catching up with family and friends as a bonus.
Thursday, November 10, 2022
Middle Eastern Spiced Date, Walnut and Chocolate Loaf
Date and Walnut Loaf is quite a classic loaf cake to bake, and I've given this a subtle Middle Eastern flavour by adding Baharat spice powder instead of Mixed Spice, and I've also added a dessertspoon of cocoa to bring an added depth of flavour and colour to the loaf.
Thursday, November 3, 2022
Honey Chocolate Cake, Bee Keeping in the Tropics, and our Honey Harvest
Hello to all Chocolate Cake lovers. I'm not a chocoholic, in fact I can give or take chocolate most of the time, but it is one of life's little luxuries along with honey. However, I do love a slice of Chocolate Cake. On the weekend, when I had a craving for chocolate and chocolate cake I was unaware of what was to follow.
Thursday, October 27, 2022
Individual and Budget Friendly Cottage Pies with Cheesy Parmesan Mash
Economical beef mince, vegetables and Worcestershire Sauce are the basis of these Cottage Pies. This is also the perfect recipe for Batch Cooking aimed to stretch a budget and make life easier for us all during the week. By that I mean, doubling the recipe, and cooking up a whole batch of mince on the weekend, and just eating what you need for that night, or serving half to dinner guests as cottage pies, and freezing the rest for later. It's very flexible. Dinner size portions of cooked beef can be frozen in small freezer bags and thawed out quickly. Cooked savoury mince can be used later in a pie maker if you have one to make individual pies, so quick, easy and delicious. A can of tomatoes, and some fresh or dried Italian herbs such as basil and oregano, and a splash of red wine can transform the mince into a delicious Pasta sauce, or you might just like to have it heated up on toast for an easy Sunday night's dinner. The possibilities are endless, and with a little imagination, nobody in your family need realise that they have eaten the same batch of mince a few times over but with a different name.
I heard an ABC morning breakfast presenter say the other day during their program that preparing the evening meal is the most stressful time of the day for her, and I thought what a shame that was, given what fronting the cameras in the morning in front of Australia must be like. That's what I would call stressful. Batch cooking and a little organisation can help to take the stress out of the daily evening meal preparation. It's also a much more economical way to purchase and cook up ingredients. Your freezer can be your best friend.
A Note about the Ingredients:
Halve the list of ingredients I have given, for 6 servings. The mixture made 13 serves for me. I cooked these Cottage pies in 13 dishes with a 1 1/2 cups capacity to test out the quantities even though I only needed 8 of them. The original recipe said to use six 1 3/4 cup (430 ml) ovenproof dishes. There's not a lot of difference and even a slightly larger ramekin than 1/3/4 cups would be ok, but we find that the 1 1/2 cup capacity is perfect, when the pies are served with additional vegetables such as fresh asparagus and broccoli. I love serving meals in individual serving dishes or ramekins, and it seems to make the meal that bit more special for everyone at the table. However, this cottage pie is also perfect cooked in 1 large ovenproof dish. They make great leftovers the next day.
 |
| Ingredients: Minced beef, carrot, celery, onion, sauces to be added |
Ingredients:
Makes 13 individual serves
2 tablespoons extra virgin olive oil
2 large onions (600 g), chopped finely
4 cloves garlic, crushed
4 stalks (600 g) celery trimmed, chopped finely
2 medium sized carrots, very finely chopped
1.5 kilos minced beef (2 x 750 g)
1/2 cup plain flour
2 cups beef stock, or 2 beef stock cubes and 2 cups hot water
5 tablespoons Worcestershire Sauce
2 tablespoons tomato sauce
3 cups frozen peas
8 large potatoes, boiled and mashed
2 cups finely grated parmesan or cheddar cheese (this can be optional)
Fresh thyme leaves for garnishing the potato mash (optional)
Homemade spicy tomato relish to serve (find my recipe at this link)
 |
| Dinner plates with my homemade Spicy Tomato Relish in small dishes ready for the Cottage pies from the oven |
Stir the flour through the mince mixture, and gradually add the stock, the Worcestershire Sauce, and the tomato sauce. Keep stirring until the mixture starts to boil and thicken. This happens quickly.
Remove from the heat, stir in the frozen peas. Season well with salt and freshly ground pepper to taste.
I cooked my mince in the morning so that it would be cold by the time I needed to add the potato to the dishes, and then I knew it was ready to go. However, it can be prepared before assembly.
Preheat your oven to 220 deg. C (200 deg. C fan forced.) Spoon the beef mixture into 12-13 x 1 1/2 cup ovenproof dishes, or just 6-8 dishes and freeze the rest.
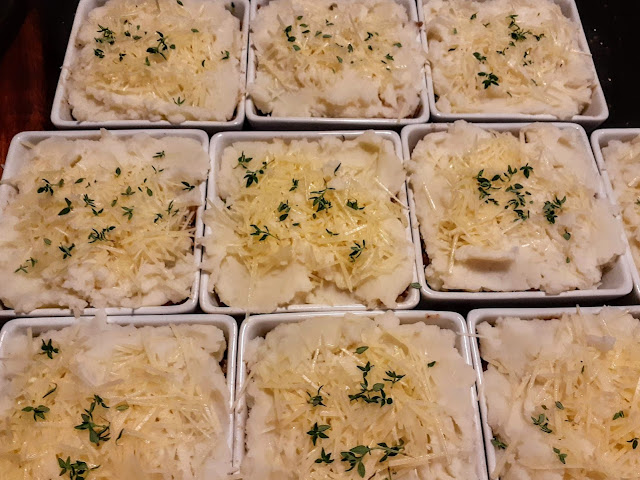 |
| Ready for the oven |
Spread the mash onto the pies. The potato needs to be hot so that it spreads well onto the cold mince. I use a fork to draw squiggles onto the surface of the potato, which ensures all of those little peaks will crisp up and brown up. My friends, this is an essential step, and is a tradition going right back with Cottage Pies that I remember as a child. Sprinkle with the parmesan cheese and some fresh thyme leaves. This is optional but I love how it looks and it gives the potato a beautiful flavour.
Place the dishes onto an oven tray to catch any overflow. Bake for about 25 minutes or until the potato is golden brown and the pies are heated through. As the ingredients are precooked this only takes half an hour at the most.
 |
| Ready to serve |
- Mashed potato doesn't freeze well. I wouldn't freeze whole cottage pies with the cooked mashed potato. It doesn't take long to boil some potatoes, and the potato can be added to the cooked mince and browned off in the oven quite quickly.
- Carrots weren't in the original Australian Women's Weekly recipe, so if you don't have them, that will be fine. In my mind though, onion, carrots and celery are the perfect vegetable base for savoury mince.
- Freshest celery, carrot and onion bring a beautiful flavour to the mince.
- Culinary Magic seems to happen when mashed potato is added to top up minced beef and is then baked to a beautiful golden topping to create a cottage pie. So delicious.
- Serving cottage pies with homemade tomato relish, or good quality bought tomato relish is the perfect accompaniment
- Fresh Asparagus is in season at the moment. Lightly blanched fresh asparagus and fresh blanched broccoli are the perfect vegetables to serve.
Friday, October 21, 2022
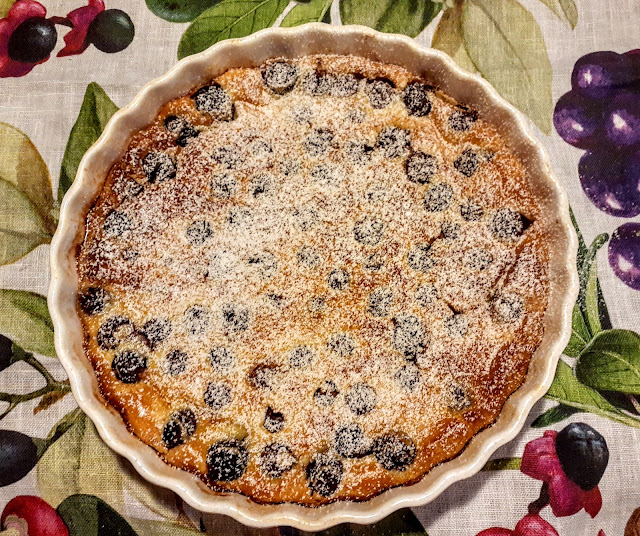
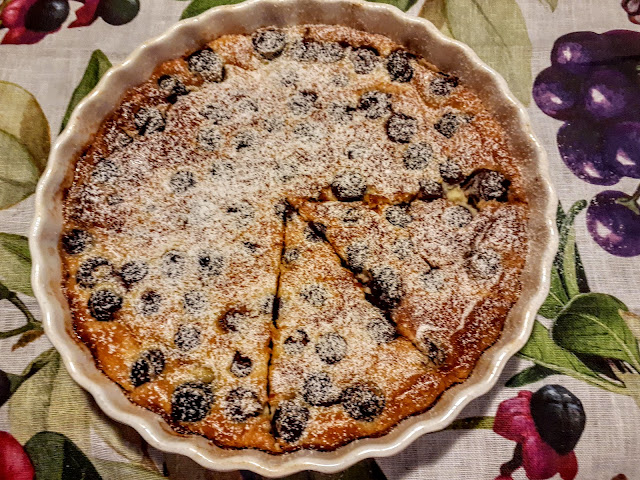
Cherry Clafoutis
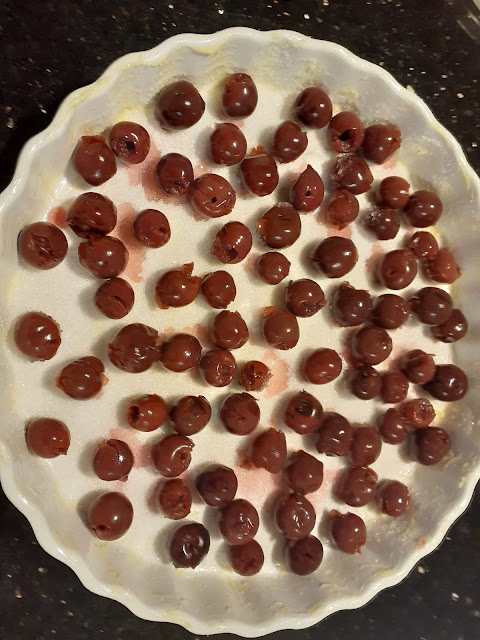
Cherry and stone fruit season is just around the corner for us here in Australia, so not to be deterred due to a lack of fresh cherries, I have chosen to make this delicious dessert using pitted Morello Cherries. They work beautifully in this French flan which is also a kind of baked custard. Baking this Cherry Clafoutis is the beginning of my plan to start cooking easy dishes with a French theme, as I am travelling to France next year in Spring to visit M & M and our three grandchildren, who are currently living in Montpellier. I finalised all of the air fares this morning, so it seems real now. I am so excited but also a little nervous as I am travelling on my own. Mr. HRK has decided not to go as it is a heck of a long way on a plane from Australia and last time we flew to the Falkland Islands and South America he experienced a lot of pain with his sinuses. His back doesn't cope well with all that sitting either so I'm being very brave and hoping that my smattering of French, the Aussie accent and a smile, will encourage people to help me navigate Charles de Gaulle Airport if needed. I've flown into there before, but it's been a long time. I just can't wait to see my grandchildren again.
A Clafoutis is a French dessert likened to a French flan, and with interesting rural origins. It is most commonly thought to have originated in the countryside around Limousin, which is slap bang in the middle of France mostly atop the Massif Central, and sometimes referred to as France's rural heartland. This is an area I would love to visit. Did you know the name of the Limousine vehicle is thought to have originated from Limousin, because of the resemblance between the covered portion of the vehicle and a popular style of black cloak worn in Limousin for warmth? Makes sense eh?
I take travel seriously these days, so I'm attempting to improve my schoolgirl French, read some of the French cookbooks sitting on my bookshelf, watch some French cooking programs, and make some recipes like this one to whet my appetite for French food. That's the food and language boxes ticked. I saw a Cherry Clafoutis made by a French chef on TV recently, however never having made a Clafoutis before I thought I would make a simpler version which I could easily replicate in my son's kitchen and which would be suitable to cook for my grandchildren. French desserts can be anything from elaborate and decadent to simple, rustic and delicious. I'm starting with the latter. This one is very low on sugar, and therefore suitable for serving to the whole family, and very quick and easy to make. A great place to start. It is also very versatile as lots of different fruits can be used, stone fruits such as apricots, peaches and plums are also perfect. I'm really looking forward to stone fruit season in a month or so.
This is really a French baked custard, and can be your Summer go to dessert. It just might be ours. Almond flour can be substituted for plain flour to convert it to gluten free, however the eggs can't be replaced, they are the essential custard ingredient.
I adapted this recipe from one by Jamie Oliver.
Bon appetit.
 |
| Straight out of the oven |
Let's cook:
Serves 4-6
Cooks in 50 minutes plus resting
Ingredients:
300 g pitted Morello Cherries or use fresh, preferably stones removed, if you have them
1/2 tablespoon unsalted butter, at room temperature for greasing
1 tablespoon caster sugar
icing sugar. for dusting
BATTER
60 g plain flour
1/2 teaspoon baking powder
3 large free-range eggs
60 g sugar
METHOD:
Preheat the oven to 180 deg. C./gas 4.
Grease a 25 cm round ovenproof baking dish with the butter. Sprinkle the sugar over the base.
Add all the batter ingredients with a pinch of sea salt to a food processor bowl and mix until there are no lumps and totally smooth.
Set aside the mixture in a largish jug for 20 to 30 minutes. I balanced my food processor jug over the bowl so that every last drop of batter drips into the bowl, or just use a spatula. It's much easier to pour the batter into the baking dish from a jug with a pouring lip than from my food processor bowl.
Dot the cherries around the base of the baking dish. If you are using fresh cherries, you can soften them up a bit by placing the dish in the oven for 5 minutes.
Remove the dish from the oven and carefully pour the batter over the top of the cherries, without moving the cherries, and the cherries are just covered.
Return the dish to the oven and bake for about 30 to 35 minutes, until it is beautifully golden and puffy. Like a souffle, the clafoutis will lose it's puffiness quickly however that doesn't really affect the taste or texture. Such a shame though isn't it? Allow the dessert to cool slightly to lukewarm.
When lukewarm, sprinkle the clafoutis with a dusting of icing sugar and serve with Vanilla Bean ice cream or whipped cream.
A few cook's notes: (I've learned a lot about making clafoutis)
- Sprinkle with icing sugar when the clafoutis is lukewarm and ready to eat, not when it's hot straight out of the oven, or the icing sugar will just absorb into the cooked custard.
- Clafoutis is also lovely served in individually buttered 12 cm diameter dishes. Ladle the batter over the cherries, filling to near the top of the dishes. Bake your dishes in the oven for 10 minutes or until the batter is no longer sticky when tested with a skewer or knife.
- If using individual dishes, it may also be easier for you to place the dishes in your oven with the oven shelf pulled out, and pour the batter into each individual dish, rather than trying to place the dishes in the oven without trying to spill any.
- I've read that clafoutis is delicious served up for breakfast in France and on the following day, if that is what you like, however I wouldn't recommend serving it up for dessert again the following day. Served fresh out of the oven on the day of baking gives the best result.
- Be warned, in my bottle of cherries, 8 cherries still had the pips in place.
Warm wishes and Bon appetit,
Pauline
Thursday, October 13, 2022
In My Kitchen, October 2022
When I start writing In My Kitchen each month, I have to really think about what I've been cooking, baking, and where I've been that's noteworthy. The weeks fly by. I've looked back at my photos for the past month, and they tell most of the story. However, we've been travelling quite a bit during this last month and haven't been home very much, so here's a rundown of life in my kitchen in between and during our travels. I've also purchased a few nice things along the way that I found quite serendipitously.
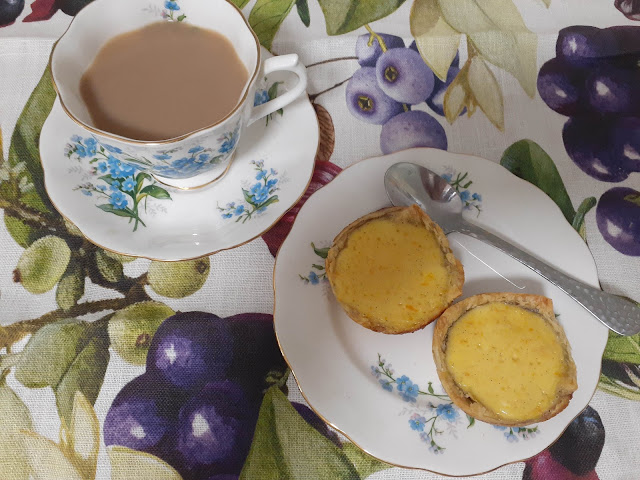
I made a batch of these Portuguese Custard Tarts in Cairns, after being inspired by the tarts we ate at the Gallery Cafe in Chillagoe, where we travelled for the weekend just recently. My recipe is based on Jamie Oliver's Portuguese Orange Custard Tarts recipe and these were delicious.
 |
 |
| Stem Ginger slices in syrup added to half the batter, before adding the remainder of the batter carefully |
 |
| Ginger cake straight out of the oven |
I also made my favourite Lemon Crispy slice, because I just happened to have a packet of Corn Flakes in the pantry, which is the basis of this quick and easy but delicious biscuit slice. I only buy Corn Flakes so that I can make these Lemon Crispies. I've given the recipe to so many of my friends, and they all love it.
Unfortunately the nasturtiums are finished in our garden now.
 |
| Taking a selfie on our way to the Opera House |
