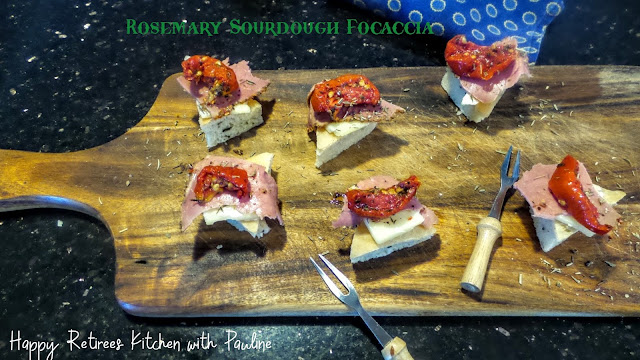
It's the "Silly Season" when Focaccia bread is perfect to serve to friends with a Grazing Platter or a Charcuterie board and to take to a Christmas party. I've taken a long break from breadmaking for a number of reasons, and consequently I haven't been feeding my Sourdough "Mother" as often as I should. Trying not to eat too much bread which is impossible when I make my own, lack of time, lack of availability of the flour I like to use, travel, all of these things meant that I have sometimes fed my sourdough Mother sparingly just enough to keep her alive in the refrigerator. That sounds awful doesn't it? However, a few days ago I decided a good place to start with breadmaking again would be to make Focaccia. It's delicious and substitutes perfectly for crackers and biscuits. It makes a really nice change. We have an old and faithful rosemary bush growing in our front garden which keeps soldiering on and produces wonderful flavours in so many dishes, and particularly in this bread, and a batch of focaccia doesn't take as long to make as a sourdough loaf does. It's a perfect choice at this time of year.
I fed my sourdough Mother jars with plain flour and water, I have three Mothers now, as she has grown over the years. I placed two jars back in the refrigerator and left the other one out to ferment, and two days later she rewarded me by bubbling away happily. This is a refresh of a post I wrote a few years ago, and hopefully will inspire me and you too my friends to start baking some sourdough as a weekly tre in the New Year, to not only stretch the budget, but to also keep healthy as sourdough is great for the gut.
I was recently told by a dietician friend, that sourdough bread is most nutritious if baked long and slow, like most foods, so that is one of my projects for 2023, to research the best way to bring the best sourdough qualities out in my bread. Even though the dough has a slow overnight rising process, apparently the bread needs to bake long and slow as well, for maximum health benefits. I'd love to hear from you if you already bake your sourdough loaves this way.
Let's Bake some Sourdough Focaccia Bread:
This is how I make my Sourdough Rosemary Focaccia Bread. There are also plenty of recipes around for how to make this with instant yeast if you don't have a sourdough starter which will still be delicious. To substitute instant powdered yeast for sourdough starter, replace 100 g of starter with 5-7 grams of instant powdered yeast, or 12-15 grams of fresh bakers yeast.
Timing:
Steeping the rosemary: 12 hours
Mixing and kneading: 15 minutes
First rising: 2 hours
Proofing: 1 hour 30 minutes
Baking: 15-20 minutes
Ingredients:
Makes 1 large focaccia, about 940 g., leftovers can be frozen. It reheats well.
- 4 sprigs fresh rosemary
- 30g (2 tablespoons) extra virgin olive oil, plus extra for drizzling
- 500 g (4 cups) plain flour
- 295 g (1 1/3 cup) lukewarm water
- 100 g (1/2 cup) liquid sourdough starter that is very active and bubbling, or substitute 5-7 grams of instant yeast
- 1 1/4 teaspoons instant powdered yeast (which I used) or if you can get it, use 7 g (2 1/2 teaspoons) fresh bakers yeast, in addition to the sourdough starter
- 10 g (2 teaspoons) salt
- Sea salt flakes for sprinkling
The night before, remove the leaves from the fresh rosemary sprigs and mix them with the olive oil. Leave them to steep overnight at room temperature. If you forget to do this the night before, add the rosemary to the olive oil the next morning, and warm up the olive oil and rosemary together in your microwave. This will help to soften the rosemary.
I kneaded my dough by hand so I will give instructions for using a stand mixer and for doing it by hand.
KNEADING BY HAND
Put the flour in a large mixing bowl and make a large well in the centre. Pour in half the water, then add the sourdough starter, yeast, and salt. Mix well, then add the rest of the water and knead until all the flour has been incorporated. Add the rosemary and the steeping oil. Knead the dough until it becomes smooth and elastic. If you think the dough is a little dry, wait until you've added the oil and rosemary before adding more water.
I always knead my sourdough by hand, however there isn't really much kneading needed for this recipe. If you prefer to use the dough hook in your Stand Mixer, here is a method for that process.
KNEADING IN A STAND MIXER
Put the flour, water, sourdough starter, yeast, and salt in the bowl. Knead with the dough hook for 5 minutes at low speed, then for 10 minutes at high speed. Add the rosemary and the steeping oil around 3 minutes before the end of the kneading time.
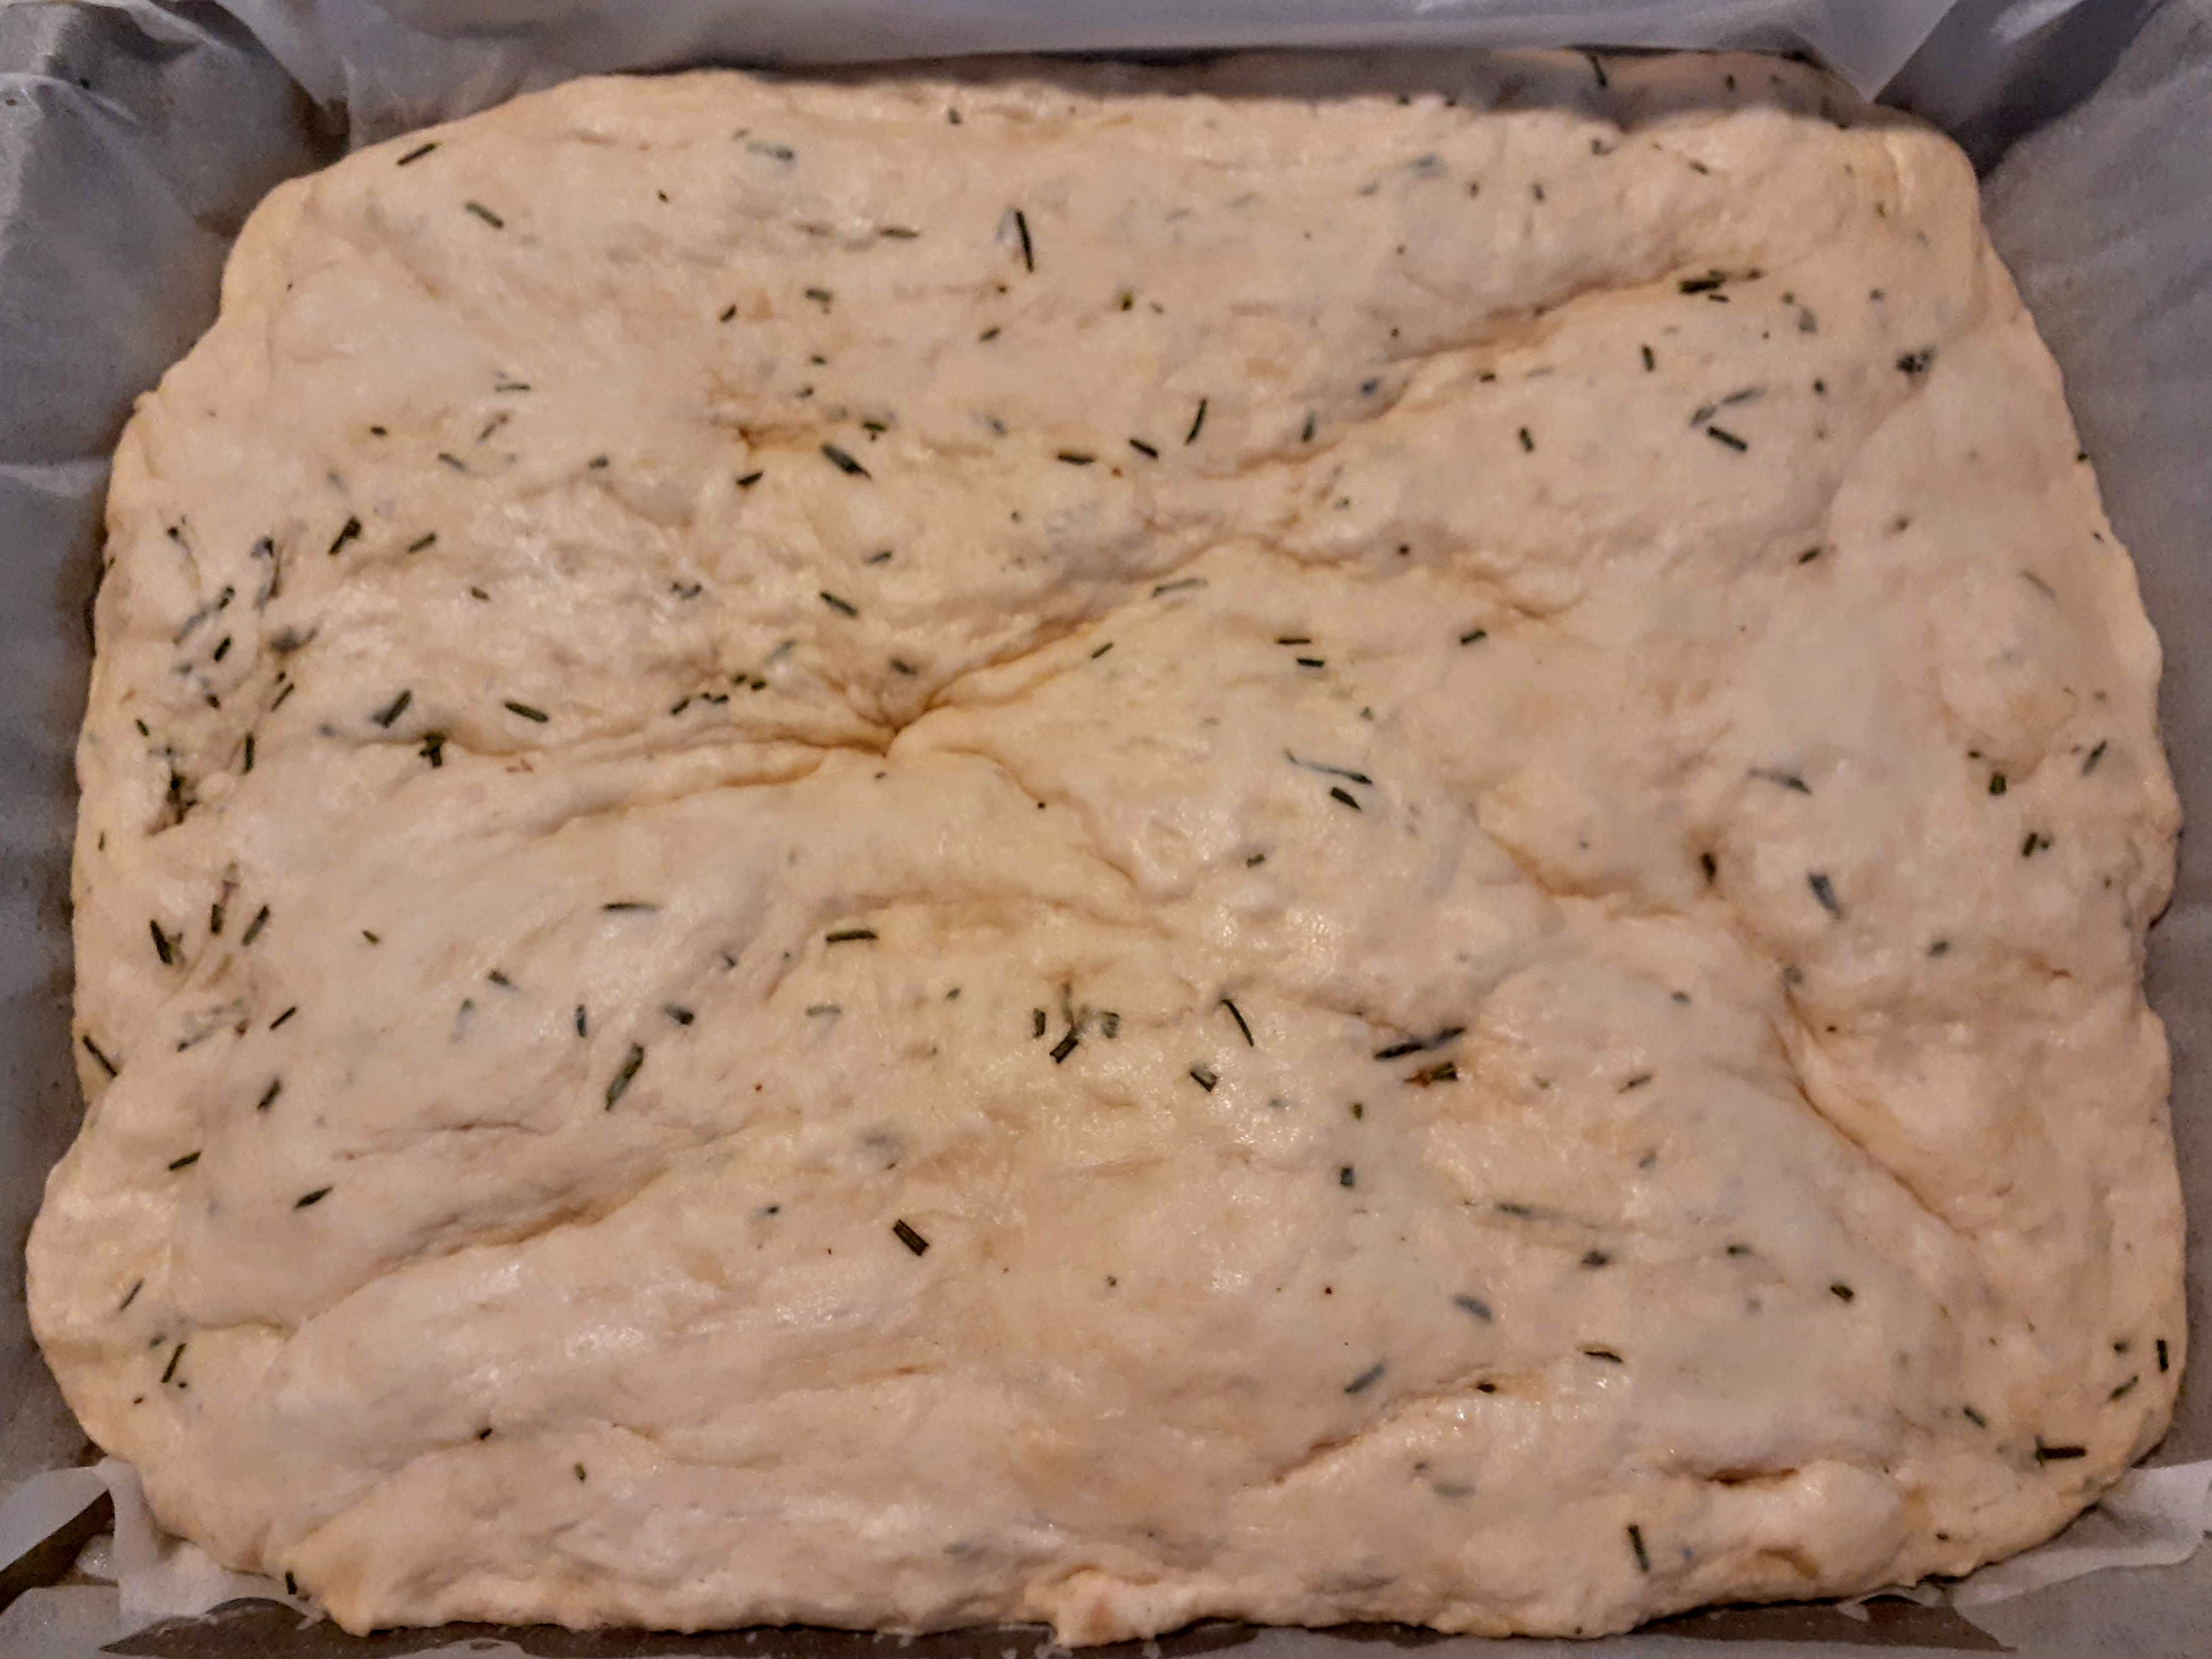
Shape the dough into a ball, cover with a damp cloth, and leave to rise for 2 hours in a warm spot. Midway through the rise, deflate the dough by folding it in half. By the end of the rising time it will have increased in volume.

Put the dough in a shallow baking pan lined with baking paper.
Stretch the dough with your hands to make a flat piece that fills a 40 x 30 cm pan, or 16 x 12-inch pan. I used one of my old baking dishes. Cover with a damp cloth and leave to proof for 1 hour and 30 minutes. Ensure the pan is deep enough for rising.
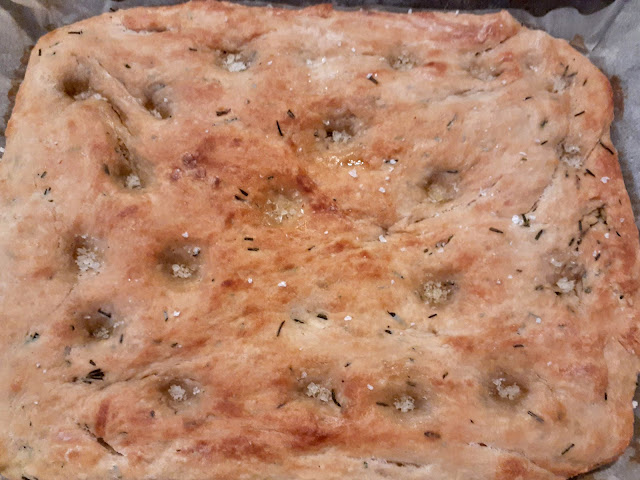
Place a baking tray on the bottom shelf of your oven and preheat to 230 deg C. (or 450 deg. F.) Use the tips of your fingers to press small holes over the surface of the focaccia. Pour a little oil into the holes and sprinkle with salt flakes.

Just before you put the focaccia in the oven, pour 1/4 cup or 50 g of water into the baking dish in the bottom of your oven.
Bake for 15-20 minutes.
Remove from the oven when beautifully browned, turn out the focaccia , and leave to cool on a wire rack.
Slice into squares or tear apart. Mr. HRK loves the rustic approach by tearing a Focaccia loaf into pieces, no photo available unfortunately. Focaccia pieces are also delicious dunked in good quality olive oil, and then into Dukkah. This is a very simple way to eat it.
However one time he excelled himself and cut it into perfect shapes.
Stay safe, healthy, and Covid free, it's on the rise again unfortunately.
Warm wishes,
Pauline