Hello, I'm Pauline, a passionate home cook with over 40 years of recipe development experience and over 12 years of food blogging. I live in Tropical North Queensland. What began as a simple way to document family recipes has grown into Happy Retiree's Kitchen, a trustworthy source for achievable, delicious recipes. I'm a self-taught cook and food and travel blogger, and have spent over a decade perfecting how to make home cooking achievable, flavoursome, and very accessible. Let's cook.
Sunday, November 27, 2022
My Family Recipe for Christmas Plum Pudding
Saturday, August 6, 2022
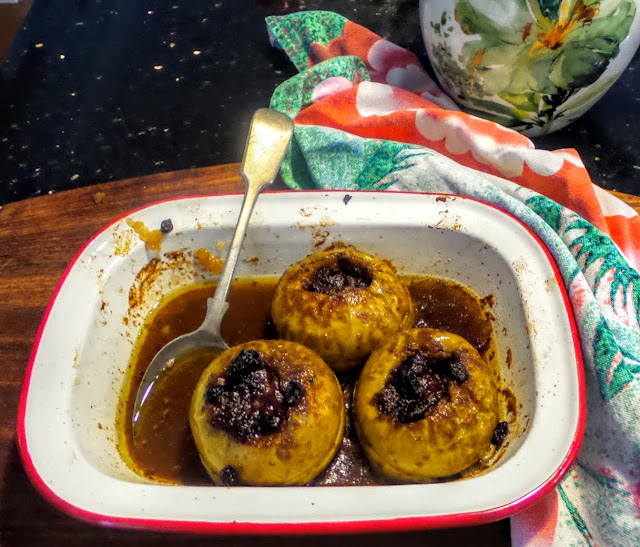
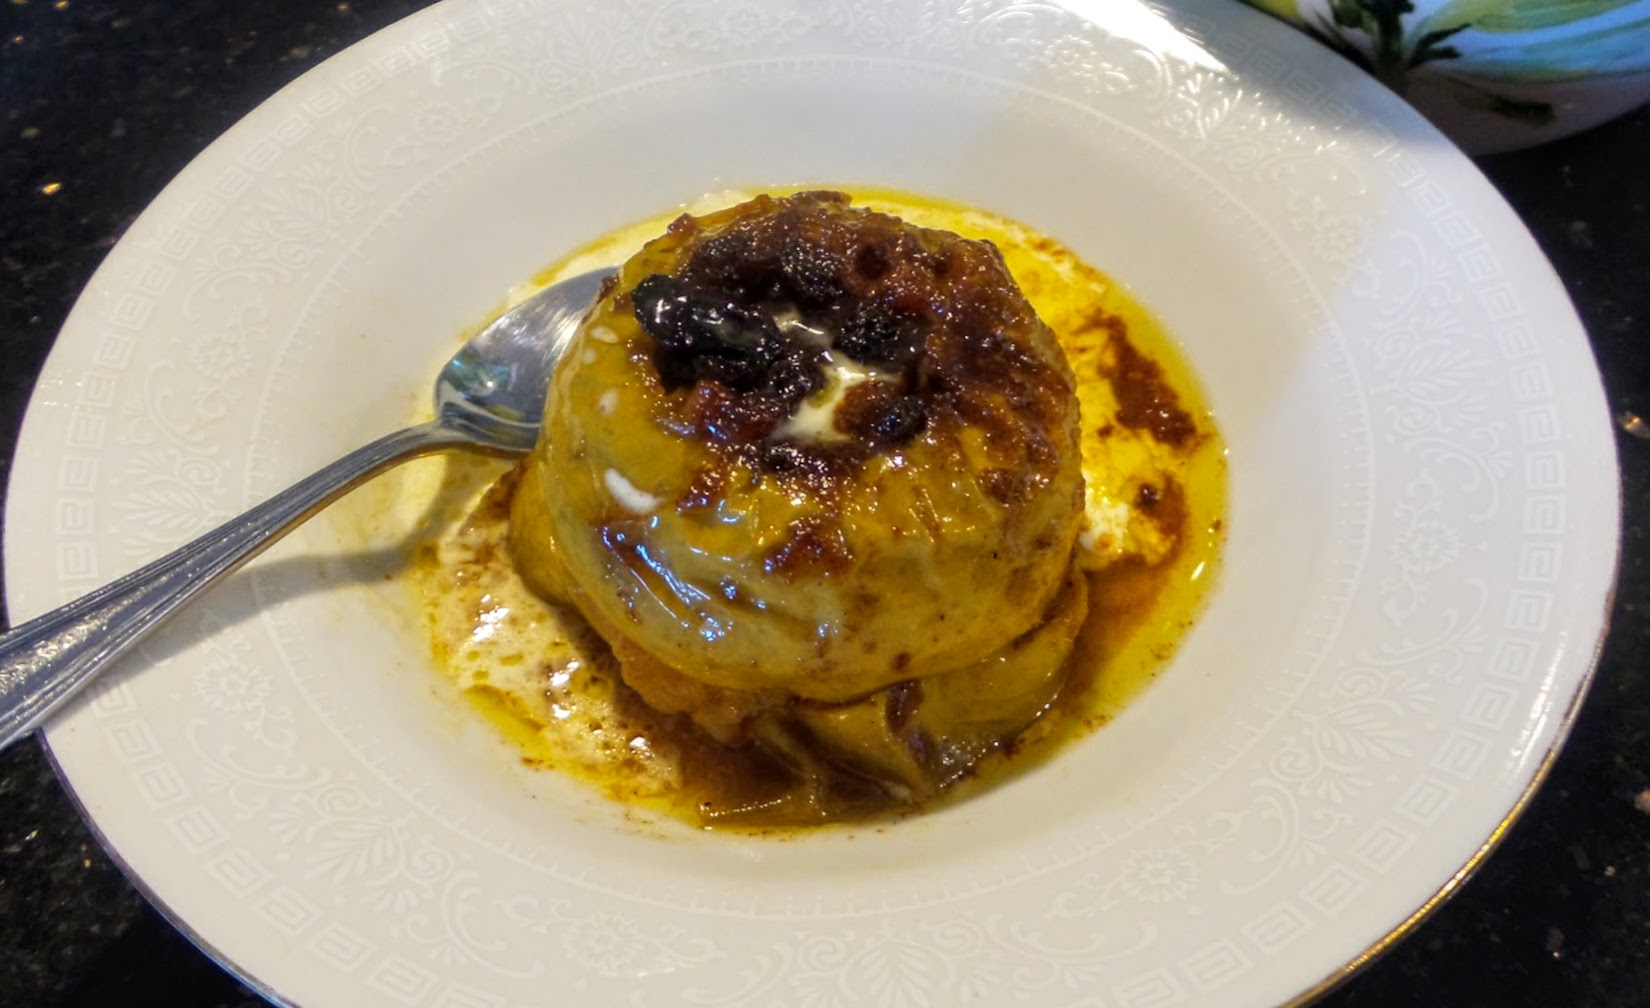
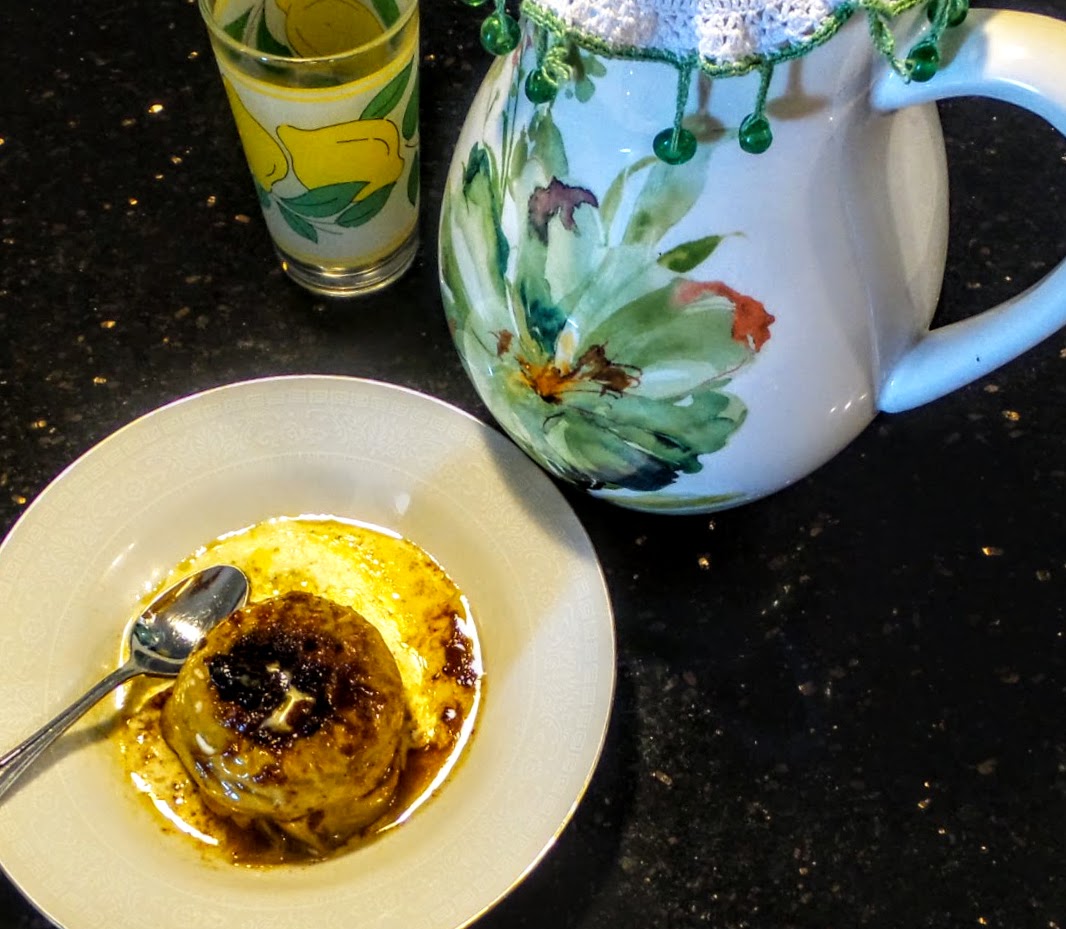
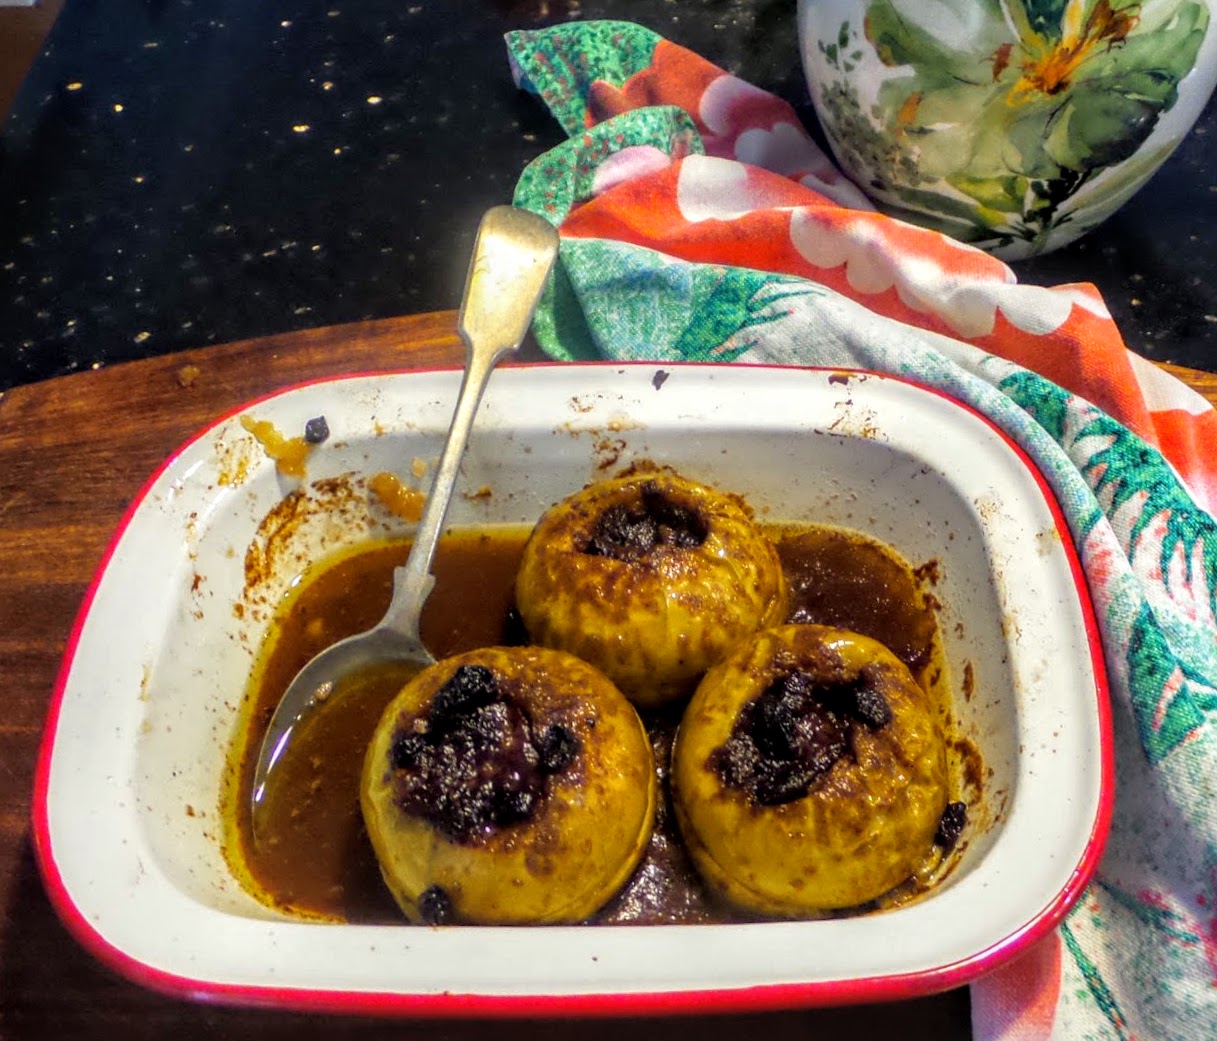
Baked Granny Smith Apples
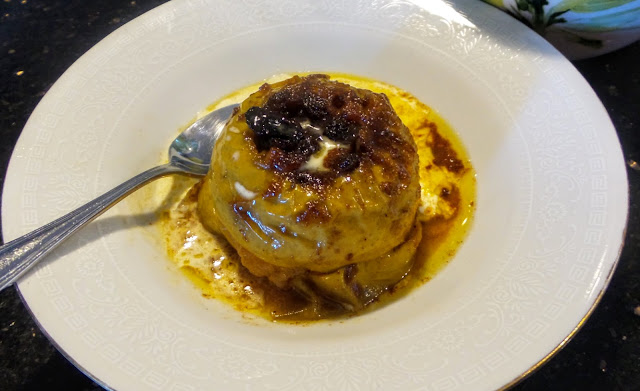
Baked apples for dessert can be cooking away while you are eating your main course, and can be prepared well in advance. It is the perfect dessert, as it not only ensures that you eat at least one serving of fruit in your day, but apples are also a great dessert for the whole family, healthy and delicious. Baked apples are quite the old-fashioned sweet, and our Grannies, even our Great Grannies, back in the day, were happily baking apples with various fillings to stretch the budget and present a delicious and welcome dessert for everyone. Desserts with every meal were the norm in my Grandmothers day. Back then, the cavity was sometimes just filled with sugar, and cloves were placed around the apple for spicy flavour, or a date or a few raisins or sultanas could be placed in the base of the apple, before filling it with sugar. They knew how to make the most of what they had on hand in the pantry. All that sugar and no guilt. They probably served them with custard or homemade ice-cream if they had an icebox, and everyone was happy.
I've taken the dried fruit ingredient to the next level in this recipe, as I baked my Fruit Mince Teacake a couple of weeks ago, and had a quarter of a large jar of fruit mince leftover in the frig. It is the perfectly spiced fruity filling for baked apples. Apples are such a ubiquitous fruit, that so many wonderful dishes can be cooked with them, however when it comes to baking, the Granny Smith apple performs the best. Did you know about 60,000 tons of Granny Smith apples are harvested in Australia each day?
Legend has it that Maria Ann Smith, also know as Granny Smith, was an Englishwoman who emigrated to Australia in the mid-1800s with her husband Thomas. She was doing some weeding one day in Tasmania, and was composting I like to think, and dumped a crate of old rotten Crab apples from their orchard at the back of their garden. Many months later she noticed a sapling growing, which subsequently produced the green and slightly sour fruit, which became known as the Granny Smith apple. I'm really pleased that the botanists haven't decided to change it's name. Granny Smith lives on, but she died never knowing that the apples she discovered would be popular the world over, thanks to their resilient qualities. There are many versions of the origin of the Granny Smith apple but they all agree that Granny Smith was responsible.
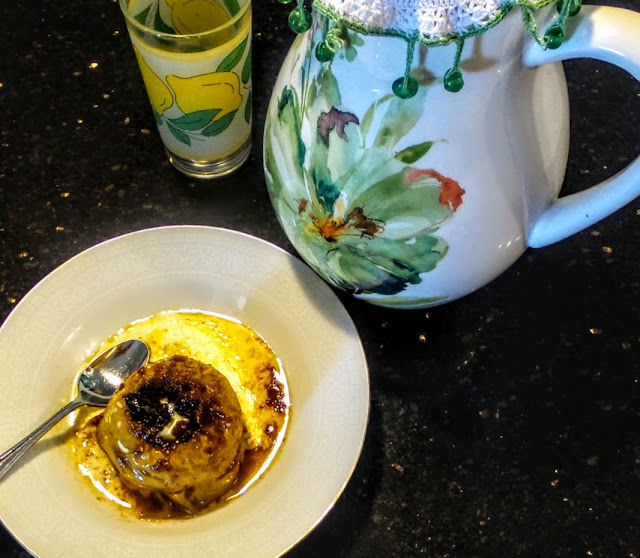
I enjoy eating fresh apples, but these baked apples exceeded my expectations, especially with fresh cream.
Ingredients:
4 large Granny Smith Apples (the green ones)
80g unsalted butter, diced and softened
1/3 cup (65g) brown sugar, firmly packed
1 tsp ground cinnamon
1/2 cup fruit mince or mixed dried fruit
Pure (thin cream) to serve
Method:
Preheat the oven to 180 deg. C
Find a baking dish that the apples fit snugly into.
Core the apples. To prevent the apples bursting during cooking, cut a thin line around the circumference of each apple with a sharp knife.
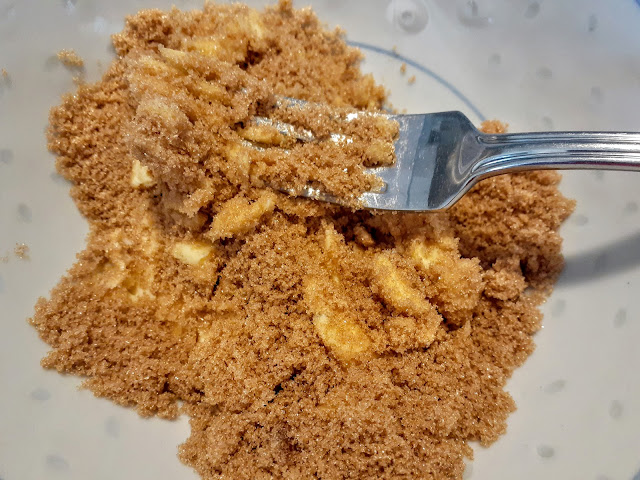
Mash the softened butter and brown sugar together in a bowl with a fork until combined.
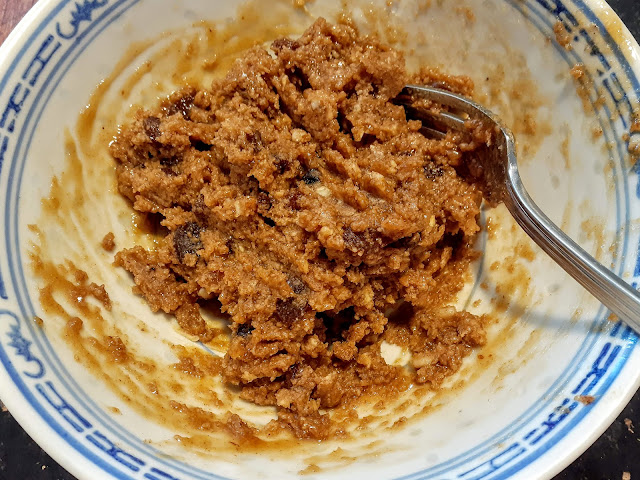
Then add the fruit mince and the cinnamon until well combined.
Spoon the fruit mixture into the cavity of each apple, and press it down well.
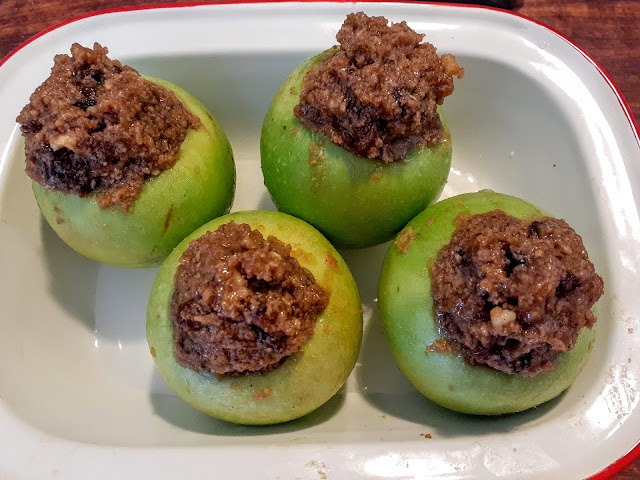
Pour 1/4 cup water (60ml) into the base of the dish. Bake for 30 minutes or until bubbling and until the apples are just starting to soften.
Place the apples on 4 serving plates, small or large, and drizzle the juices from the baking dish over the apples, and top with a lot of cream.
Serves 4
I have Granny Smith apples in my frig crisper, and some dried fruit in packets, so dessert is sorted for tonight. We'll be very happy to enjoy a rerun of this dessert, whilst there is still a hint of cool weather left, however this dessert is still light enough to be eaten in Summer.Saturday, July 10, 2021
Golden Syrup Dumplings, a comforting dessert
The night time temperatures have plummeted here so it's time to indulge with a warming dessert. I am often asked to make this dish for dessert when I am cooking for the whole family. However last time when we were away and I wanted to make them, I found it difficult to find a recipe that I liked online. So here is my favourite Golden Syrup Dumpling recipe which I recently rediscovered in an old school recipe book of mine, which was a relief as I thought I had lost the recipe forever. The whole story about this lost recipe was in my last post. This is comfort food in a bowl.
The recipe was originally given to me by Theresa, a former work colleague, who was a qualified and talented book binder in a library where I worked, many moons ago. I really hope book binding hasn't become a lost craft in this digital age.
If you are very well organised with plating up your main course, the dumplings can be placed in the saucepan to simmer on a low heat and will be cooking as the main course is being eaten. Let the steam do the work. Dessert is then ready to be served following the main course. It's that easy. However it is important that your wide saucepan can maintain a low simmer for 10 minutes. I had trouble with that this time, as the thermostat on my stove top has decided to cause problems, and I can only maintain a low heat on the small hotplates, the large hotplates only work at a high heat. I found a way around it, however it looks like we will be purchasing a new stove top in the near future.
1/2 cup white or lightly packed brown sugar (I use white)
2 tablespoons golden syrup
30 g butter
Dumplings:
Ingredients:
1 cup self-raising flour
30 g butter
1 egg, beaten
1/3 cup milk
Serves 4
Let's cook:
- Prepare the syrup first so that you are ready for cooking the dumplings. Place water, sugar, golden syrup, and butter in a wide, shallow saucepan with a lid. Stir occasionally over low heat to dissolve sugar, and rest the sauce while you make the dumplings.
- To make the dumplings, sift the flour into a mixing bowl. Rub in the butter to form crumbs with your fingers, then make a well in the centre of the mixture and add egg and milk. Mix gently so that ingredients are just combined. (Don't over mix). Add more flour if necessary until you have a dough which forms a ball. The consistency should be similar to a scone mixture.
- Bring the prepared syrup to the boil. With floured hands, form dough into little balls and place, one at a time into the syrup. Alternatively, drop portions of dough from a spoon into the boiling syrup. Or prepare the dumplings in advance and keep them covered and refrigerated until ready to use.
- Cover the saucepan immediately with a lid, and let the steam do it's work to create light, fluffy dumplings. Reduce heat and simmer until dumplings are cooked and well risen (about 6-10 minutes, depending on size). Don't overcook or they will be tough.
Pauline
Friday, March 13, 2020
Quick Blueberry Self Saucing Pudding

Need a quick but delicious pudding for dessert just because you want some comfort food in a hurry on a rainy and windy day, or for just no particular reason? A self saucing pudding always hits the mark. This post is laced with nostalgia, focusing on a pudding recipe that Mr. HRK passed on to me from his Mum Jessie, a long time ago. All of the ingredients were already in my pantry so that was easy. I added dried blueberries to the batter instead of using currants or sultanas, as that's what I had left over from making my Rustic Blueberry Scones. I always try to keep a couple of packets of dried blueberries on hand as they come in so handy.
Thursday, November 8, 2018
Spiced Prune Compote
We used to simply call this dish Stewed Prunes, and whilst this recipe cuts back on the sugar and adds more heavenly scented spices, essentially it is a homely blend of stewed prunes, great for the constitution and promoting regularity, if you know what I mean. Cook this very easy combination of ingredients, and you will have a week's worth of delicious dessert at your fingertips, which just keep improving in flavour. It is also delicious served on your morning porridge, especially for those now experiencing cooler weather in the Northern Hemisphere.
As I cook this, I just love the beautifully rich and spicy aromas in the kitchen reminding me of baking Christmas cakes and Plum Puddings. Which reminds me, Christmas is just around the corner, so Christmas cakes should be next week's job.

Ingredients:
500g prunes, pitted or unpitted
1 vanilla bean, sliced in half lengthwise or 1/2 teaspoon vanilla paste
1 cinnamon stick
1/2 teaspoon ground cinnamon
1/2 teaspoon ground nutmeg
1 teaspoon ground ginger
2 strips of lemon zest
1 tablespoon Port (optional)
2 teaspoons Date Syrup (or substitute Maple Syrup or a mild honey)
Method:
Add the prunes to a large saucepan and cover well with water. Combine all the other ingredients and add to the saucepan. Simmer for 30-35 minutes, ensuring that a gentle simmer is maintained so that the prunes don't boil dry. The prunes should be plump and luscious when they are cooked. I think they plump up more when they are unpitted. With that though comes a warning to everyone to remove the seeds as they eat them, and of course they should be removed before being given to children.
The flavours of this dish will develop even more over the next few days, if left in a covered container in the refrigerator. Extra honey or maple syrup can be added if you like it sweeter.
Serve with boiled custard, yoghurt, ice cream or whatever you fancy.

Bye for now,
Warm wishes
Pauline
Monday, November 13, 2017
Nigella's Chocolate Cake with Coffee Buttercream
On Friday, I made a Chocolate cake with Coffee Buttercream and I really enjoyed making this cake. I haven't cooked a double layer cake with a buttercream icing for quite a while, and it's how cakes always used to be made, generally with icing. This was simply a matter of adding the wet ingredients to the dry ingredients, with no electric mixer involved, just a wooden spoon and a bowl. A cinch to make. We had our tennis friends over for Dinner, after tennis, and as it was Lou's birthday, I wanted to make her a proper cake with icing, that could be nicely lit up by candles. The cake I chose is from Nigella Lawson's latest recipe book, "At My Table", and thanks Nigella because it is delicious and a delight to eat.
It's so nice to celebrate with cake, don't you think. As we get older, the saying of "a second on the lips, a lifetime on the hips" becomes particularly relevant, unfortunately, so Mr. HRK and I try to limit ourselves to desserts and cakes for mainly celebratory events now. We are getting better at it. Twenty years ago that wasn't an issue for me. However it is amazing how often celebrations come around and of course as a starter I have cake every Tuesday at Mahjong, which is a longstanding tradition, and so life goes on. It's all about enjoying a celebration now and then, and balancing our diet and lifestyle around the celebrations.
Anyway let's cook:
Ingredients for the cake:
225g Plain Flour
275g Caster Sugar
75g sieved good quality Cocoa
2 teaspoons Instant Espresso Coffee Powder
2 teaspoons Baking Powder
1 teaspoon Bicarbonate of Soda
175ml Full Cream Milk, at room temperature
175 ml Vegetable Oil, plus more for greasing the baking tins if you wish (I used butter for greasing mine)
2 large Eggs, at room temperature
250ml of Water, from a freshly boiled kettle
Ingredients for the Icing
350g icing sugar
175g soft Unsalted Butter
Instant Espresso Coffee Powder, 2 1/2 teaspoons, dissolved in 1 x 15ml tablespoons just-boiled water
(All of my tablespoon measurements are 20ml and that is what I probably used in this recipe with no problems)
This icing is a cinch to make in a food processor. Because it is warmer and more humid where I live than where this recipe was probable tested, I thought I might have problems with the icing melting all over the cake but it held it's consistency beautifully, although it is slightly cooler here at the moment.
- Preheat the oven to 180 deg. C./160 deg. C. Fan forced
- Grease the sides and line the bases of two 20 cm cake tins. It is important not to use cake tins with loose bottoms as this mixture is very runny (a very liquid batter).
- Combine the flour, sugar, cocoa, 2 teaspoons of powdered instant espresso powder, baking powder and bicarb soda in a large bowl. Mix with a fork until thoroughly combined.
- Whisk the eggs, milk and oil together in a smaller bowl. Pour the wet ingredients into the dry and with a whisk or wooden spoon beat to mix until you have a smooth, but thick mixture like a fudge.
- Gently beat in the just boiled water, scraping the sides and bottom of the bowl as you do.
- A smooth dark, glossy and fairly runny batter will develop and when everything is well mixed, pour equally into the two tins. (If you have a large batter pouring jug that you can mix the ingredients in use that for easier pouring, however I just used a large bowl.)
- Place the cake tins into your oven for 25-35 minutes, but Nigella suggests that you start checking at 20. Mine took 35 minutes to cook, by which time, the cakes were coming away from the sides of the tin, and a few cracks were forming on the surface. Don't worry about that, it will all be covered up by delicious butter cream icing. When the cake tester came out clean I knew they were cooked.


Let's make the icing now:
Pulse the icing sugar in your food processor a few times to remove any lumps but make sure the feeding funnel on the lid is covered so that icing dust doesn't fly everywhere:)
Place one of the cakes on a serving plate or stand, flat-side up. It is probably better to place the highest cake as the base. Spread the lower layer generously with half the coffee butter cream, then make a sandwich with the second layer, with the top of the cake facing upwards.
Pile the rest of the butter cream on top, and use a wide icing knife or spatula to spread the icing, over the cake. Nigella uses the word swirlingly to describe this technique which I love.
Decorate as you wish. I used smashed pistachio nuts, or you could use chocolate covered coffee beans as she did. It is your choice.
If you eat some cake this week, I hope you really enjoy it. Have a great week. We are enjoying some rain which is wonderful, and means it is also cool.
Best wishes
Pauline
Friday, February 5, 2016
Marilyn's Heaven in a Bowl Custard
![]() |
| Custard |
CUSTARD, HEAVEN IN A BOWL
Jump straight to the recipe:This is one of those recipes which I am sure will become part of the McNee clan's cooking repertoire. Marilyn goes back a long way as a teaching colleague of Neil's, and came to the Retiree's lunch at our place last week with a plum pudding left over from Christmas, a cheesecake, and this nostalgic custard. What I love about Marilyn's generation, is that she has no qualms about taking a shortcut with her cooking when necessary, hence the use of the Vanilla Instant pudding mix in this recipe. I should also mention she taught Home Economics for many years, hence her cooking, and her dressmaking etc is highly respected.
Neil was so excited by this custard, that I felt almost guilty that I don't cook more of it for him. In this heat we are experiencing at the moment, it is brilliant to be able to just mix up the ingredients for a recipe, chill it in the frig and it is ready. No cooking involved. I took a bowl of the custard which was leftover from the Retiree's lunch over to Kati's the following day for her birthday lunch. She found it in her frig that evening, and renamed it Heaven in a Bowl. I think she and little Leon ate it all in one sitting.
Neil remembers when the Vanilla Instant Pudding craze started when he was a just a boy living in Toowoomba. He often played over at his neighbour's house in the afternoons, where they sometimes made the pudding for dessert. Occasionally he was offered some, and as a lad he was in heaven when that happened. I don't remember my Mum ever using instant puddings, except perhaps jellies, as I think she cooked most things from scratch. However, in those days in Rockhampton they didn't frequent shops or the very scattered supermarkets as often as we do now.

The addition of the sprinkle of nutmeg in this pudding gives the dish an individual flavour, akin to that of homemade custard.
- Add milk and cream to a bowl.
- Sprinkle in the pudding mix.
- Beat with an electric hand beater until the mixture is thick enough.
- Sprinkle with ground nutmeg and mix in.
- Place covered bowl in the refrigerator and allow to set. This won't take long.
- Whilst this is a custard it will set as a pudding consistency.
- Serve with fresh fruit, frozen mango, plum pudding or whatever you are serving or just eat it on it's own as comfort food.
Warm wishes,
Sunday, August 17, 2014
Passionfruit Butter or Passionfruit Curd
Passionfruit are in season, and it is wonderful to have the time now to convert the surplus into preserves and special treats. The bittersweet flavour and fragrance of the common purple passionfruit is without peer.
Ingredients:
10 large passionfruit
3 eggs
200g castor sugar
30 g unsalted butter
1/3 cup (80ml) lemon juice
Cut the passionfruit in half with a sharp, serrated knife and take out the pulp.
Beat the eggs well.Tip the eggs into a stainless steel saucepan, and add the passionfruit pulp, sugar, chopped butter and lemon juice.
Stir ingredients over a low heat until mixture comes to the boil, then keep at a simmer for 15 minutes, stirring constantly with a wooden spoon to ensure it doesn't burn or reduce down too much.
The mixture will thicken by the end of this cooking time, but will set properly and reach the required consistency when it cools.
Ladle the hot passionfruit butter into into clean, warm sterilised jars and seal.
When opened, store the jars in the refrigerator.
Sunday, February 16, 2014
Lemon Sago Pudding or Lemon Tapioca Pearl Pudding
Lemon sago is an old fashioned dessert, which Mum often cooked for us as kids, however back then I didn't appreciate it as much as I do now. Very strange.