Showing posts with label rye sourdough bread. Show all posts

Thursday, March 30, 2023

Herbed Mushrooms on Home Baked Toasted Sourdough


The unique umami of edible mushrooms combined with fresh herbs, garlic and balsamic vinegar shines through in this recipe in both taste and nutritional benefits. Essentially it is a simple dish to make but every element within brings wonderful savoury richness to the plate. This recipe evolved after I had baked two loaves of rye sourdough bread in the morning. I felt like celebrating the success of the bread with a tasty lunch to compliment toasted sourdough. 

Sunday, February 5, 2023

In My Kitchen - February 2023

Before Christmas I was selected as a prospective juror for two weeks from the 30th January, 2023, so whilst trying to do my civic duty, I said I would be available if my name was chosen in the second selection, and of course it was. This meant I needed to cancel any commitments for these two weeks, so that I would be available. However, late each afternoon last week I was messaged by the Supreme and District Court to the effect that I wouldn't be required the following day, so it's been a week of just planning things day by day. Next week could be exactly the same, with no assurance that I will be required but if I am I will have to be available or risk being heavily fined. It seems a strange system, but I can't think of a better one, so next week I will be living day by day as well. That means plenty of time in the kitchen, reading a good book, playing the piano, impromptu catch ups, etc., sounds good. One week to go without being able to make any definite daily plans in advance. I have already sat on a jury panel once, have you? Thankfully mine wasn't a disturbing case, and I found the experience quite interesting.

Photo taken before the spinach started to wilt a little.

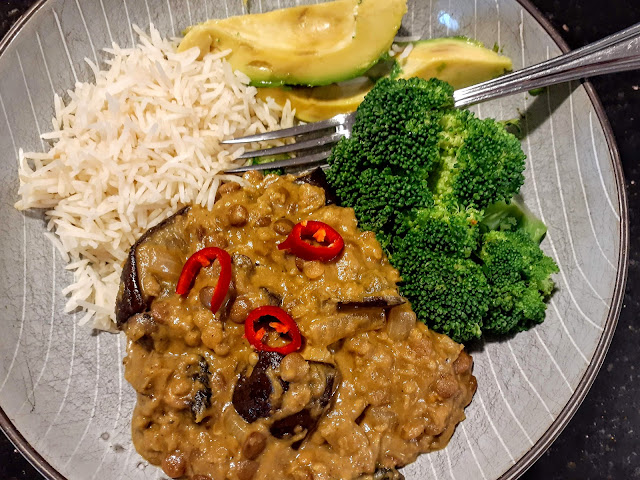
 I've made two vegetarian Lentil curries, a week apart, because the first one was so delicious. It was a Lentil, Mushroom and Spinach Curry, and I made this one when all of the flooding was occurring In Southern Queensland and New South Wales and there wasn't very much fresh fruit and vegetables available at the supermarkets or the farmer's markets because of the heat and then the rain. I bought a packet of spinach leaves and some mushrooms, which were close to the expiry date and made this curry. I always have jars of green and red lentils in the pantry, so they were the basis of an earthy and delicious lentil curry. 

Then a week later, I changed the vegetables slightly and made an eggplant and mushroom lentil curry, which we enjoyed even more, perfect for the wet weather at the time. Even though this is such a simple recipe, I'll post it on the blog soon, as I know you will enjoy it too. A simple vegetarian meal with leftovers during a busy week, is just what is needed sometimes. However leftover chicken could easily be added to it.
 

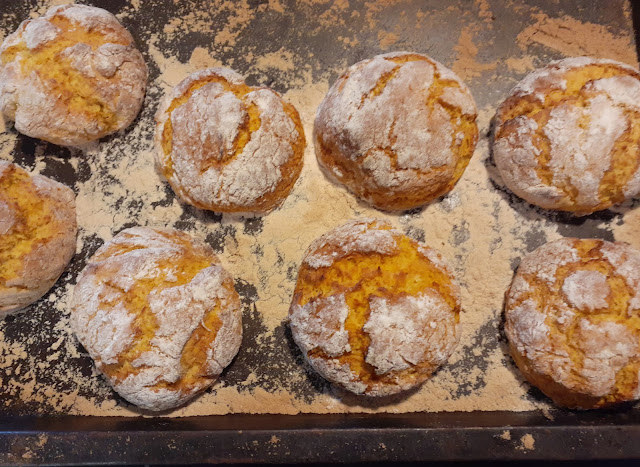
I had some leftover mashed pumpkin in the refrigerator so I made a batch of golden Pumpkin Scones from a Kent (Jap) pumpkin, just last week. Cooked mashed pumpkin keeps well in the frig. I made these ones slightly larger than normal, and the recipe made 8 instead of 10. I think a pumpkin scone needs to be on the larger side as they are so delicious with a cuppa. They also reheat beautifully in the microwave oven.  I haven't made pumpkin scones for a while, and it pays to keep in practice don't you think?

So while the scone making flour fest "in my kitchen" was in full flight, I resurrected my Sourdough Mother from the depths of the refrigerator, poor thing. She responded beautifully to being fed with just plain flour and warm but boiled water, by bubbling away happily on the warm windowsill of our North facing laundry.  I always ferment a couple of jars of the sourdough, more than I need, just in case one doesn't work well. The trick is to catch the bubbling dough just in time before it starts bubbling up through the lid of the jar onto the windowsill below. The jars really need to sit in a container in case that happens. "Bubble, bubble, toil and trouble", always pops into my head when I am working with sourdough as it seems a bit witchy, even though it should be "Double, double, toil and trouble" originally from Shakespeare's tragedy, Macbeth. 

Beautiful sourdough bubbles

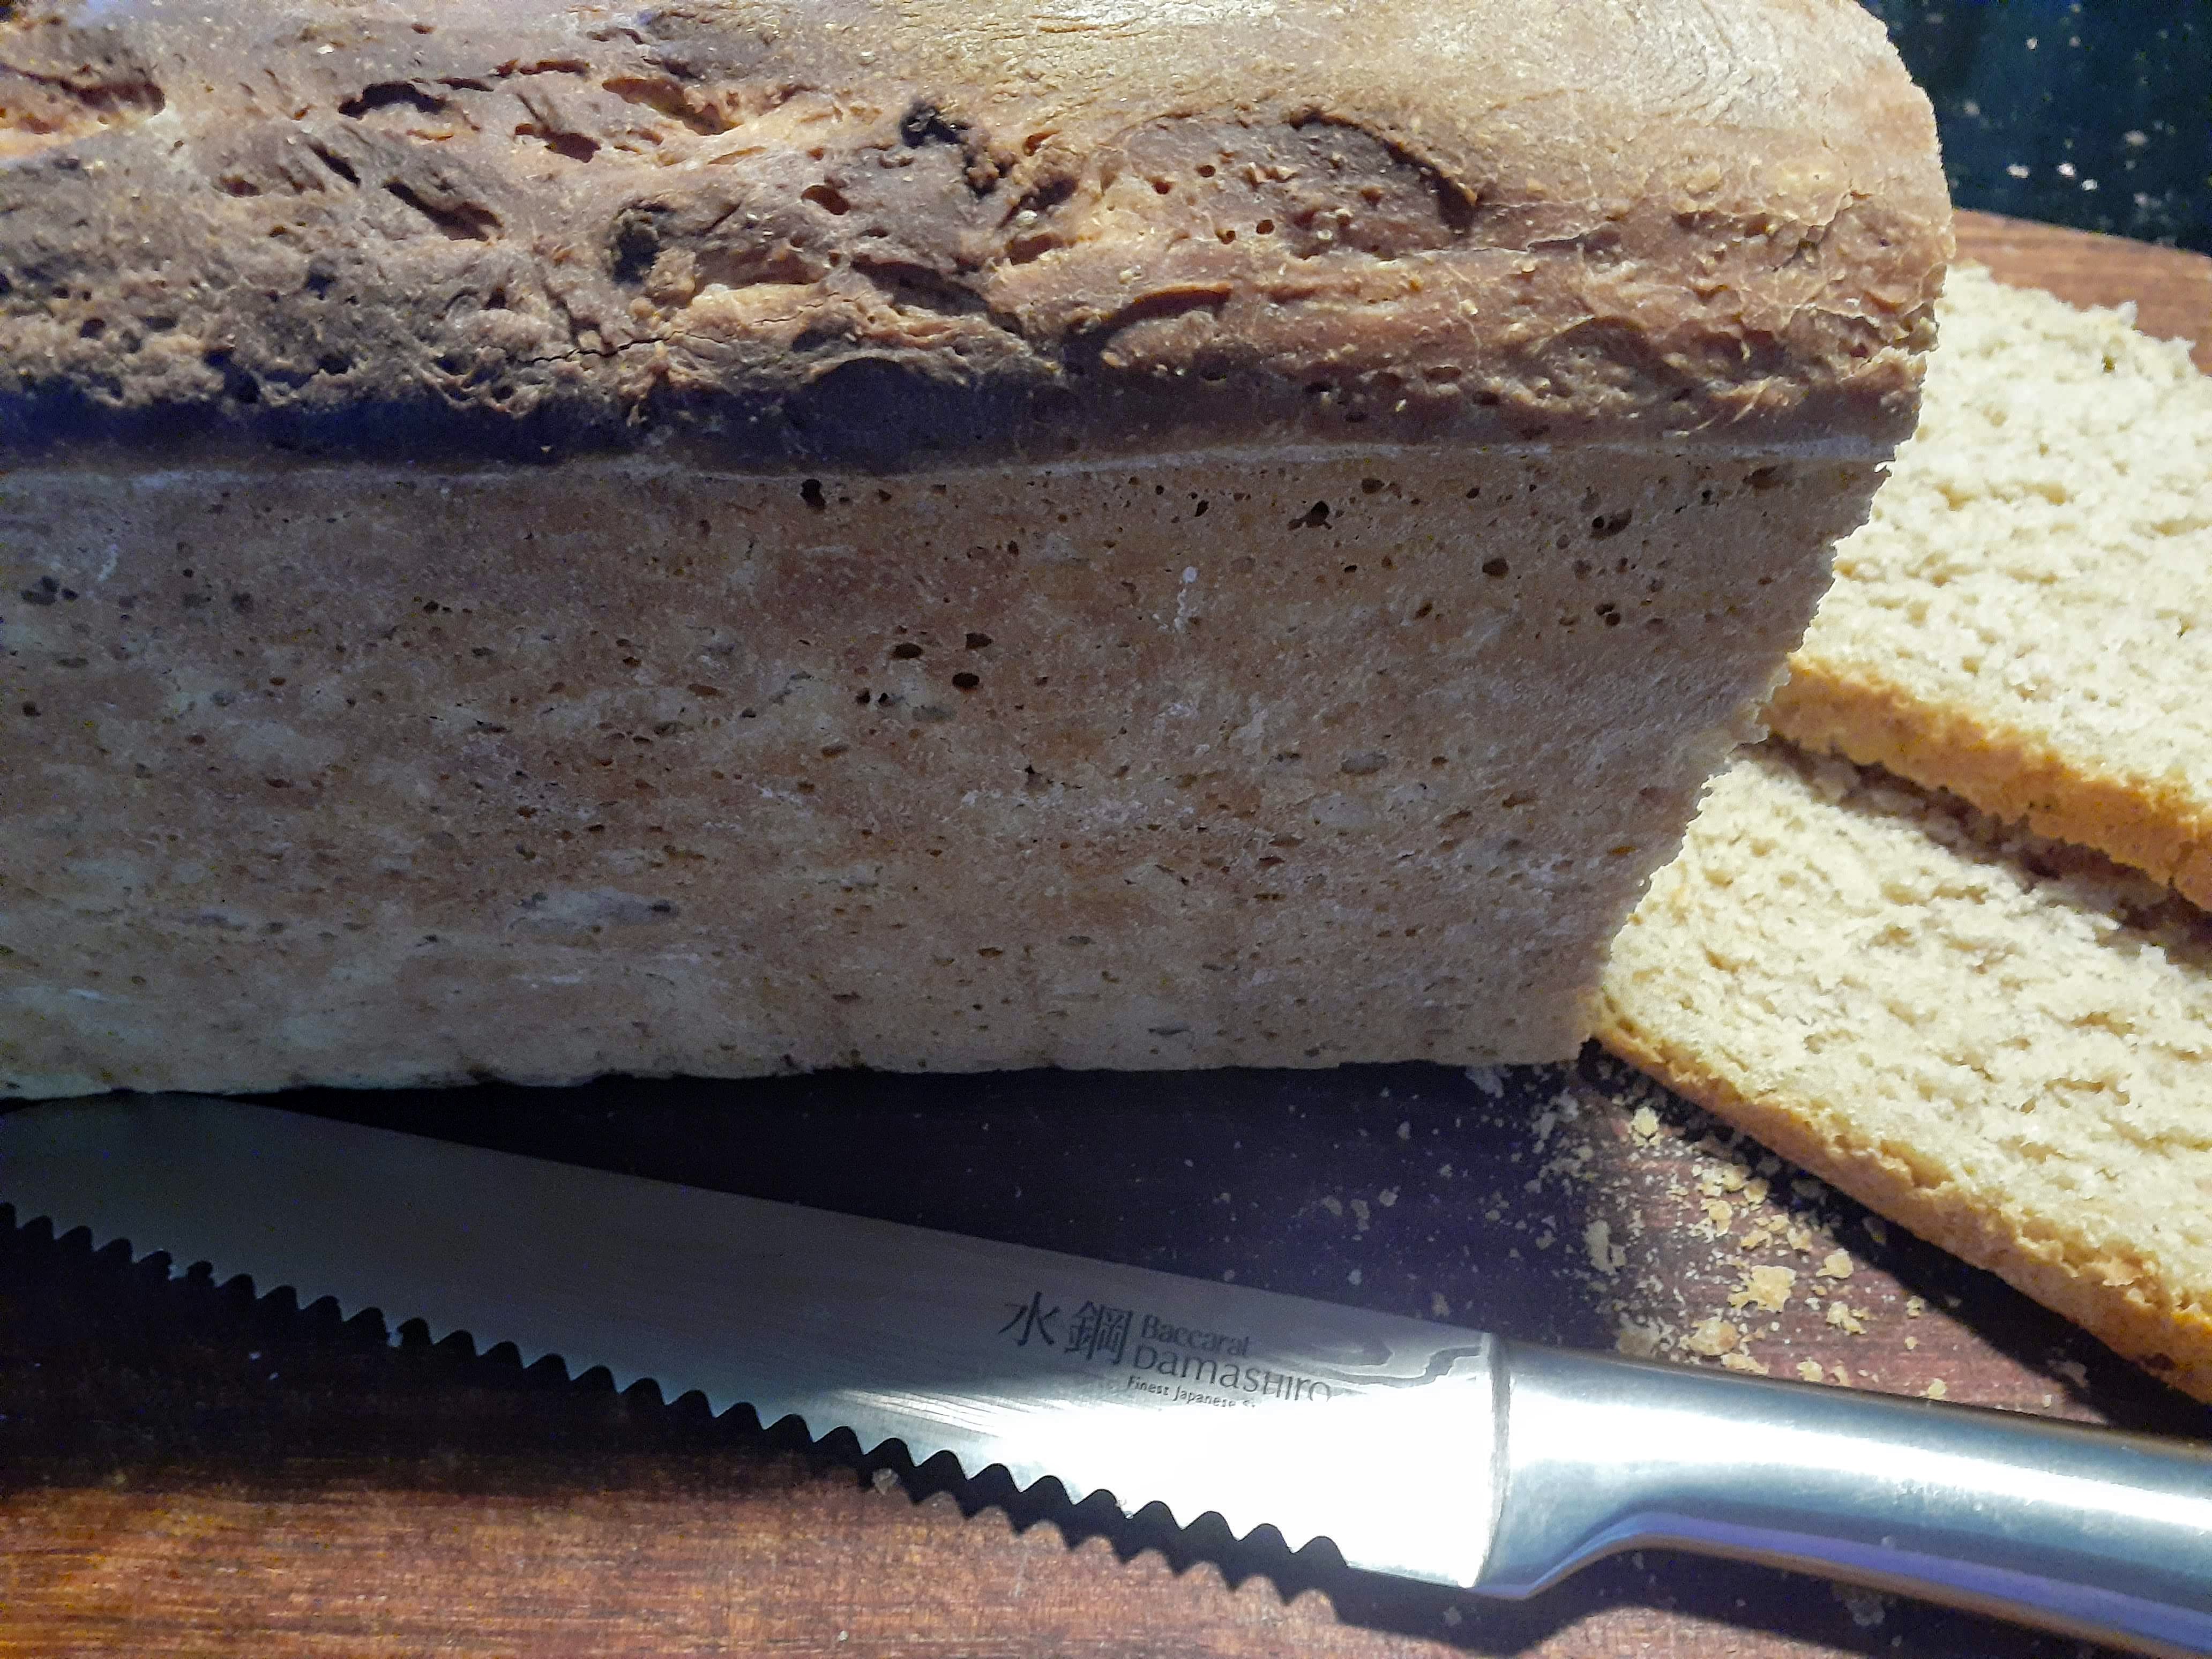
I mixed up the sourdough for the bread, and then left it to rise slowly in two large bowls overnight at room temperature. I have just baked two loaves, a large hi-top loaf and a smaller loaf. The air conditioning is on during our heat wave, so it's perfect conditions inside for this dedicated baker. These loaves don't have the large holes like the round artisan loaves, as I used a lower hydration recipe, which works well for a standard loaf of sandwich bread. I didn't add any glaze or flour dusting to the surface of this loaf, so it is quite rustic in appearance, but tastes great after it has cooled slightly and is fresh out of the oven. I have made round artisan style loaves before, using the high-hydration method, which are great to have if visitors are coming over.


The smaller loaf today from the second dough mix. Different lighting also?

January included the Lunar New Year celebrations, celebrating the Year of the Rabbit, and whilst we don't get involved in any actual celebrations where we live, I was obviously influenced by all of the fun and publicity at the time. I made a Chinese Omelette for dinner one evening, named Egg Foo Young. I deconstructed it and made a very tasty pork filling to sit inside the omelette. It was a lot of fun to make with all those bean sprouts, and delicious to eat. Egg Foo Young was created by economical Chinese kitchen cooks to use up meat and vegetable leftovers, as was Fried Rice. It's very versatile as well.


It was also Australia Day on the 26th January, amid quite a lot of controversy about what it should really be named and on which date it should occur. The day before we enjoyed some Crystal Bay Prawns on a sandwich for lunch as the easy accessibility to fresh seafood here is one of the food highlights of living in our great Southern land and North Queensland. The prawns are farmed in the Hinchinbrook Channel near Cardwell in Far North Queensland and are sometimes sold at the supermarket. Australia Day is always very laid back. Good friends, P & J invited us over for an Australia Day meal in the afternoon which was delicious, with beautiful seafood to enjoy and homemade Aussie pavlova for dessert.


I purchased a new Australian cookbook, simply called Dinner. I've been wanting Nagi Maehashi's cookbook for ages as I often try her recipes and she has built up a very reliable reputation with her everyday recipes here in Australia, and overseas too I believe.


I agree wholeheartedly with her five non-negotiable rules in the kitchen, and would like to add one more to the list please Nagi.  If cooking with wine, keep a glass for yourself to drink, tee hee.


I made a simple Chicken stir-fry using Nagi's special stir fry sauce, and also tried her Tip on tenderising the chicken, Chinese style. It was delicious. It was extremely hot outside last night, even at 7 pm, still around 30 deg. C, so I cooked the meal inside in a frypan, rather than in a wok which we usually do on our outside gas burner. It was still delicious. This photo is before I added Nagi's magic sauce. Even though stir fries are considered fairly common place these days, I'll post the recipe later so that I can find it easily when I am travelling, and also for your interest if you don't have her book. My stir fries often involve chopping up whatever vegies I have on hand, adding some sliced chicken or beef, some herbs, and then adding some soy sauce and a little oyster sauce as well. Quick and easy. I took this stir fry to the next level by actually following a recipe.

Chicken, snow pea, capsicum and carrot, and a special stir fry sauce about to be added.

That's all folks for now. Thanks for dropping by. I'd love to hear from you, so if you do read my latest IMK or any of my posts, you can leave an anonymous comment at the end in the Comments section if you wish.  Anonymity is guaranteed. And if I happen to know you personally, just type your first name at the end of your comment and say hi, and that would be great.

This is my February submission to the #IMK series hosted by Sherry from Sherry's Pickings. Each month bloggers from around the world gather to share what is new in their kitchen.  I don't buy a lot of new merchandise for my Kitchen, mainly food ingredients, but I love cooking and baking. I hope you enjoy some of my recipes and stories.

Cheerio from very tropical North Queensland,

Pauline x

Tuesday, September 1, 2020

White Cannellini Bean and Tuna Dip with Homemade Sourdough Cob Bread


I am loving Spring already, what a gorgeous day it is here today in North Queensland for the first day of Spring. I hope it is wherever you are as well,  and that in the Northern Hemisphere the start of Fall brings lots of hope for a better year ahead. This was the last weekend for Winter, and by Saturday my sourdough starter was happily bubbling away, so I made the most of it and  mixed up three loaves of sourdough in bowls ready to rise all night in my warm laundry. While I was sleeping, the sourdough was doing its work, the perfect arrangement. On Sunday morning I found my mojo and prepared two loaves for proofing, and then excitedly thought that I would try my hand at an artisan style cob loaf for a change. So my friends, my story is as much about this delicious White Bean dip that I saw on John's blog at Kitchen Riffs, as about my artisan style cob sourdough loaf.

I saw the Bean dip recipe on KR's blog early in the morning and had been hankering after it ever since as it looked like a great alternative to carbs. All those beans are very healthy for our gut, and then when my bread came out of the oven, this went with that and we had a delicious lunch of  Cannelini Bean Tuna Dip with freshly baked Sourdough Cob Loaf and salad. Not something we generally do for lunch but my friends it was tasty and light and the dip only took 15 minutes in the food processor to prepare. I added some extra tuna, lemon juice and seasoning to the original recipe but that's just me wanting a really tasty topping for the sourdough. For afternoon snacks, dips, and drinks, I might go lighter on the lemon juice and the tuna and just use the 141 g. as per the recipe, but it depends on your taste buds at the time. I always like to taste my food as I cook. Thanks for the inspiration KitchenRiffs. Here are the ingredients for the Dip and then I will tell you about my best sourdough cob loaf to date. I'm still excited at the result.

Ingredients:
  • 1 x 400 g (15 oz.) can of white beans (I used cannellini beans)
  • 1 garlic clove, the bigger the better
  • 3 chopped shallots or substitute chopped chives 
  • 141 grams (5 oz.)  from a large can of tuna in olive oil, and add more according to taste if you like it stronger 
  • 2 tablespoons of freshly squeezed lemon juice (or more to taste)
  • finely grated zest of 1 lemon
  • 2 to 4 tablespoons of extra virgin olive oil
  • salt to taste
  • freshly ground black pepper to taste, about 12 grinds
  • finely chopped shallots, parsley or chives to garnish, just the green part
Method:

Drain the can of beans in a colander, rinse them and set aside to drain.

Peel the garlic clove, roughly chop, and add to your food processor bowl.

Wash and prepare the shallots, roughly chop, and add to the food processor. Save some green  bits from the shallots for a garnish, chopped chives work well too.

Add the can of tuna and the olive oil it's packed in to the food processor. Add the cannellini beans. 
Process the lot  until well mixed.

Add your lemon zest and lemon juice. While the motor is whirring, slowly add the olive oil, 2-3 tablespoons. (If you have made hummus or pesto in your food processor you will know to add a little extra olive oil to achieve the right consistency and some more lemon juice if it needs a little extra kick for your taste.)

Now add salt and pepper to taste.


Scrape the dip mixture from your food processor bowl using a rubber spatula or whatever bowl scraper you use.

For individual servings, spoon into individual bowls, or just use one large serving bowl. Garnish attractively with finely chopped shallots, chives or parsley. I was in a hurry to  put this on our table,  so some chopped shallots was what I used. 

I used my freshly baked sourdough cob bread slices  for dipping, but you can use pita bread, crackers, cucumber slices and other chopped vegetables such as carrots and celery. I was in a hurry so I just used whole cherry tomatoes and cucumber. Delicious and fresh.

Whilst I was preparing my cob loaf, my rectangular bread loaf was baking so the oven was nice and hot for the cob.


 I bake sourdough bread most weeks now, and as long as I remember to have my starter dough (Mother) fermented and ready and bubbling after a couple of days of feeding we have fresh sourdough bread baking by Thursday. Last weekend it happened to be Sunday, which was a free day, so I decided that was the day I wanted to try a different bread making technique and make a cob loaf. I've been inspired for quite a while by posts written on sourdough by Celia@FigJamandLimeCordial, who produces beautiful artisan style cobs of bread using covered enamel baking dishes, and has been very kindly making bread for her neighbours during the Covid crisis. She is also a very clever lady with handicraft. Anyway, I couldn't help myself, and I also invested in a book recommended by Celia written by Emilie Raffa, called "Artisan Sourdough Made Simple". In her book she refers to Celia's technique and breaks down the process of how to bake a loaf which resembles one baked by an artisan bakery. Well my friends to be honest, I didn't quite achieve that, but following Emilie's technique for a simple rye sourdough cob I was pleased with the result for my first attempt. I used my red enamel CHASSEUR pot with a lid to bake the loaf in and it worked. I was really excited with the result. My friend Lulu just happened to call in and visit whilst I was taking loaves in and out of the oven and found herself caught up in the excitement. The loaf had a beautifully browned crust, with a pattern, sounded hollow on the base when tapped, and most importantly was absolutely delicious.


I used my standard recipe that I generally use for making sourdough loaves, and if you would like my recipe you can find it here on my blog. Save me from typing it out again.

Whilst baking a loaf using this method takes more time, the result is worth it. So here is the method I used for the actual baking of the cob loaf after I had proofed it in a proofing basket lined with a flour dusted tea towel, however you could use a bowl. After the initial proofing of the dough overnight, and a gentle kneading, with floured hands cup the dough and pull it toward you in a circular motion to tighten its shape. It is very malleable at this point. Place the dough into your proofing basket, seam side up.

For the second rise, cover the dough and let it rest until it is puffy but not fully risen, which took about an hour in the warm sun.

Now for the baking, I was getting excited.  Preheat your oven to 230 deg. C., 450 deg. F Yes it needs a hot oven. Cut a sheet of parchment paper to fit the size of your baking pot.

Place your sheet of parchment over the dough and invert the proofing basket to release. Dust the dough with plain flour,  gently coating the whole surface of the dough. Then, decide what design you would like on your dough when it comes out of the oven, and make 8 cm cuts around the dough using either the tip of a razor blade or a small serrated knife. This is what I use. In her book, Emilie give lots of ideas about designs for her bread as does Celia on her blog. I just did four simple slits this time because I was pushed for time, next time I will be more creative.


Use the parchment to lift the dough into the baking pot. This is very important as it is still soft to handle.

BAKE the dough on the centre rack of your oven for 20 minutes, covered with the lid of your pot.. Remove the lid, and continue to bake for 30 minutes. Lift or tip the bread out of the pot, and finish baking the bread back in the oven directly on the rack for the last 10 minutes. Transfer your loaf to a wire cooling rack and cool for 1 hour before slicing, if you can keep the hungry hoards away from it that is.

Your work is done and your bread will be delicious using that technique.

Enjoy Spring or the Fall my friends, I am feel quite optimistic that things can only improve from here on in.

Oops we have visitor, must go. Sorry about any typos:)

Warm wishes

Pauline


Saturday, November 23, 2019

Roasted Garlic and Rosemary Pull apart Sourdough Bread

"There is no sincerer love than the love of food"
GEORGE BERNARD SHAW


The aroma from a sourdough cob loaf, fresh from the oven can only be improved upon by adding long sprigs of rosemary,  and roasted garlic and butter and reheating it a day later. I had all of the essential ingredients to make this after I had made three loaves of sourdough bread the day before, and the cob loaf had turned out beautifully. I had locally grown Eungella garlic, a large rosemary bush growing in our garden,  a couple of bush lemons in the crisper from a friend's lemon trees, and all of the other ingredients which are staples in my pantry so it was meant to be when I saw this recipe in the monthly edition of the Mindfood magazine. My goodness it is so good to be alive and to be able to enjoy this Mediterranean taste sensation, made from sustainable local produce and simple homemade bread, however a bought artisan cob loaf would still taste great and do the trick.

My bread making day seems to have evolved into Thursday, sometimes fortnightly, which means we have nice fresh bread for the weekend. I hate wasting any of the sourdough, despite what my recipe says,  so often I end up making more bread than we need.This means a loaf goes into the freezer sliced, and I can also play around with making a cob for fun and experimenting. This cob and the subsequent rosemary garlic bread has been a  fun thing to do, with a very tasty result. Beware my friends, breadmaking can become quite a passion.

I adjusted the ingredients in this recipe to suit a single cob,  when catering for my family, however just double the ingredients for two cobs or more if you are entertaining friends. One cob easily feeds 10 people for a dinner party as a side to the main meal.  In my books you can't have too much garlic or rosemary flavour so add a bit more to this if you like it as well. Next time I will add two sprigs of rosemary to each incision, as I have so much of it growing here. However just three sprigs per loaf still infuses the loaf with an amazing flavour.

My sourdough is turning out really well at the moment, thanks to the warmer weather I think, so this version of garlic bread was delicious. I am using my homemade creation of a banneton, the basket used by artisan bakers for making cob loaves. I will invest in a real banneton at some point. However at the moment so that the bread will keep it's shape whilst it is rising, I use a round cane basket, originally a Christmas basket, line it with a thick tea towel dusted with flour, cover it with a clean shower cap to keep in the heat and moisture, and then cover it with another tea towel and rise it in the morning sun. If you haven't seen my rye sourdough recipe, you can find it here.  For a cob loaf, I often replace half of the rye flour with white breadmaking flour so that it is lighter.

Here is my garlic rosemary cob loaf straight out of the oven and heading for the dinner table. Remove the rosemary, place it on a nice serving board, slice it up and enjoy.


 Ingredients:

1 garlic bulb
1/2 tablespoon sherry vinegar
1/2 tablespoon extra-virgin olive oil
1 large cob sourdough loaf
75g  butter, softened
1 teaspoon grated lemon zest
3-4 long rosemary sprigs
salt for seasoning

Let's cook:

Preheat your oven to 200 deg C (180 deg fan forced). Place the garlic bulb on a thick sheet of foil, you might need two sheets to prevent leakage.

Drizzle the garlic with the sherry vinegar and oil and then season with salt.

Wrap the foil securely around the garlic, then place on a baking tray and place in the oven. Roast for 20 minutes, or until garlic is tender. You could bake two garlic cloves to use in something else or just add more to your bread if you love it.

Meanwhile, make three incisions along the top of your cob loaf, being careful not to slice all the way through.  Place your loaf on a lined baking tray.

Wait for your garlic to cool off slightly so as not to burn your fingers, and then squeeze the roasted garlic cloves out of their skins, into a small bowl.They will just pop out.

Add the butter and lemon zest and mix to combine.

Spread the garlic butter into the incisions in the bread, and press in the rosemary sprigs.

Season pepper and sprinkle some salt flakes or Himalayan salt across the top of the cob.

Increase the oven to 220 deg. C (200 deg C fan forced). Bake your beautiful loaf for 10 minutes, until crisp and golden on the outside and delicious on the inside whilst the aroma permeates your whole house.

Thanks for dropping by, and I hope you have a great weekend doing whatever you have planned.

Best wishes

Pauline


Sunday, January 28, 2018

Rye Sourdough Bread


This is a very quick post before we leave on holiday. I am taking a small quantity of sourdough starter with me.You just never know when you will be able to whip up a loaf of bread en route.

This is my latest recipe for Rye sourdough bread that I am using and I just love it. I want to know I have the recipe at my fingertips if I have a sudden urge to make a loaf. I love the flavour of rustic Rye and it is grown as a bread making grain. I use Laucke Rye Breadmaking flour at the moment. However, I will be researching where I can buy Rye flour more economically, probably online. Please let me know if you know of a reliable mill to buy it from.


Ingredients:

140g Desem (sourdough starter)
360g Bakers Flour (Laucke Rye breadmaking flour)
112g plain flour (or wholemeal for a heavier and even healthier loaf)
278g lukewarm water
31g oil
21g honey
10g salt

Method:

Mix the Desem,water, oil, honey and salt together in a container.
Combine the Bakers Rye flour and plain flour together in a large bowl and make a hole in the centre of the flour.
Add the sourdough yeast mixture to the flour and mix to form a dough. Leave to rest in the bowl for 10 minutes.
Remove from the bowl and knead a few times. Place back in a clean, lightly oiled bowl, and allow to rise in a warm spot for 3-4 hours until double the size.

Remove from the bowl, knead again a few times and place in a lightly oiled bread tin.
Allow to rise again in a warm spot for a couple of hours until it fills your tin.

Using a very sharp knife, make a few slits across the top of the bread to facilitate a better rise.

Place in a preheated oven at 220 degrees for 10 minutes.
Lower the temperature to 200 degrees for another 20 minutes.

 Remove from the oven and remove the hot cooked bread from the tin, very carefully,  and then place the bread back in the oven for 5 minutes to crisp up. Remove and allow to cool before slicing. (Waiting is the hardest part)

This is a quick summary I have given of my bread making process. Seeds can be added to the flour or on top of the loaf if desired.

Please contact me though if you would like some more information.

Best wishes

Pauline